Gladiator LNER/BR J6
Moderators: 52D, Tom F, Rlangham, Atlantic 3279, Blink Bonny, Saint Johnstoun, richard
- Robpulham
- LNER A4 4-6-2 'Streak'
- Posts: 1719
- Joined: Thu Mar 27, 2008 9:54 pm
- Location: Lower Wensleydale
- Contact:
Re: Gladiator LNER/BR J6
The sun shone again over Wensleydale this morning so I took the advantage to get the top coat of cellulose on the J6.
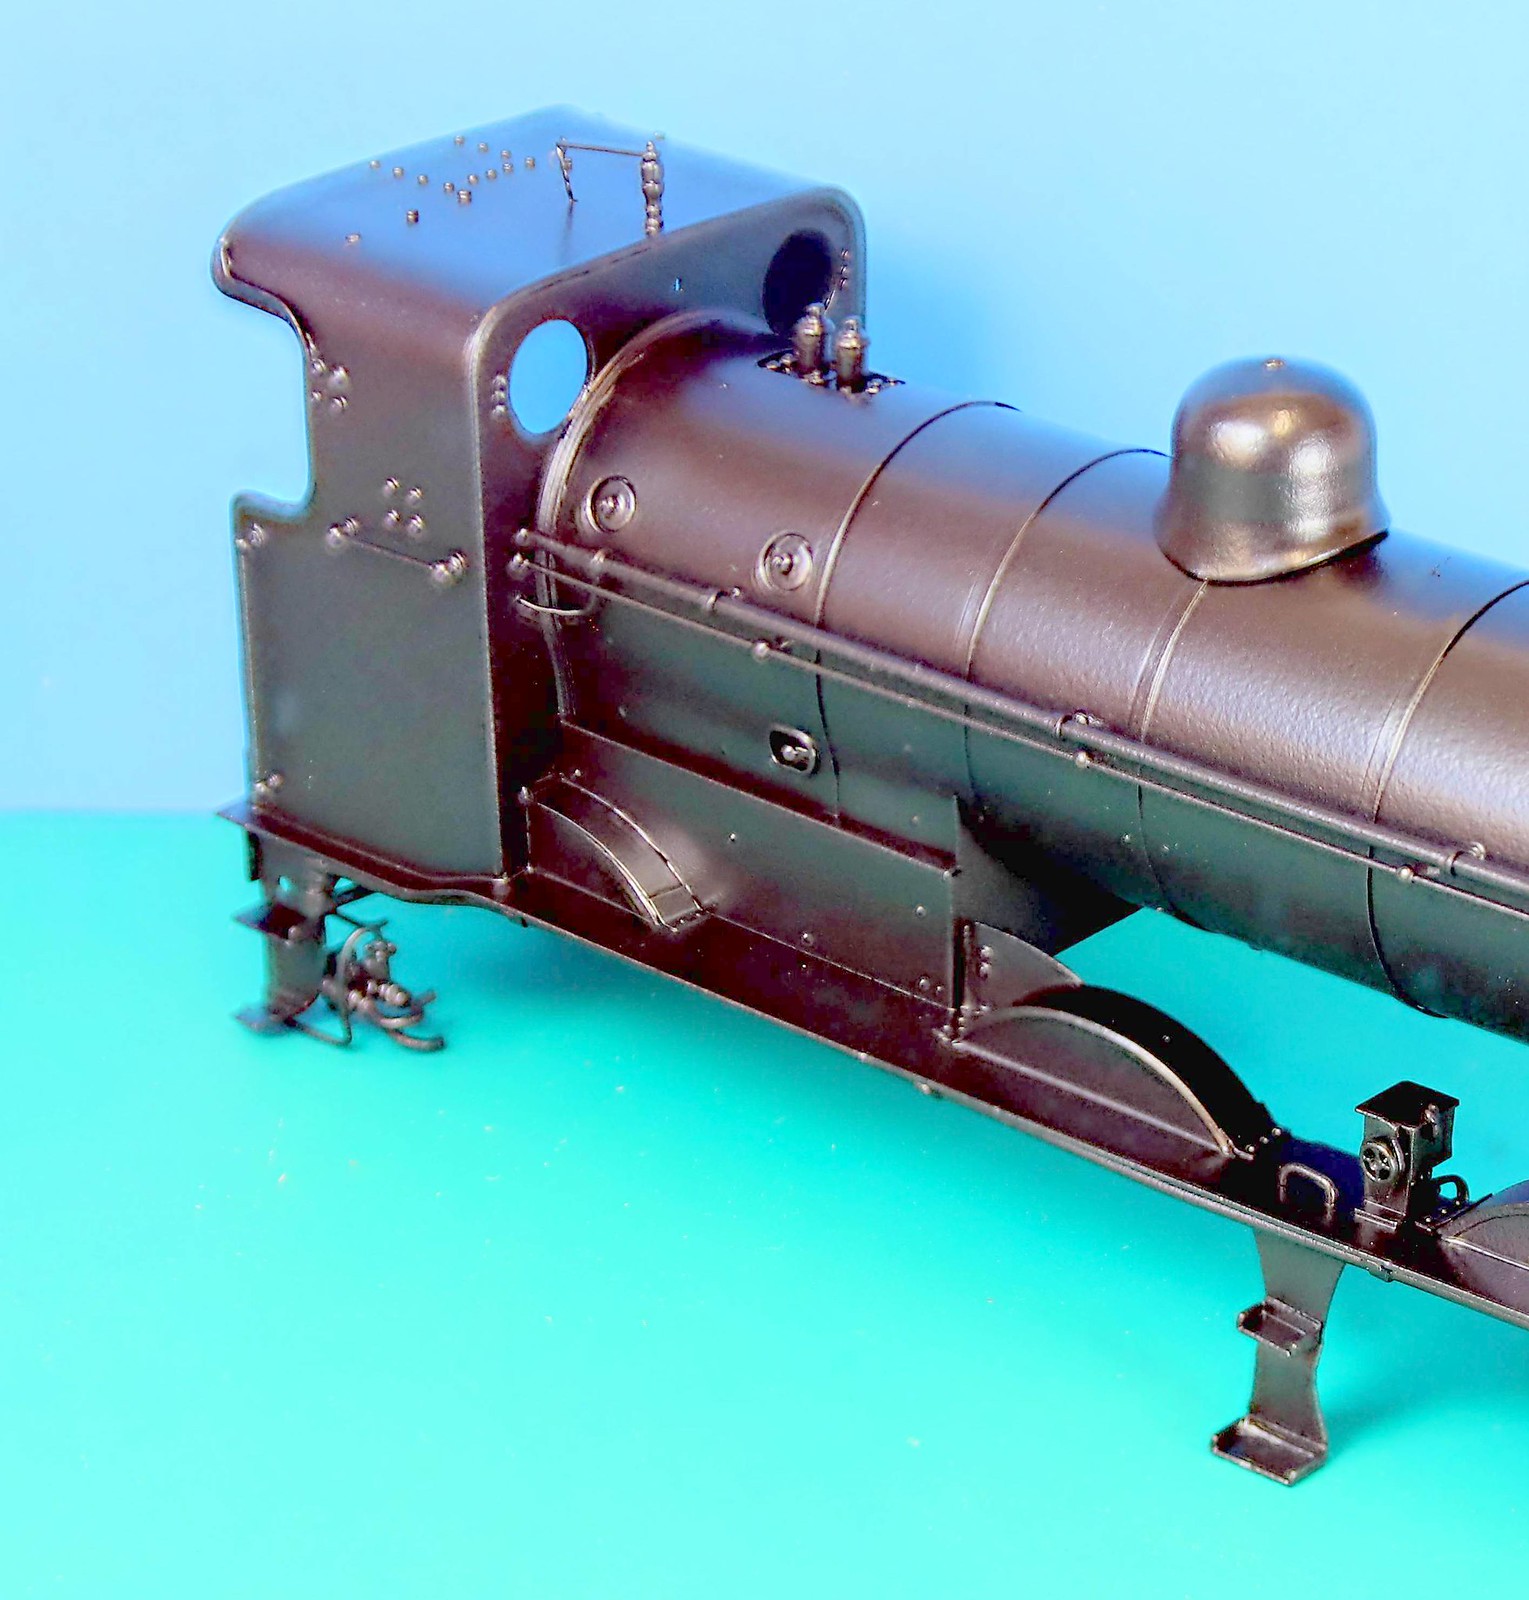
This is without doubt the best results that I have ever had from rattle can paints. - 'Clostermann' (Advanced Paints https://www.advancedpaints.co.uk/) Cellulose Satin Black
-
- LNER V2 2-6-2 'Green Arrow'
- Posts: 1094
- Joined: Mon Sep 19, 2011 12:24 am
Re: Gladiator LNER/BR J6
you'll be joining UB40 next "Rattle and Hum"!!!!!!!
looks really good Rob, especially from a can. Did you use up the whole can?
Paul
looks really good Rob, especially from a can. Did you use up the whole can?
Paul
- Robpulham
- LNER A4 4-6-2 'Streak'
- Posts: 1719
- Joined: Thu Mar 27, 2008 9:54 pm
- Location: Lower Wensleydale
- Contact:
Re: Gladiator LNER/BR J6
No, I reckon there will be enough left for a tank engine too.
- Robpulham
- LNER A4 4-6-2 'Streak'
- Posts: 1719
- Joined: Thu Mar 27, 2008 9:54 pm
- Location: Lower Wensleydale
- Contact:
Re: Gladiator LNER/BR J6
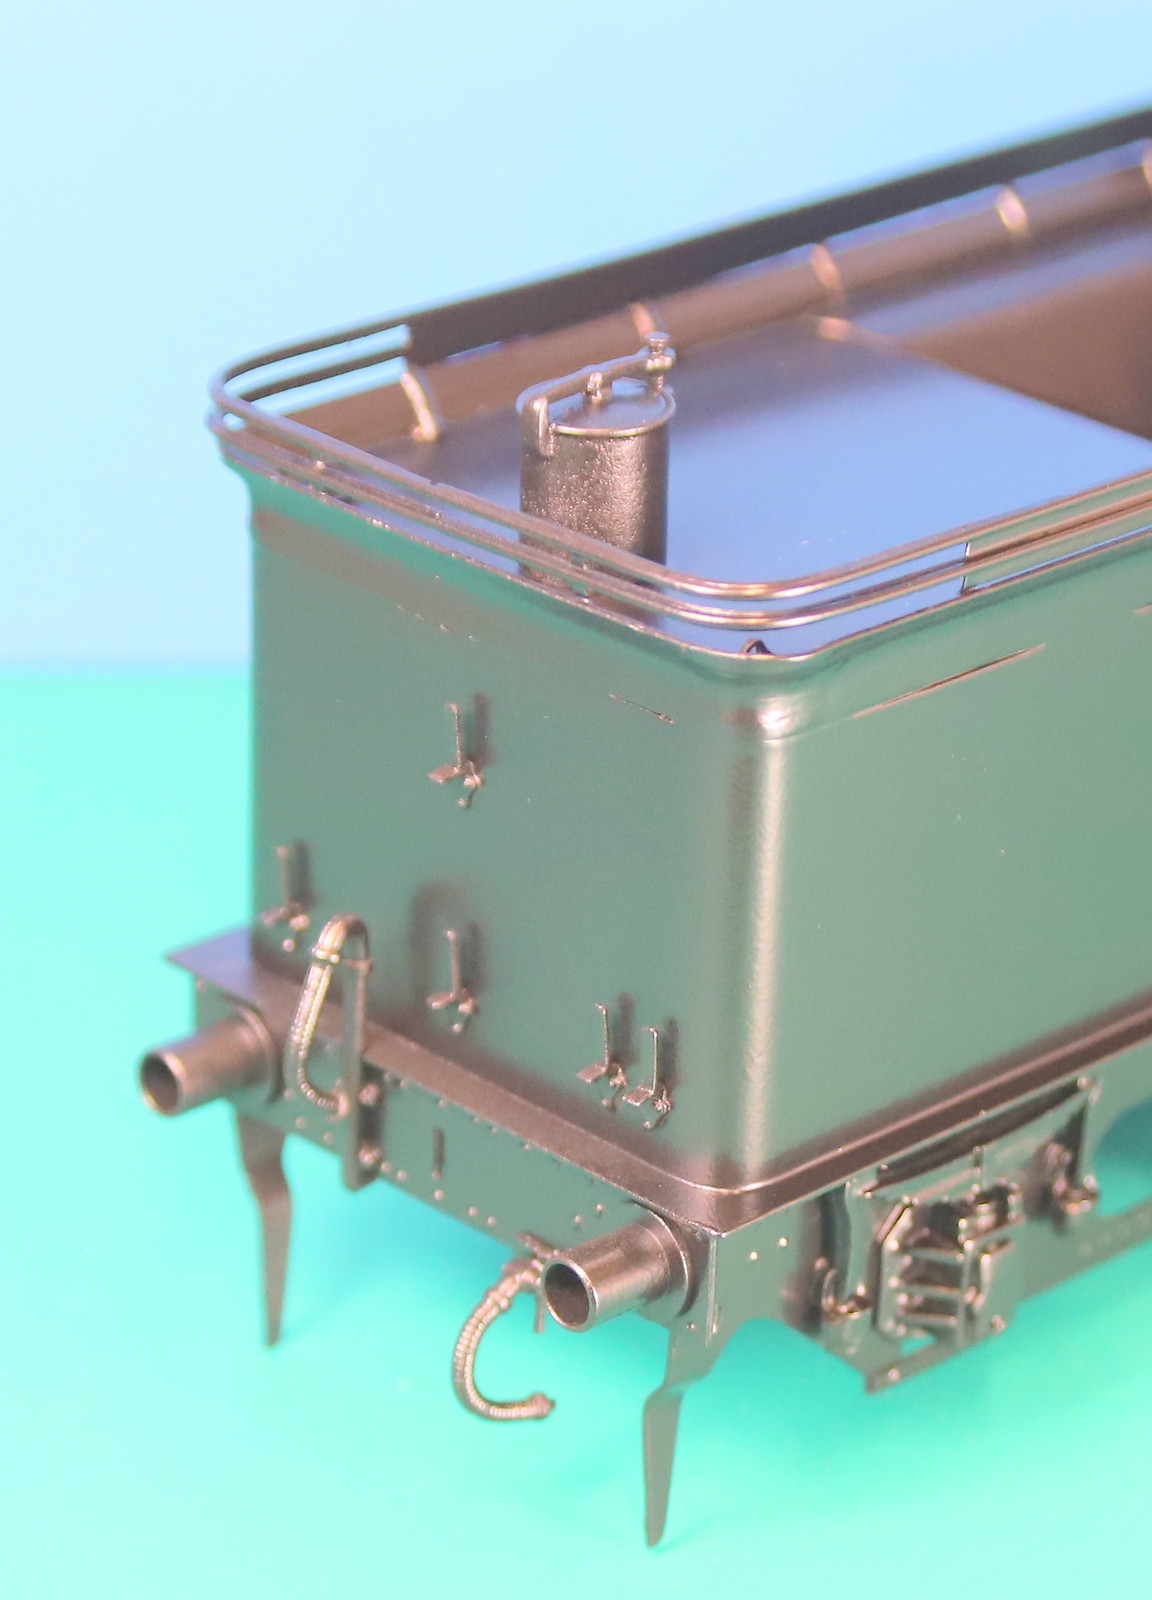
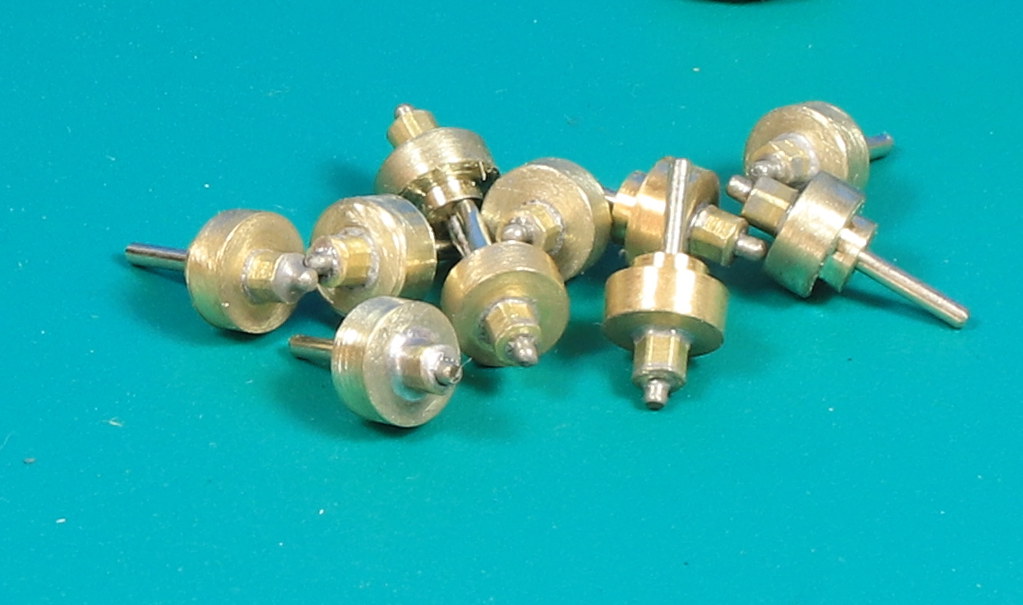
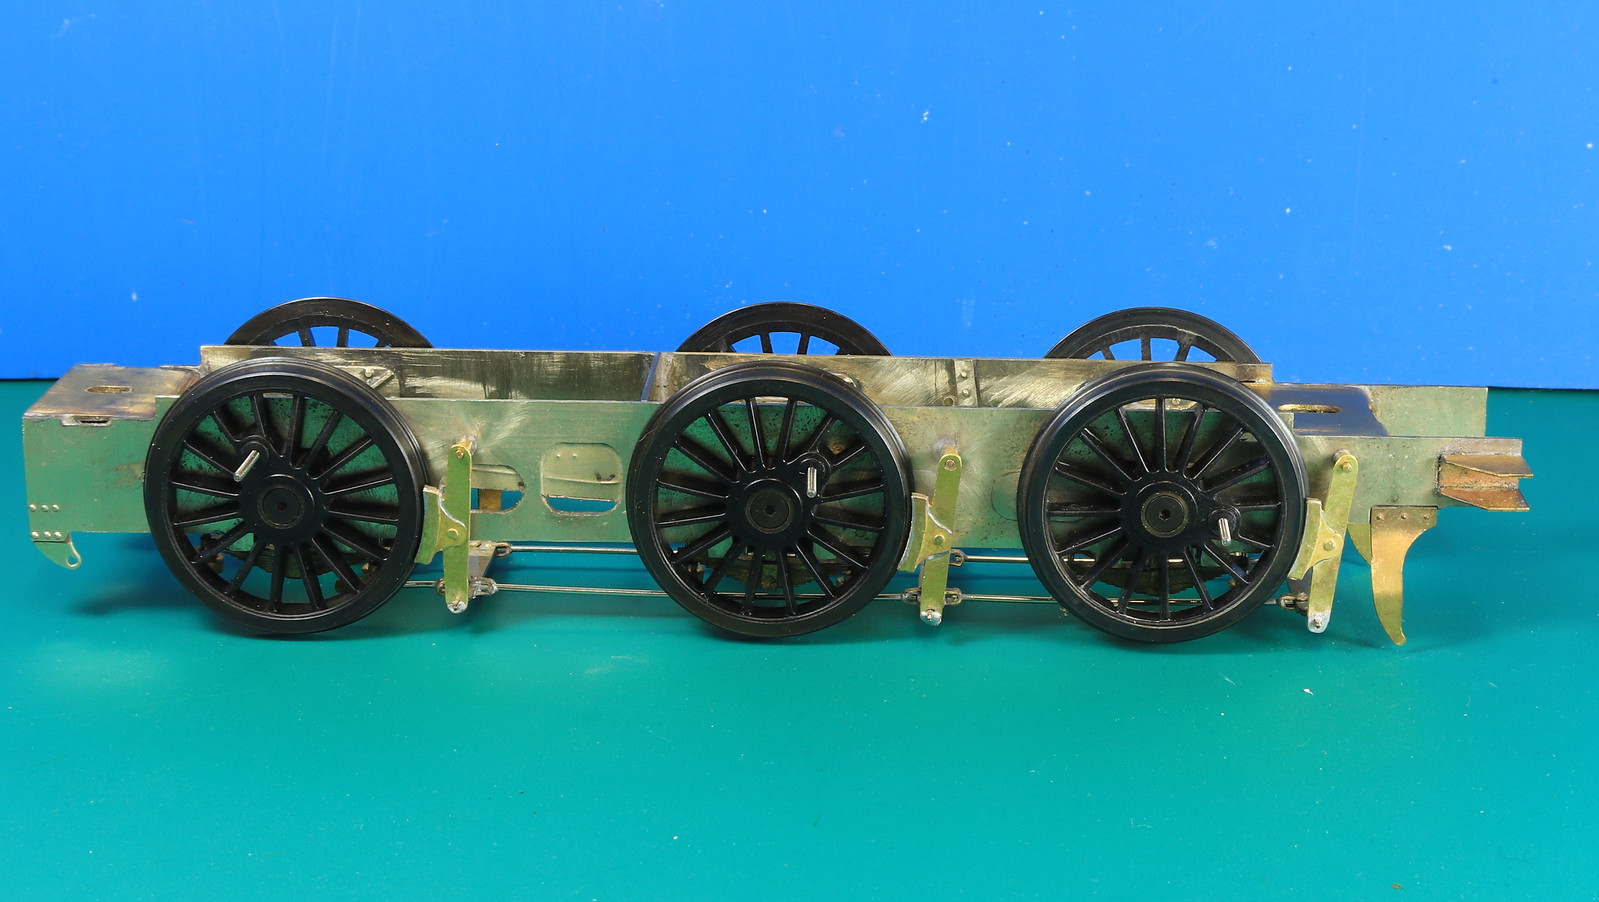
Thinking about it, I do need to do the loco chassis too. So there may not be as much left as I thought.
- Robpulham
- LNER A4 4-6-2 'Streak'
- Posts: 1719
- Joined: Thu Mar 27, 2008 9:54 pm
- Location: Lower Wensleydale
- Contact:
Re: Gladiator LNER/BR J6
In between pressing rivets out on the footplates of an LMS Princess that I am building (not shown on this forum due to it's complete lack of anything to do with the LNER ) I did more work on the J6 to relieve the tedium.
Next task was fitting the brakes. I wanted them to be removable so I turned up some hanger brackets cum spacers.
Then I soldered them to the chassis and made up the brakes to hang from them.
I made similar length spacers from tube to sit on the end of the brake cross beams.
Finally I fitted the brake cylinders which of course meant milling out the centre of the frame spacer. This seems to be the story of my life recently.
The GA showed some turnbuckle type adjusters so I milled some thick walled tube to represent them.
- Robpulham
- LNER A4 4-6-2 'Streak'
- Posts: 1719
- Joined: Thu Mar 27, 2008 9:54 pm
- Location: Lower Wensleydale
- Contact:
Re: Gladiator LNER/BR J6
While working on the brakes I made a small discovery which made things a bit awkward. When rebuilding the springs and dampers from the original Ragstone castings I had set the dampers much too low under the springs. That combined with them being slightly over size and a few of them not quite being round meant that when testing the wheels rubbed on them and the brake pull rods wouldn't seat properly.
An easy fix I thought. I will turn up some slightly smaller dampers which will be round and it should be an easy job to pop the dampers off and reseat the replacements flush under the springs.
Oh no when I tried to get the dampers off I ended up pulling the whole thing apart
Replacements duly turned I also decided to add the quite prominent nuts on the bottom
I decided it would be easier to just assemble the dampers onto some new pins and then fit them to the springs and hangers
- Robpulham
- LNER A4 4-6-2 'Streak'
- Posts: 1719
- Joined: Thu Mar 27, 2008 9:54 pm
- Location: Lower Wensleydale
- Contact:
Re: Gladiator LNER/BR J6
During the week in between other things I got the rest of the dampers refitted to the springs and then tried the brakes again. A much better fit.
I still need to sort out the cross rod and the levers to the brake cylinders.
- Robpulham
- LNER A4 4-6-2 'Streak'
- Posts: 1719
- Joined: Thu Mar 27, 2008 9:54 pm
- Location: Lower Wensleydale
- Contact:
Re: Gladiator LNER/BR J6
This last week also saw the transfers applied to the J6 a Job I always dread...
Not the best photos in the world but you get the idea.
I also got some paint on the plates and the buffer beams
The loco is to be weathered so I wasn't too fussed that the cover of the white on the numerals isn't perfect.
Not the best photos in the world but you get the idea.
I also got some paint on the plates and the buffer beams
The loco is to be weathered so I wasn't too fussed that the cover of the white on the numerals isn't perfect.
- Robpulham
- LNER A4 4-6-2 'Streak'
- Posts: 1719
- Joined: Thu Mar 27, 2008 9:54 pm
- Location: Lower Wensleydale
- Contact:
Re: Gladiator LNER/BR J6
Since painting seems to have been the order of the day I also managed to fit in painting/weathering the back head too.
Nice and grubby for the depths of the cab.
- Robpulham
- LNER A4 4-6-2 'Streak'
- Posts: 1719
- Joined: Thu Mar 27, 2008 9:54 pm
- Location: Lower Wensleydale
- Contact:
Re: Gladiator LNER/BR J6
Still making slow but steady progress in between with the J6.
The tender is now coaled and ready for weathering. I plan to weather the loco and tender at the same time so that I get them looking the 'same'
I almost forgot, I dropped the LG Miniatures fire irons in some dilute metal black which has given them a nice 'rusty' appearance.
The tender is now coaled and ready for weathering. I plan to weather the loco and tender at the same time so that I get them looking the 'same'
I almost forgot, I dropped the LG Miniatures fire irons in some dilute metal black which has given them a nice 'rusty' appearance.
- Robpulham
- LNER A4 4-6-2 'Streak'
- Posts: 1719
- Joined: Thu Mar 27, 2008 9:54 pm
- Location: Lower Wensleydale
- Contact:
Re: Gladiator LNER/BR J6
This week has seen more work on the J6 most of which isn't really photogenic as it's been to do with assembling and fitting the inside motion which isn't quite there yet.
In order to assemble much of the motion I needed some pin so I decided to turn some taper pins from 0.9mm nickel rod.
Having touched up the tool of a stone and got myself into a bit of a rhythm, I soon had a dozen or so ready. I only remembered to take a picture after I had fitted most of them...
Whilst pondering on aspects of the fitting of the motion, my thoughts turned to the remaining jobs to be done and one of those is sand pipes.
A quick check on Laurie Griffin and Ragstone site's didn't reveal much in the way of sand pipes so I decided to make my own.
I started by checking sizes on the GA and settled on some 0.8mm rod for the pipe itself. I had a length of microbore tube that fitted over it and used that to make the body of the fitting where the steam pipe attaches.
I started by filing a notch in the pipe such that with a slight bend to the remainder I could feed the 'pipe' through the sort end giving me an angled branch.
Next I filed an angled flat on the end of the tube to create the other branch of the fitting.
Some home made nuts/unions and 0.45mm beading wire for the steam pipe, completes the job - x four of course
- Robpulham
- LNER A4 4-6-2 'Streak'
- Posts: 1719
- Joined: Thu Mar 27, 2008 9:54 pm
- Location: Lower Wensleydale
- Contact:
Re: Gladiator LNER/BR J6
A bit of a milestone was reached in the Pulham household last night. I have been tinkering for a number of days with the inside motion, getting it all to fit in the frames. I had to mill the inner side of each crosshead to clear the eccentric straps etc. so they are now handed and I also had to enlarge the centre section of the motion bracket to allow the assembled eccentric rods, expansion links etc to pass through it. Then came the final job of determining the length of the connecting rods and cutting them to length.
Once they were cut and tried in place the length was right but they wouldn't fully rotate because I hadn't made the slots in the motion bracket deep enough. Much filing and testing ensued but I didn't seem to be getting anywhere and then I realised that because of the constant assembly/disassembly for testing, I had the frames upside down. What I was viewing as the top was in fact the bottom so I had been adjusting the wrong side. More filing and test ensued and I got there in the end.
https://youtu.be/dK2cuyRbb9w
Having tested the pistons successfully with the valve parts resting outside the motion bracket I put it all together inside for a further test.
https://youtu.be/njuSUQVBkjc
- Robpulham
- LNER A4 4-6-2 'Streak'
- Posts: 1719
- Joined: Thu Mar 27, 2008 9:54 pm
- Location: Lower Wensleydale
- Contact:
Re: Gladiator LNER/BR J6
It's alive at long last. I fitted the final parts of the motion, and the motor and gave it a test run. Thankfully it ran straight off without any issues with the motion itself but the chassis had an odd wobble on the rolling road when running forward that wasn't evident when running in reverse.
Initially I wasn't concerned, because running on my rolling road is never as smooth as it is on track. But then I noticed that the middle driver had a pronounced wobble and thought that the screw had worked loose. When I lifted if off the rolling road and felt the wheel, it felt loose but when I tried to tighten the screw it barely moved and the wheel was still loose. This was a bit dismaying because this is the axle that I have spilt for the motion.
My first test was to swap the two centre wheels over to see if I had the same issue and much to my relief, both tightened up as they should and the wobble went away.
https://youtu.be/lseBFtgIyxg
- Atlantic 3279
- LNER A4 4-6-2 'Streak'
- Posts: 6546
- Joined: Fri Jun 26, 2009 9:51 am
- Location: 2850, 245
Re: Gladiator LNER/BR J6 - Inside Motion Now Working
Quite a challenge with all that scope for tight spots, and quite some achievement to get it all to work in the end.
Most subjects, models and techniques covered in this thread are now listed in various categories on page1
Dec. 2018: Almost all images that disappeared from my own thread following loss of free remote hosting are now restored.
- Robpulham
- LNER A4 4-6-2 'Streak'
- Posts: 1719
- Joined: Thu Mar 27, 2008 9:54 pm
- Location: Lower Wensleydale
- Contact:
Re: Gladiator LNER/BR J6 - Inside Motion Now Working
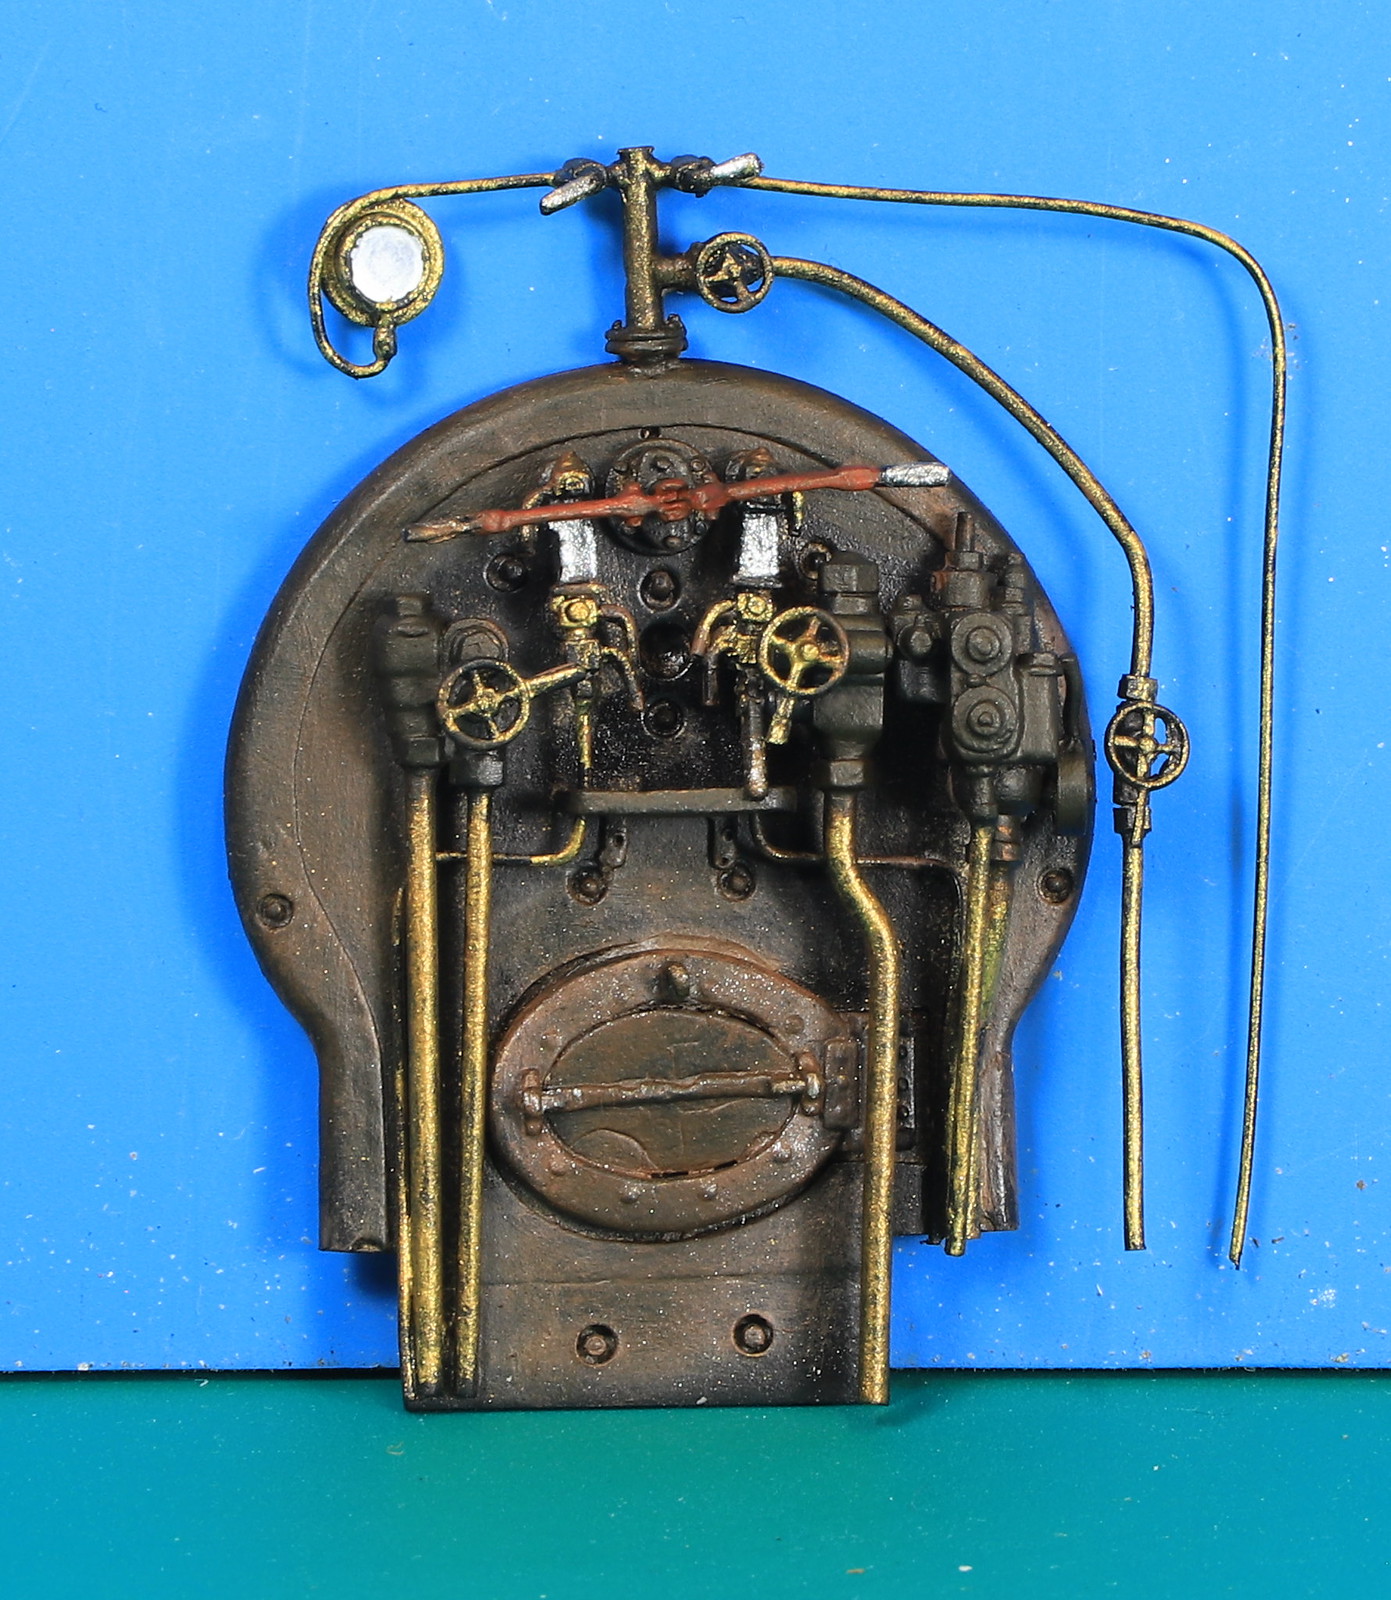
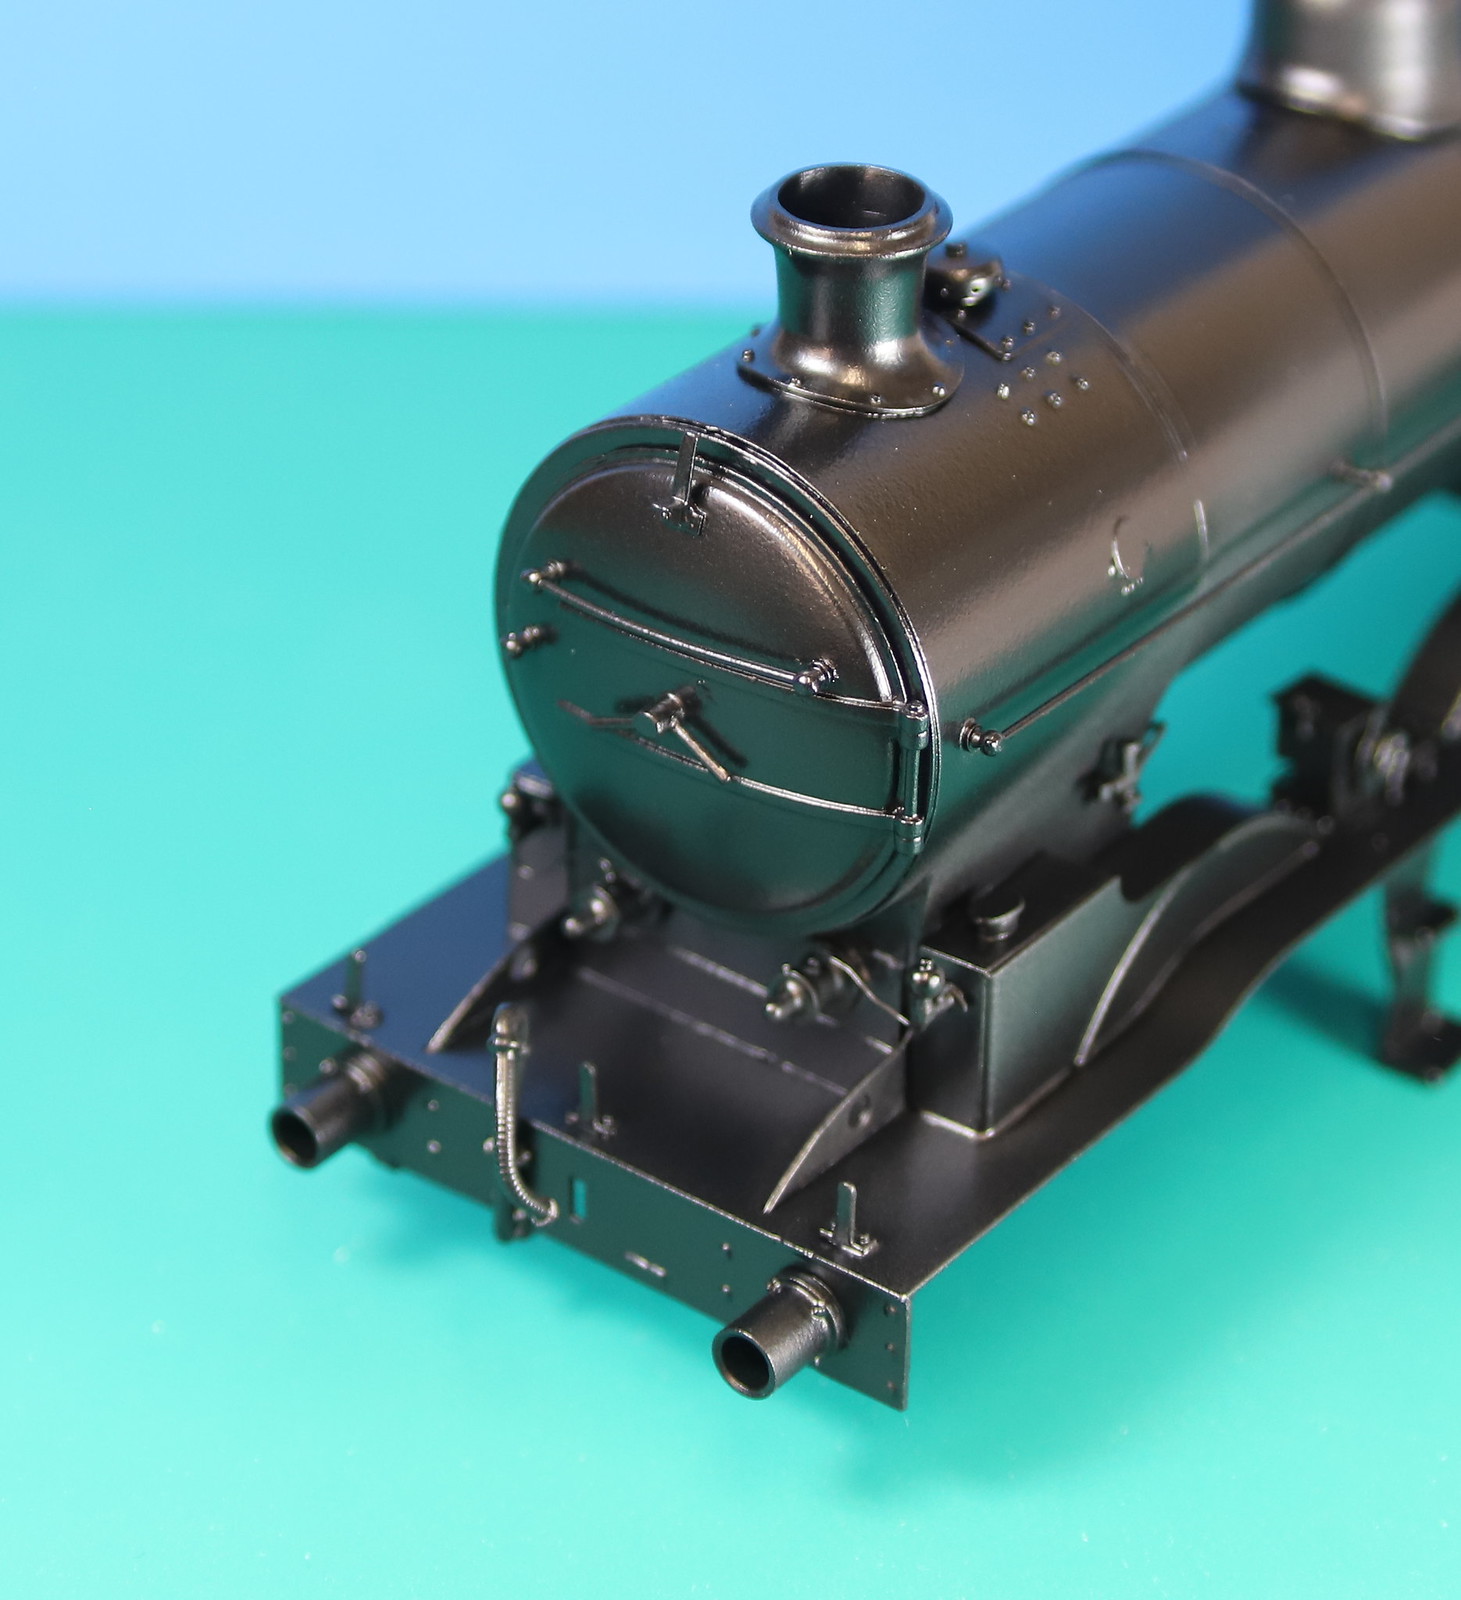
Thanks Graeme, I must admit that I'm walking on air at the minute.Atlantic 3279 wrote: ↑Wed Jun 15, 2022 9:00 pm Quite a challenge with all that scope for tight spots, and quite some achievement to get it all to work in the end.
I had to mill off one side of each crosshead, effectively making them a handed pair, in order for all the eccentric bits and pieces to fit between and within the inner slide bars that and making the holes in the motion plate much wider in the centre section to get the eccentric straps and expansion links through the motion bracket once assembled.
I was talking to a friend a few weeks ago who has done many sets of inside motion and he said that once you have done it you will feel obliged to do it in all your future builds or between the frames will just look empty. Having had the buzz of doing it I am inclined to agree with him.