Gladiator LNER/BR J6

This forum is for the discussion of railway modelling of the LNER and its constituent companies.

Moderators: 52D, Tom F, Rlangham, Atlantic 3279, Blink Bonny, Saint Johnstoun, richard

Post Reply
User avatar
Robpulham
LNER A4 4-6-2 'Streak'
Posts: 1715
Joined: Thu Mar 27, 2008 9:54 pm
Location: Lower Wensleydale
Contact:

Re: Gladiator LNER/BR J6

Post by Robpulham »

As promised below are some photos of the flares as fitted. there is still much cleaning up and some filling of the corners with solder to do but so far I am very pleased with how they are going.

Starting with some shots after soldering on the flares but before starting to filling the corners with solder.

Image

Image

Image

Image

Then with the mostly filled in corners.

Image

Image

If they are of interest I also took a series of photos of my using my Proxxon vice with one soft jaw fitted to bend the curves on the flare strips.
User avatar
Robpulham
LNER A4 4-6-2 'Streak'
Posts: 1715
Joined: Thu Mar 27, 2008 9:54 pm
Location: Lower Wensleydale
Contact:

Re: Gladiator LNER/BR J6

Post by Robpulham »

Last Thursday evening I made much progress on the tender for the J6.

The coal plate is now in as is the front section of the tender.

Image

Image

Image

There is still a goodly amount of cleaning up to do and the sides of the coal space are still to solder in but I feel that I have broken it's back now.
john coffin
LNER V2 2-6-2 'Green Arrow'
Posts: 1088
Joined: Mon Sep 19, 2011 12:24 am

Re: Gladiator LNER/BR J6

Post by john coffin »

More than broken the back Rob, looks really good well done.

Paul
User avatar
Dave
LNER A4 4-6-2 'Streak'
Posts: 1689
Joined: Sat Nov 13, 2010 9:33 pm
Location: Centre of the known universe York

Re: Gladiator LNER/BR J6

Post by Dave »

Excellent work as usual Rob
User avatar
Atlantic 3279
LNER A4 4-6-2 'Streak'
Posts: 6534
Joined: Fri Jun 26, 2009 9:51 am
Location: 2850, 245

Re: Gladiator LNER/BR J6

Post by Atlantic 3279 »

Interesting to see the way that the fingers forming the rear corners of the cornice converge together downwards from a continuous top strip, rather than flaring apart upwards. I imagine that is a much better arrangement for a neat strong result after soldering up and filing back to shape.
Most subjects, models and techniques covered in this thread are now listed in various categories on page1

Dec. 2018: Almost all images that disappeared from my own thread following loss of free remote hosting are now restored.
User avatar
Robpulham
LNER A4 4-6-2 'Streak'
Posts: 1715
Joined: Thu Mar 27, 2008 9:54 pm
Location: Lower Wensleydale
Contact:

Re: Gladiator LNER/BR J6

Post by Robpulham »

Atlantic 3279 wrote: Tue Nov 13, 2018 1:39 pm Interesting to see the way that the fingers forming the rear corners of the cornice converge together downwards from a continuous top strip, rather than flaring apart upwards. I imagine that is a much better arrangement for a neat strong result after soldering up and filing back to shape.
Hi Graeme,

Although I hadn't considered it prior to your posting it is and does make for a decent finish. - To be honest I haven't done battle with any other type yet but I am sure that I will.
User avatar
Robpulham
LNER A4 4-6-2 'Streak'
Posts: 1715
Joined: Thu Mar 27, 2008 9:54 pm
Location: Lower Wensleydale
Contact:

Re: Gladiator LNER/BR J6

Post by Robpulham »

More progress last night. Despite starting quite late I managed to get the two coal space sides in place.

I had anticipated that one of them may not fit very well and might leave a gap that would in fairness be hidden by the coal but I was pleasantly surprised when after a little tweaking with pliers and a rub of some abrasive paper it went into place as it should. Just the details and coal rails to add now.

Image

Image

Image

I am not sure why but I chose to use shiny sinks to clean it up after I finished instead of my usual Bar Keepers Friend and it turned all the solder black making it look to be worse than it is.
User avatar
Robpulham
LNER A4 4-6-2 'Streak'
Posts: 1715
Joined: Thu Mar 27, 2008 9:54 pm
Location: Lower Wensleydale
Contact:

Re: Gladiator LNER/BR J6

Post by Robpulham »

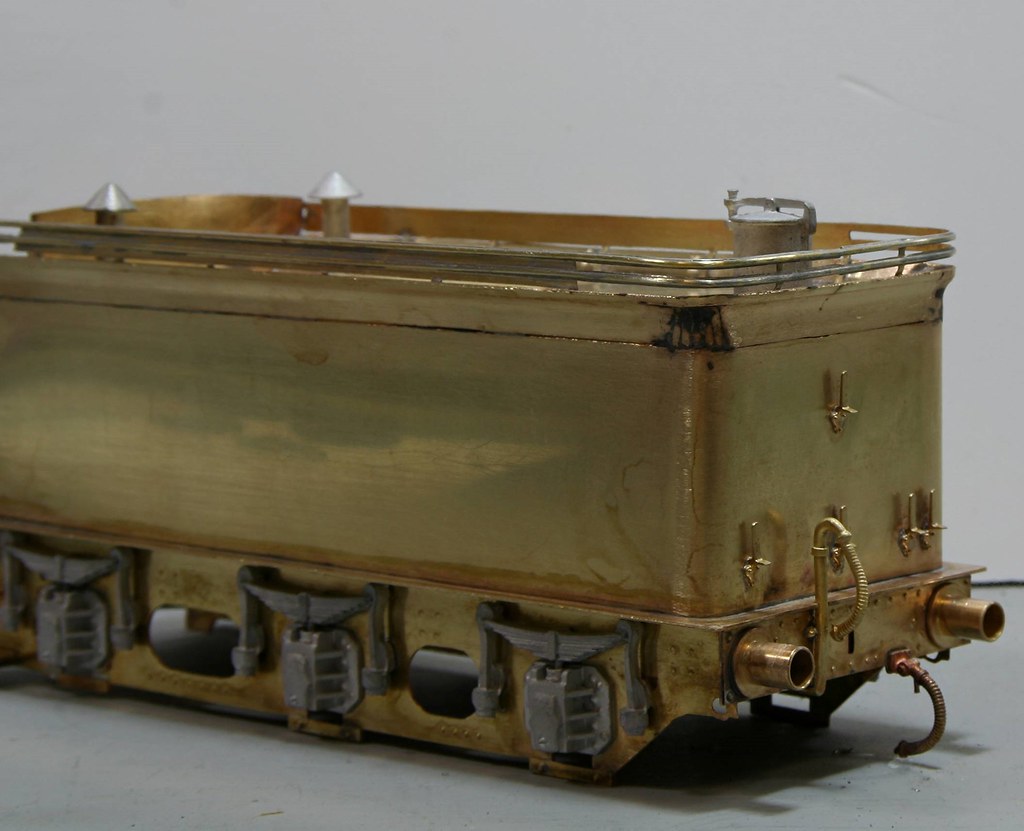
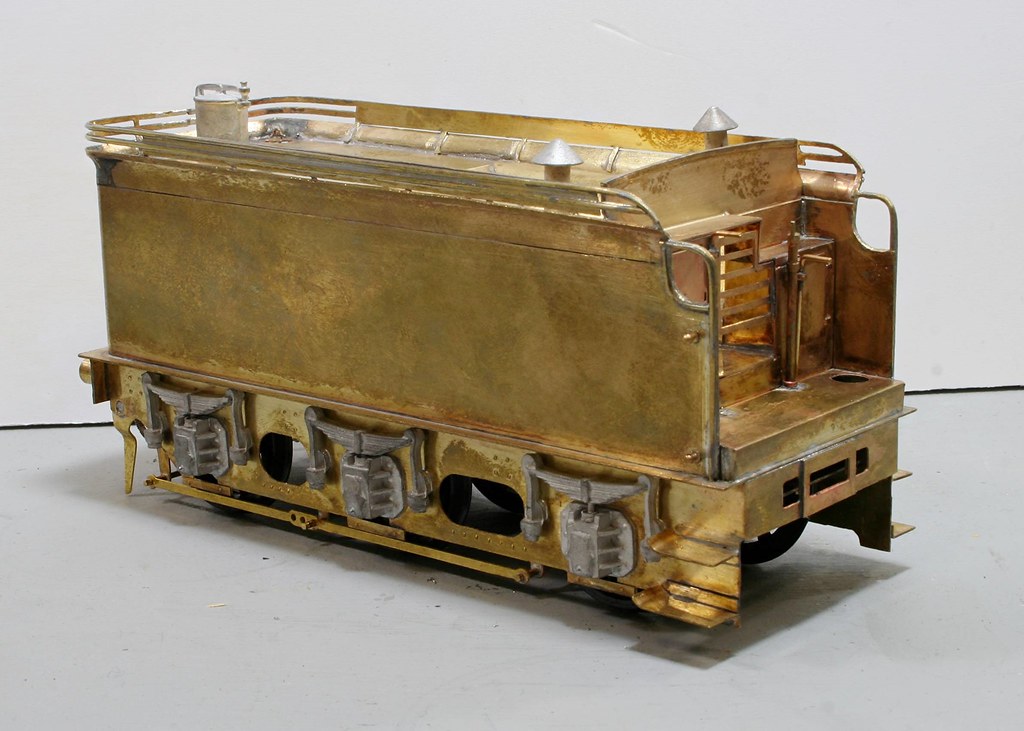
Further progress on the tender for the J6. Starting off with a slight backward step.

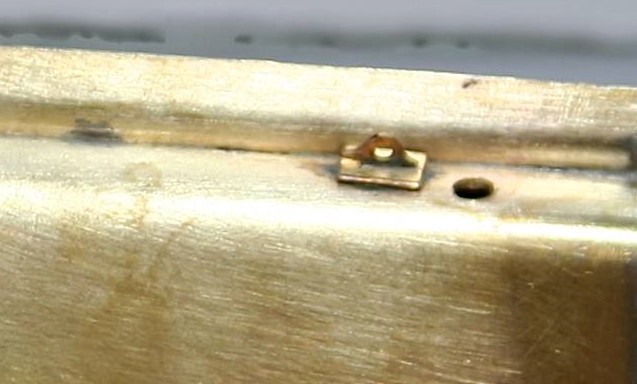
While struggling with the instructions I hadn't read the text when fitting the lifting eyes I just followed the drawing which unfortunately showed the wrong type of backing plate. Reading through the text late last week I saw my error and by coincidence David Hill of Gladiator pointed it out the day after on the Guild forum.

My customer had seen the post and said it didn't matter if they didn't show too much but it was only a few minutes of a job with the microflame and a scalpel to take them off and swap them for the right ones.

Image

Image

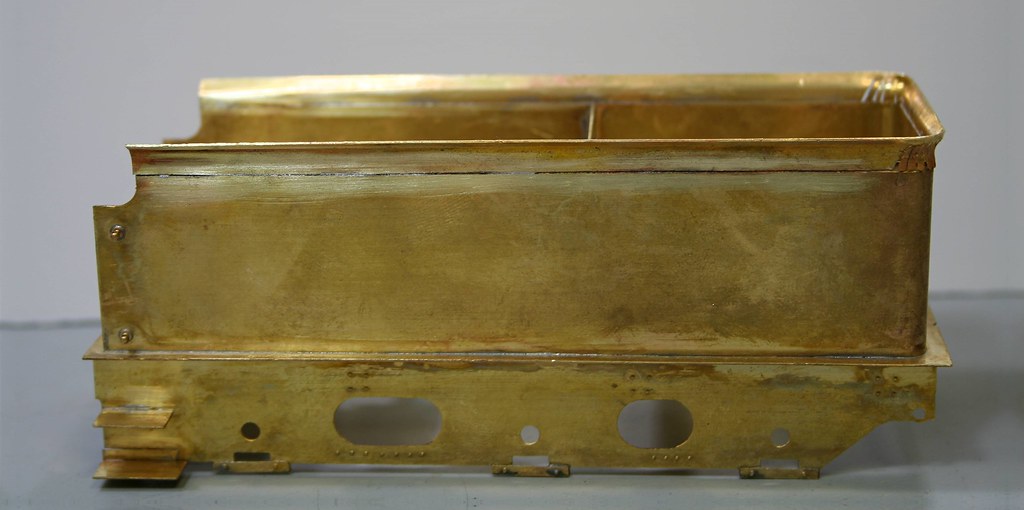
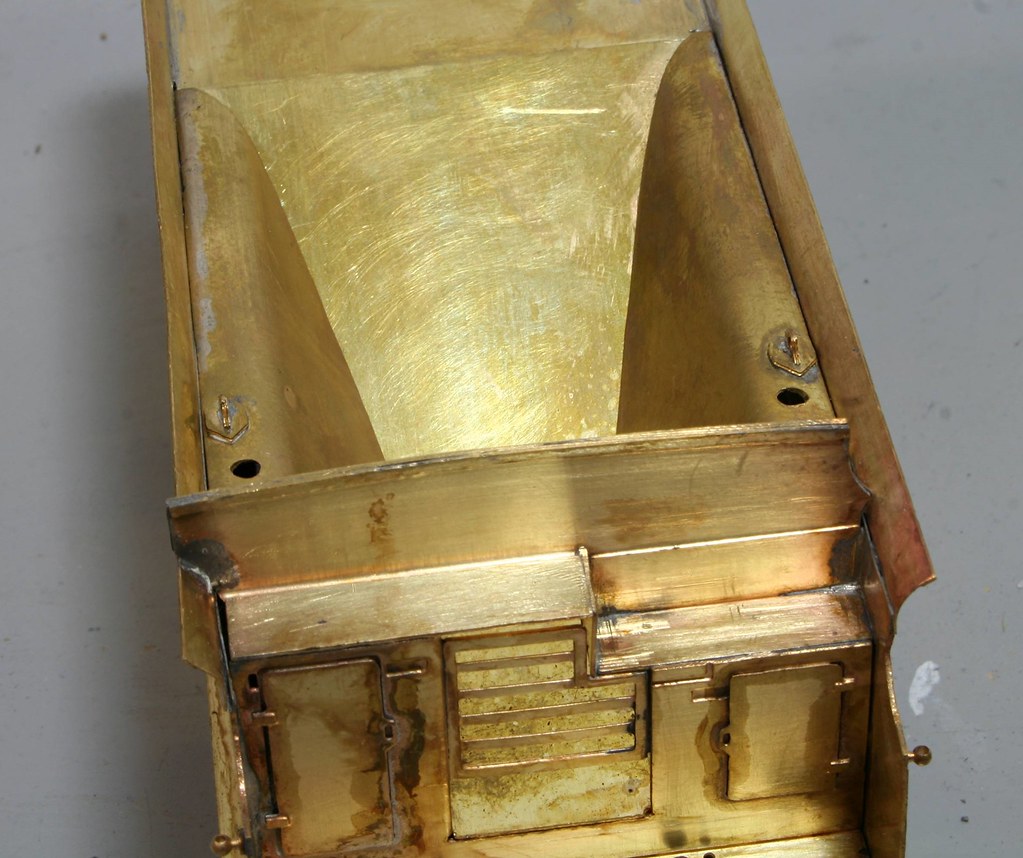
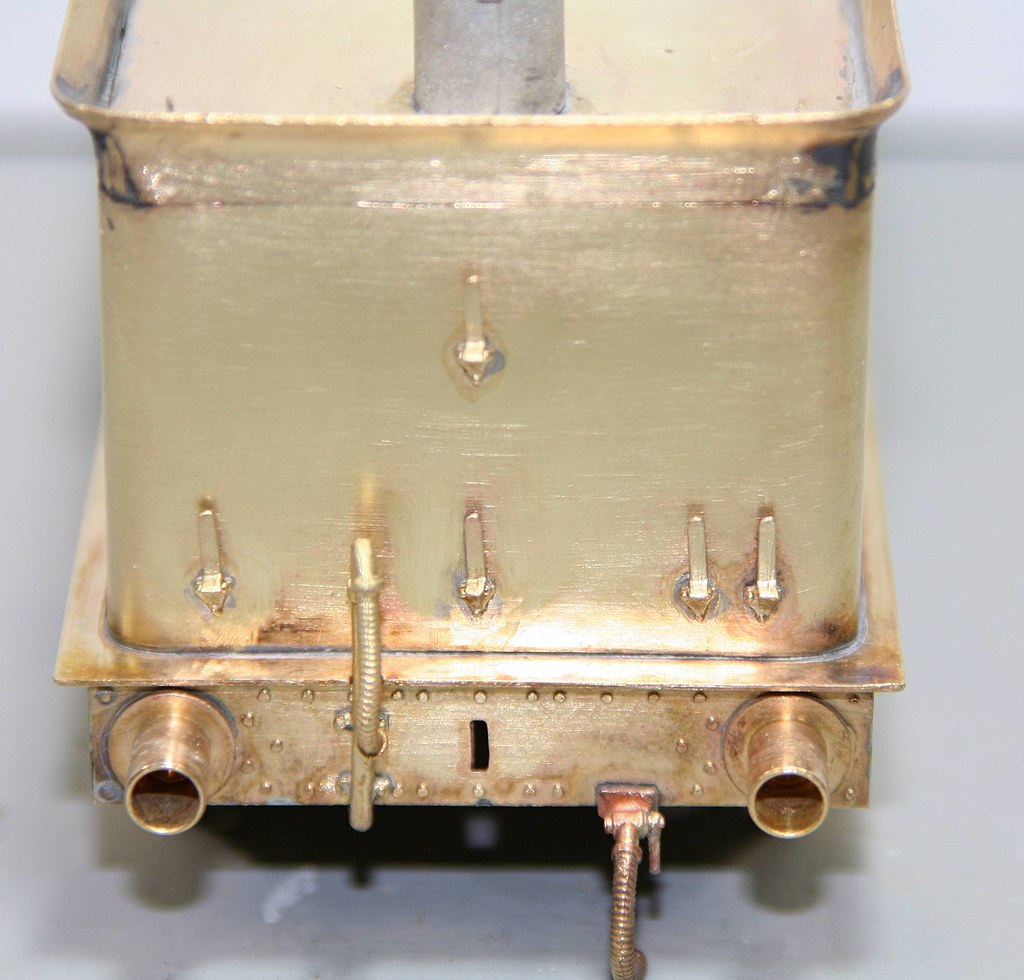
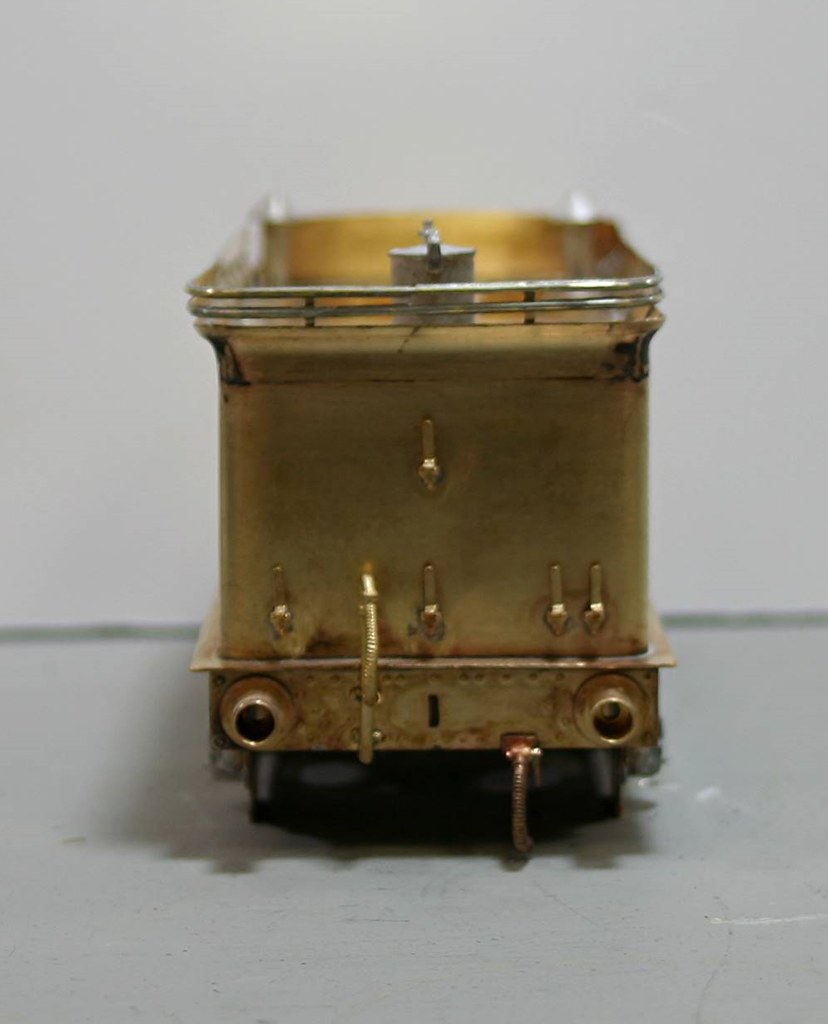
Next I added the vacuum and steam heat pipes to the rear of the tender.
Image

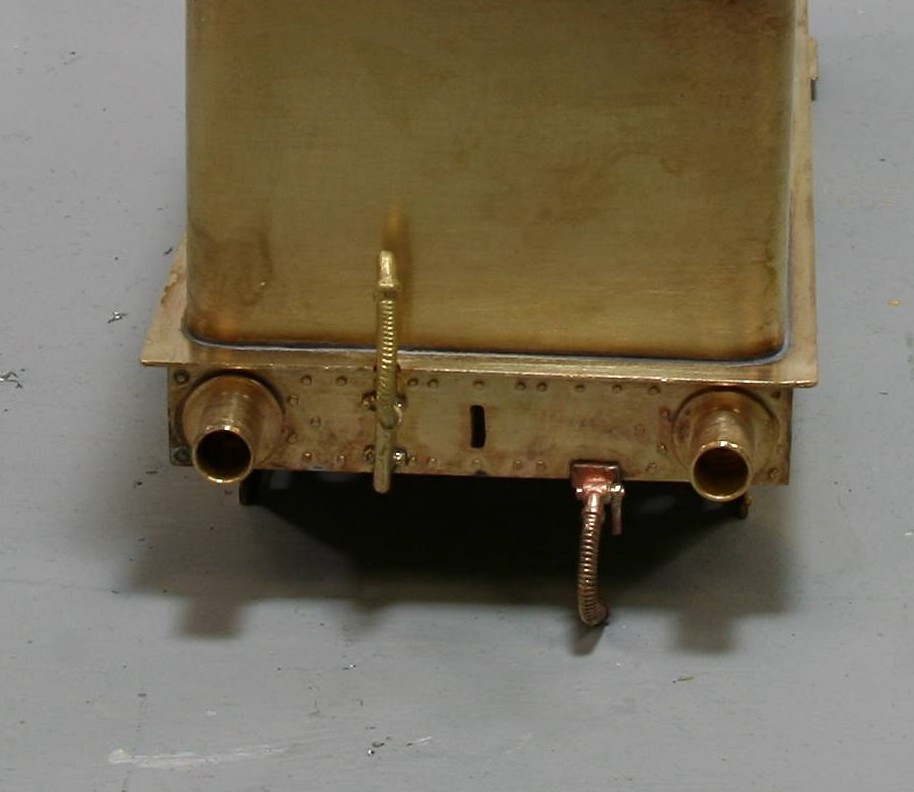
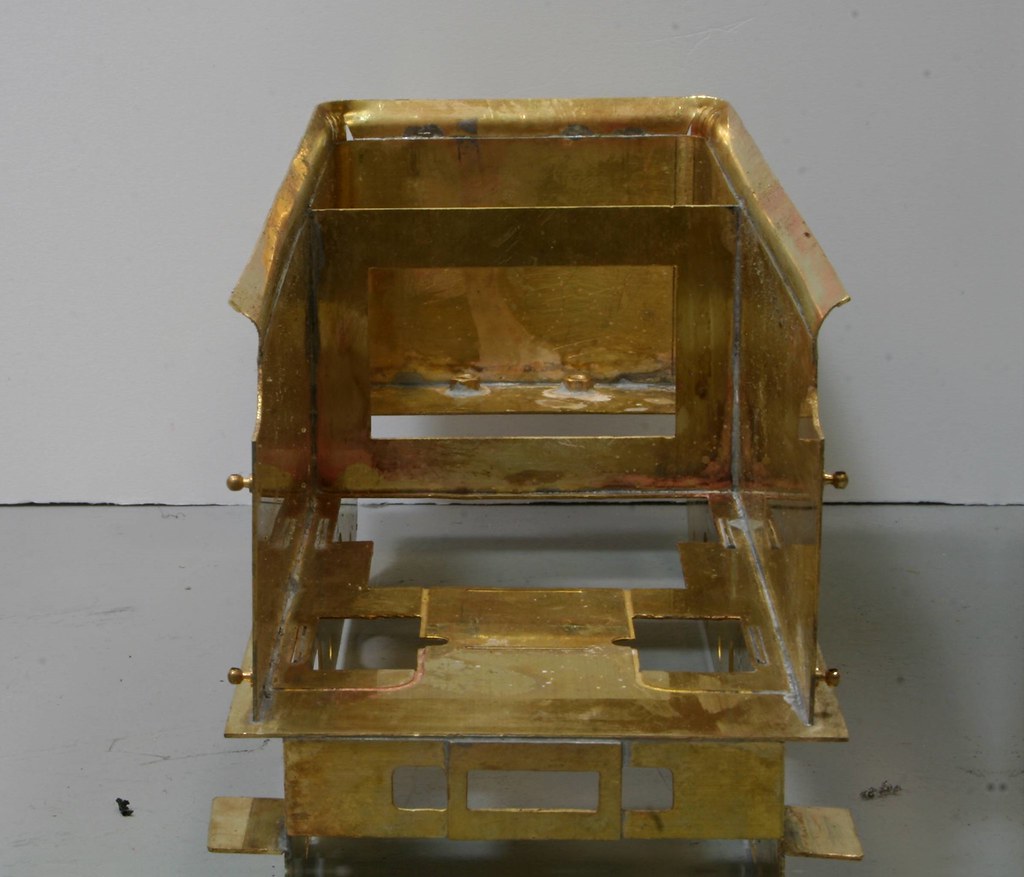
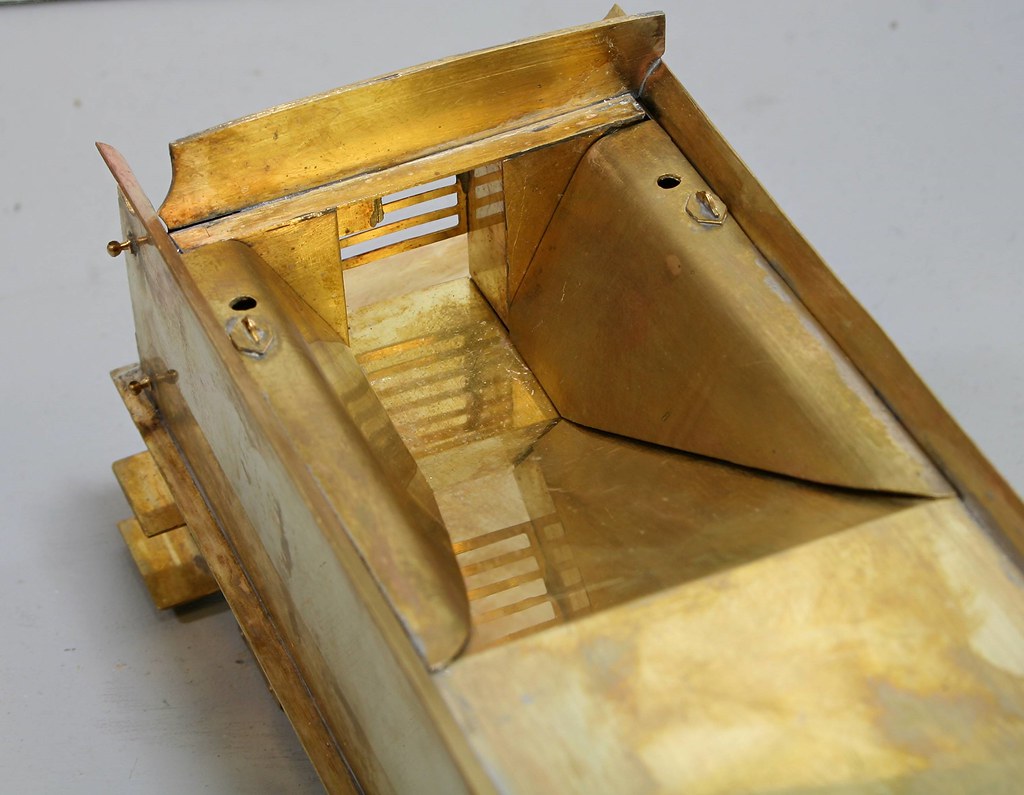
Then I started on the front.

Image

Image

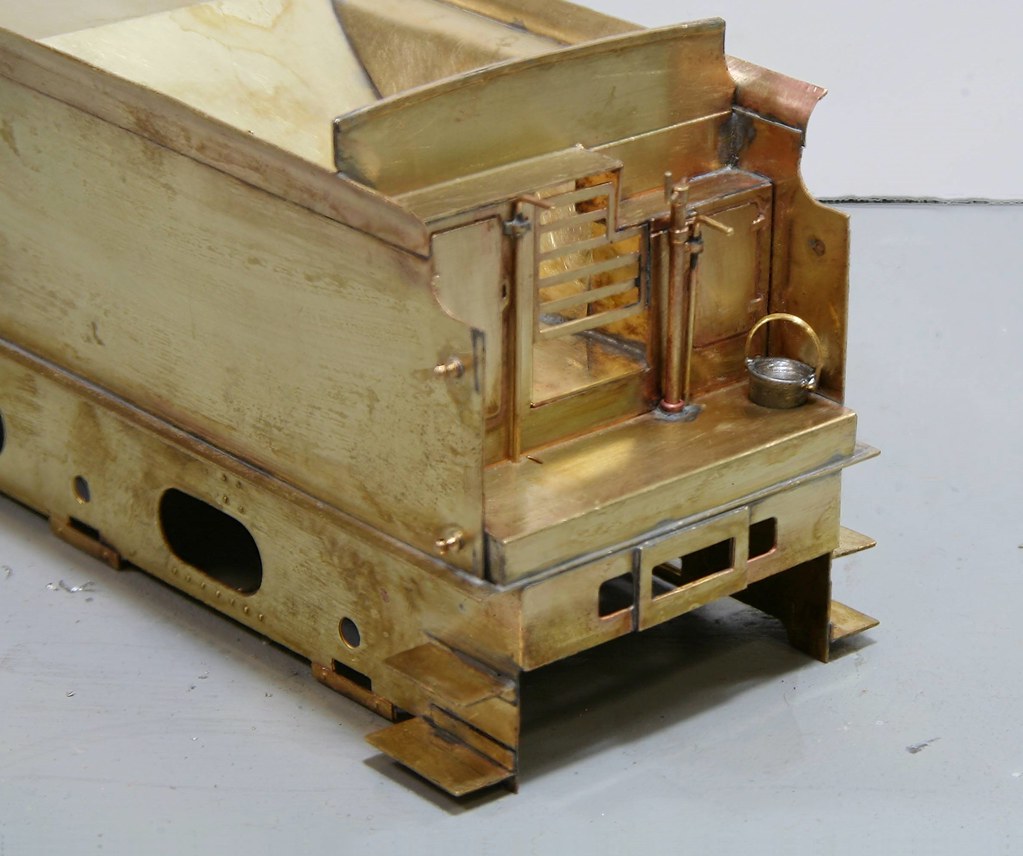
The brake standard was one that I had in my spares box that was left over from the B16 build. The other levers are bent wire and scrap etch.

Image

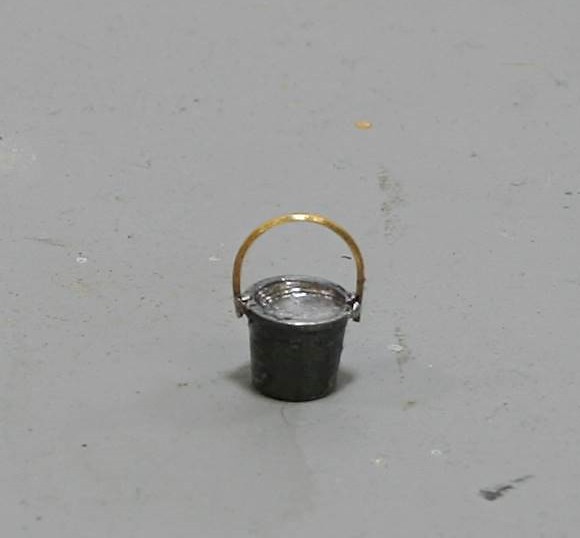
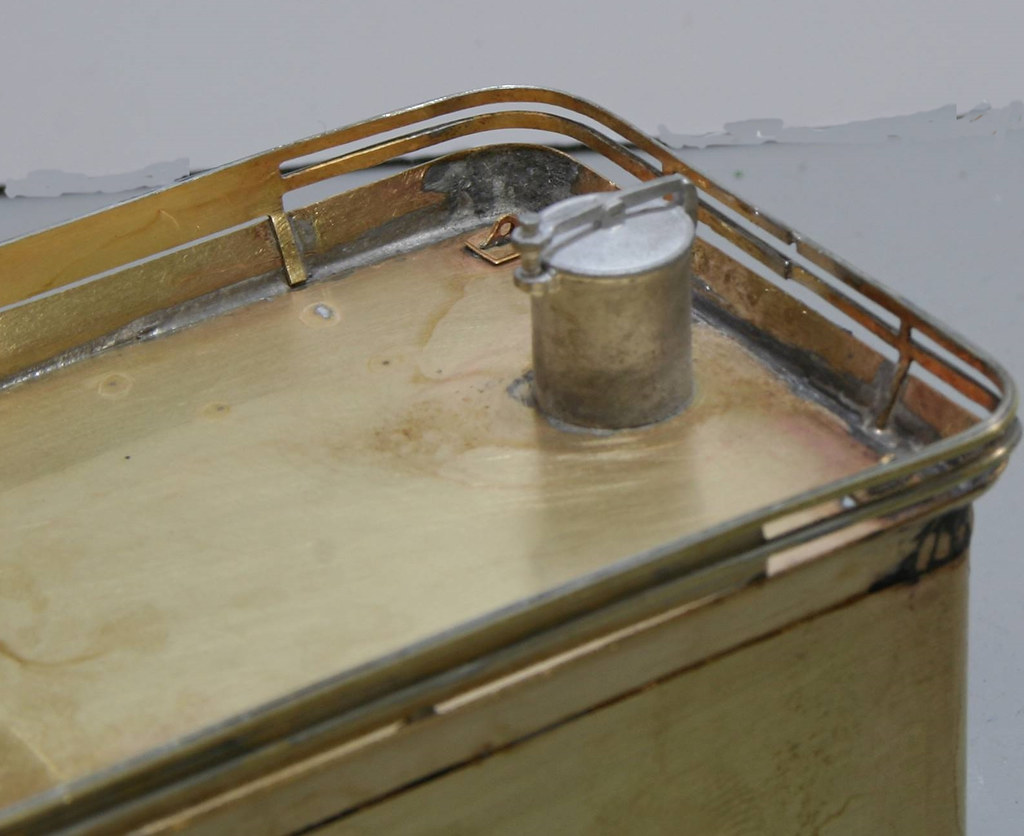
The bucket is one of Jim McGeown's castings that I had sat on my desk for a long time after I had made a bit of a mess of trying to hollow it out.

I took it back into the workshop to see if I could do anything with it after being informed that the hole in the left hand side was for a bucket. I then remembered the collets that I had made for drilling the valve guide castings on the Streamlined Duchess and used one of them to tidy up the inside of the bucket top using a dental burr and lastly soldered a handle on from scrap etch.

Image
User avatar
Robpulham
LNER A4 4-6-2 'Streak'
Posts: 1715
Joined: Thu Mar 27, 2008 9:54 pm
Location: Lower Wensleydale
Contact:

Re: Gladiator LNER/BR J6

Post by Robpulham »

I didn't seem to make much visible progress in last night's session but I got the lamp irons on and hopefully you can see why I prefer to replace etched versions with cast ones where possible.

Image

I have also fitted one inside the side sheet at the front of the tender but alas the camera decided to focus on the nearside so the added lamp iron came out so blurred you couldn't see it.

I will try again when I next take photos.

I did manage to add the tank filler though so another detail bites the dust.

Image

Coal rails next I think.
User avatar
manna
LNER A4 4-6-2 'Streak'
Posts: 3793
Joined: Sun May 24, 2009 12:56 am
Location: All over Australia

Re: Gladiator LNER/BR J6

Post by manna »

G'Day Gents

Nice to see a close up view of a GN tender being built, Thanks. :D Although, I'm surprised you didn't have a opening tank filler, :wink:

manna
EDGWARE GN, Steam in the Suburbs.
User avatar
Dave
LNER A4 4-6-2 'Streak'
Posts: 1689
Joined: Sat Nov 13, 2010 9:33 pm
Location: Centre of the known universe York

Re: Gladiator LNER/BR J6

Post by Dave »

Seconded Manna, but we should not encourage Rob.
I do like the lamp irons.
User avatar
Robpulham
LNER A4 4-6-2 'Streak'
Posts: 1715
Joined: Thu Mar 27, 2008 9:54 pm
Location: Lower Wensleydale
Contact:

Re: Gladiator LNER/BR J6

Post by Robpulham »

Thanks gents,

An idea I may consider when I do one for myself. :D

Because we stayed in Wakefield this weekend it gave me an extra evening at the bench - usually I am worn out by the time we get to Bishop Auckland and rarely do anything once I arrive on Friday evening.

As luck would have it I was able to finish work early too so I had around 5 hours at the bench which saw off the remaining upper works details.

The coal rails were too long and I had to split them at the rear of the tender. I think that this is a result of the cut out in the tender flare for the hand grip which is a feature of this type of tender.

I followed David Hill's example and soldered half round beading over the coal rails and what an improvement it's made.

Image

Image

I also put half round beading in one the inside of the front hand grip sections to make it a round profile. and you can see the additional lamp bracket too which wouldn't focus on my last photo session.

Image

Image

Image

Image

Image

I also got around not fitting a nut to secure the front of the tender top by tapping a piece of tube and soldering it in when the nut should be.

This just leaves me with the chassis which I have made a start on.
User avatar
Robpulham
LNER A4 4-6-2 'Streak'
Posts: 1715
Joined: Thu Mar 27, 2008 9:54 pm
Location: Lower Wensleydale
Contact:

Re: Gladiator LNER/BR J6

Post by Robpulham »

Yesterday saw the tender completed apart from wiring the pick ups and setting the ride height which will be done towards the end of the build.

Image

Image

Image

You will note that I have added an extra frame spacer. I did this because I am using the tender for pick ups and wanted to ensure that there was no flexing which might affect them - The brass spacer was a scaled up P4 spacer from the spares box which I cut down to fit.

Image

Image

Image

Back onto the loco next.
User avatar
Robpulham
LNER A4 4-6-2 'Streak'
Posts: 1715
Joined: Thu Mar 27, 2008 9:54 pm
Location: Lower Wensleydale
Contact:

Re: Gladiator LNER/BR J6

Post by Robpulham »

I spent 2 and 1/2 hours last night preparing the cradle for the foot plate which contains the valances....

Some this was my own fault because it's quite thick nickel silver and like David found out when he built one recently, you need to file a lot out of either side of the fold lines to allow the valances to sit vertical. I had attempted to fold up one side some time ago which needs a bit of brute strength but then found that it wouldn't come to 90 degrees.

The first job was to straighten the side already bent enough to allow me to file out the fold line. I did this by annealing with the microflame and then using the vice to squash the etch back almost flat. Once I had filed the fold lines, I bent it as far as I could with one of the sides off a set of bending bars and then used a rubber mallet to bash it to the final 90 degree fold while the middle section was firmly gripped in a second set of bending bars to ensure that it stayed flat.

Hopefully I will get the footplate shaped and soldered on tonight so I will take photos after that.
john coffin
LNER V2 2-6-2 'Green Arrow'
Posts: 1088
Joined: Mon Sep 19, 2011 12:24 am

Re: Gladiator LNER/BR J6

Post by john coffin »

Took me a minute or two to realise that you might mean the valance on the loco, and allows me to remind
every one that it is worth checking that the fold lines are etched deep enough.

Nice work on the tender though Rob, the camera is no friend of the modeller is it, the coal rails seem a little
wavey, but otherwise it looks really good.

Thanks for keeping us updated.

Paul
Post Reply