The A3's coming along nicely - I've been watching progress from afar on RMW and WT. I've got one to build, but that won't begin until the end of next year; Finney engine, hybrid tender (1928 non-corridor job) representing No.2502 Hyperion c1935.
But boy, those MOK etched sheets are something else - almost worth framing a photograph of them for posterity!
Rob P's 7mm Loco Workbench - LNER 06 from MOK 8F
Moderators: 52D, Tom F, Rlangham, Atlantic 3279, Blink Bonny, Saint Johnstoun, richard
-
buckjumper
- LNER N2 0-6-2T
- Posts: 52
- Joined: Tue Jan 30, 2007 1:40 pm
- Location: Hertfordshire
-
Robpulham

- LNER A4 4-6-2 'Streak'
- Posts: 1715
- Joined: Thu Mar 27, 2008 9:54 pm
- Location: Lower Wensleydale
- Contact:
Re: Rob P's 7mm Workbench - LNER 06 (from an MOK 8F)
Cheers Adrian,
I did have a moment of do I build it or frame the etches when I opened the box. As I get to the next sheet I will post a picture of that too.
I too hope to have a Finney LNER engine on the go next year too (I intercepted a parcel from MF earlier this year and fingers crossed it's a V2)I will have to wait until my birthday in October to know for sure.
-
Blink Bonny

- LNER A4 4-6-2 'Streak'
- Posts: 3946
- Joined: Mon Dec 03, 2007 9:21 pm
- Location: The Midlands
- Contact:
Re: Rob P's 7mm Workbench - 2750 Papyrus
I used to model in N and OO - I may "do something" with my N before I'm much older - and I found that a step change in terms of the detail added to look right without looking too fussy. I started putting cab windows, aws gear and vac pipes on my N. I soon stopped with the cab glazing though after I parked a new Black 5 next to one I had breathed on.Robpulham wrote:I think I would struggle with so much difference in size.
I OO I reckon drain taps are the next refinement to those in my fleet without them. Oh, thank you, Mrs BB! A box of rivets to count...
If I ain't here, I'm in Bilston, scoffing decent chips at last!!!!
-
Robpulham
- LNER A4 4-6-2 'Streak'
- Posts: 1715
- Joined: Thu Mar 27, 2008 9:54 pm
- Location: Lower Wensleydale
- Contact:
Re: Rob P's 7mm Workbench - LNER 06 (from an MOK 8F)
More progress has been made despite having to deviate from the instructions slightly. The instructions tell you to solder a 10ba nut onto a recess on the frames to locate the cylinders. Initially I struggled to lo locate the recess as it is in fact a hole (there was a half etched recess for locating the bearings for the compensation beam so I was looking for something similar for this).
Having decided to leave the nuts off until I could clear up where they go in a moment of clarity I then pretty much guessed the location. However by this time I had made a start on the cylinders and having folded them up and soldered a 10ba nut to each of them. I brought them t the frames and confirmed that I had been right in my assumption of where they locate and the location of the 10ba nuts on the frames. This however left me puzzled as if I solder a nut to the frames then a screw would pass through this nut, through the frames, through the rear of the cylinder and into the nut soldered inside the cylinder. I decided to leave it off. for now as I can still access it to add them if needed later.
The other bits of guess work were two 6ba nuts that hold the motor support (there are half etched recesses for location but then no real indication of which way around the bracket goes that they are attached to and it can fit either way). I took an educated guess and soldered it with the nuts on the opposite side as to where I expected the screws to come from. There was a similar situation with two strips that mount on the outsides of the frames each having a 10ba nut soldered to them. I reasoned that anything being screwed to them would most likely come from underneath so I mounted them with the nuts upper most. However with these I wasn't quite as confident so I have only soldered the tabs at present just in case I have it wrong.
Having soldered up the cylinders and the frame (I mounted it in my Hobby Holidays jig to solder the tabs after ensuring all was square before going on to solder all the seams) after I had removed all the tabs and cleaned up I couldn't resist putting the wheels in temporarily to see how it runs and so far so good.
-
buckjumper
- LNER N2 0-6-2T
- Posts: 52
- Joined: Tue Jan 30, 2007 1:40 pm
- Location: Hertfordshire
Re: Rob P's 7mm Workbench - LNER 06 (from an MOK 8F)
Lovely clean, neat soldering, Rob. There's nothing quite like that first gerfingerpoken of a new rolling chassis!
-
Robpulham
- LNER A4 4-6-2 'Streak'
- Posts: 1715
- Joined: Thu Mar 27, 2008 9:54 pm
- Location: Lower Wensleydale
- Contact:
Re: Rob P's 7mm Workbench - LNER 06 (from an MOK 8F)
Thanks Adrian,
Yes I do have to stop myself from just sitting there pushing it up and down the track
Yes I do have to stop myself from just sitting there pushing it up and down the track
-
Robpulham
- LNER A4 4-6-2 'Streak'
- Posts: 1715
- Joined: Thu Mar 27, 2008 9:54 pm
- Location: Lower Wensleydale
- Contact:
Re: Rob P's 7mm Workbench - LNER 06 (from an MOK 8F)
It's been a while since I updated this as I was waiting for parts for the brake cross beams for the A3 to arrive from Ragstone. They have now arrived as indeed has a second lot that I have ordered for the W1 so now I just need a day when I can concentrate and get the whole chassis assembled and running.
Watch this space!!
I have also made a little progress on the 06 having shorted out the wheels at one side using a method recomended by Mike Cole (Resseldar of this parish).
This involves drilling both the centre boss and the back of the wheel rim; cutting groove in the back of the spoke and soldering in a piece of nickel or brass rod. This is then rubbed flat on a piece of emery sat on a sheet of plate glass giving the result below.
-
Robpulham
- LNER A4 4-6-2 'Streak'
- Posts: 1715
- Joined: Thu Mar 27, 2008 9:54 pm
- Location: Lower Wensleydale
- Contact:
Re: Rob P's 7mm Workbench - LNER 06 (from an MOK 8F)
Well 3 months later I have made some more progress on Papyrus - I think that my getting nearer to having the layout space, that I want something besides Severn running to test it with.
I assembled the brakes ready for fitting to the chassis. I threaded the ends of the brake cross beams so that they can be removed if needs be. All the part's in the photo are Ragstone castings with the exception of the cylinders and the rear linkage rods that are 1mm brass rod with short sections of tube and 16BA nuts to create the turnbuckle type adjusters.
I just need to make a couple of brackets to hold the brake cylinders in place then I think I am ready to assemble it at long last.
I assembled the brakes ready for fitting to the chassis. I threaded the ends of the brake cross beams so that they can be removed if needs be. All the part's in the photo are Ragstone castings with the exception of the cylinders and the rear linkage rods that are 1mm brass rod with short sections of tube and 16BA nuts to create the turnbuckle type adjusters.
-
Atlantic 3279

- LNER A4 4-6-2 'Streak'
- Posts: 6540
- Joined: Fri Jun 26, 2009 9:51 am
- Location: 2850, 245
Re: Rob P's 7mm Workbench - LNER 06 (from an MOK 8F)
Hi Rob,
I'm amazed that you cope with leaving projects in suspended animation for months, and with having several on the go at once. I'd either get frustrated with the delays or just lose interest, on top of which I would struggle to think my way back into the necessary features of the job after each lay-off. They always look good though, so obviously that working method suits you.
I'm amazed that you cope with leaving projects in suspended animation for months, and with having several on the go at once. I'd either get frustrated with the delays or just lose interest, on top of which I would struggle to think my way back into the necessary features of the job after each lay-off. They always look good though, so obviously that working method suits you.
Most subjects, models and techniques covered in this thread are now listed in various categories on page1
Dec. 2018: Almost all images that disappeared from my own thread following loss of free remote hosting are now restored.
Dec. 2018: Almost all images that disappeared from my own thread following loss of free remote hosting are now restored.
-
Robpulham
- LNER A4 4-6-2 'Streak'
- Posts: 1715
- Joined: Thu Mar 27, 2008 9:54 pm
- Location: Lower Wensleydale
- Contact:
Re: Rob P's 7mm Workbench - LNER 06 (from an MOK 8F)
Thank you Graham,
I do find that I do lose interest on modelling subjects occasionally (like the NER horsebox) for various reasons. When I lose it and try to continue my heart isn't in it and I am never happy with the end result. So having learnt this over time in previous hobbies I now put it aside before I get too despondent with it. picking it back up again refreshed sometime later usually means that the end result satisfies me.
This particular kit is an exception in that the delay was caused by waiting for parts from Ragstone, which took about 6 months (to be fair to Andy Beaton, he was still making the patterns when I ordered them and he did say that there would be a delay). Then when they finally arrived I was engrossed in something else and I didn't want to start before I was in the right frame of mind and I had time available to dedicate to it.
As to how good a job I make at picking it up again, this bit has gone OK but time will tell for the whole.
We have spent quite a lot of this year converting our garage into a Studio for Chris (my good lady) and a layout area/workshop for kit building for me. Thankfully this is now almost complete so I should have a lot more time to dedicate to modelling.
____________________________________________________________________________
Re: Rob P's 7mm Workbench - LNER 06 (from an MOK 8F)
Some of us have had works in progress in suspense for years!Atlantic 3279 wrote:Hi Rob,
I'm amazed that you cope with leaving projects in suspended animation for months, and with having several on the go at once......
-
All thumbs

- H&BR Q10 0-8-0
- Posts: 184
- Joined: Tue Sep 06, 2011 1:44 am
Re: Rob P's 7mm Workbench - LNER 06 (from an MOK 8F)
All of mine were suspended 23 years ago, remained packed up when we moved house at the end of January 1992 and gradually moved further and further back into the attic until their recent re-discovery - here are two 3H vans which I was hacking about at the time and I may have had up to 20 wagon and van kits "on the go" at the same time.Horsetan wrote:Some of us have had works in progress in suspense for years!Atlantic 3279 wrote:Hi Rob,
I'm amazed that you cope with leaving projects in suspended animation for months, and with having several on the go at once......
- The 3H kit as it came was unfitted - these two have
ABS clasp brakes, cylinders etc as well as ABS replacement buffers.
Be gentle! Returning to the hobby after more than 20 years away...
-
Robpulham
- LNER A4 4-6-2 'Streak'
- Posts: 1715
- Joined: Thu Mar 27, 2008 9:54 pm
- Location: Lower Wensleydale
- Contact:
Re: Rob P's 7mm Workbench - LNER 06 (from an MOK 8F)
More work on the A3, but not in the construction of it 
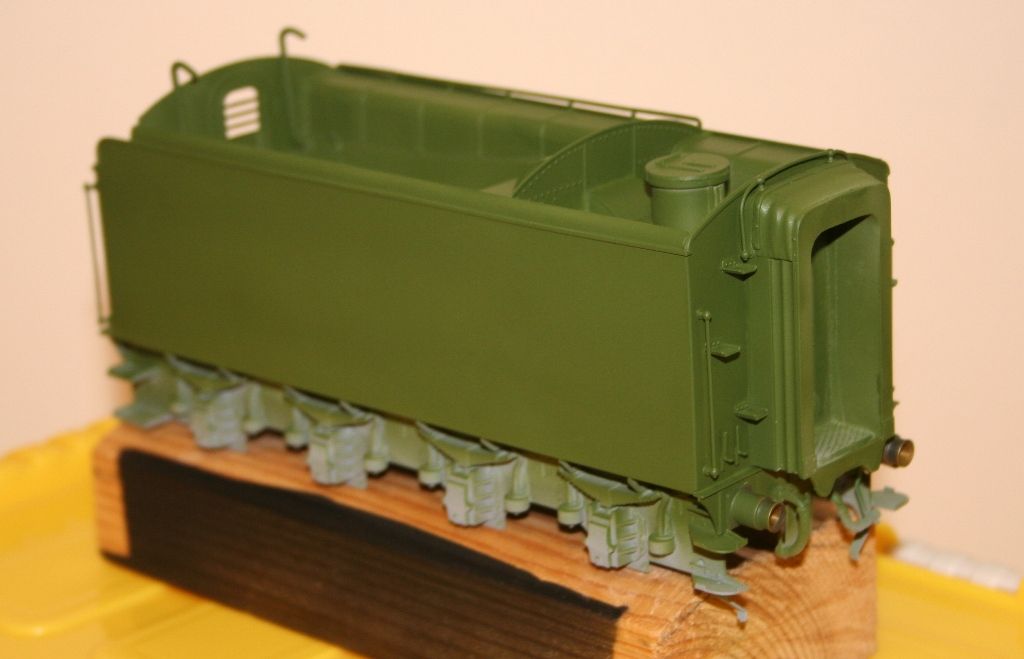
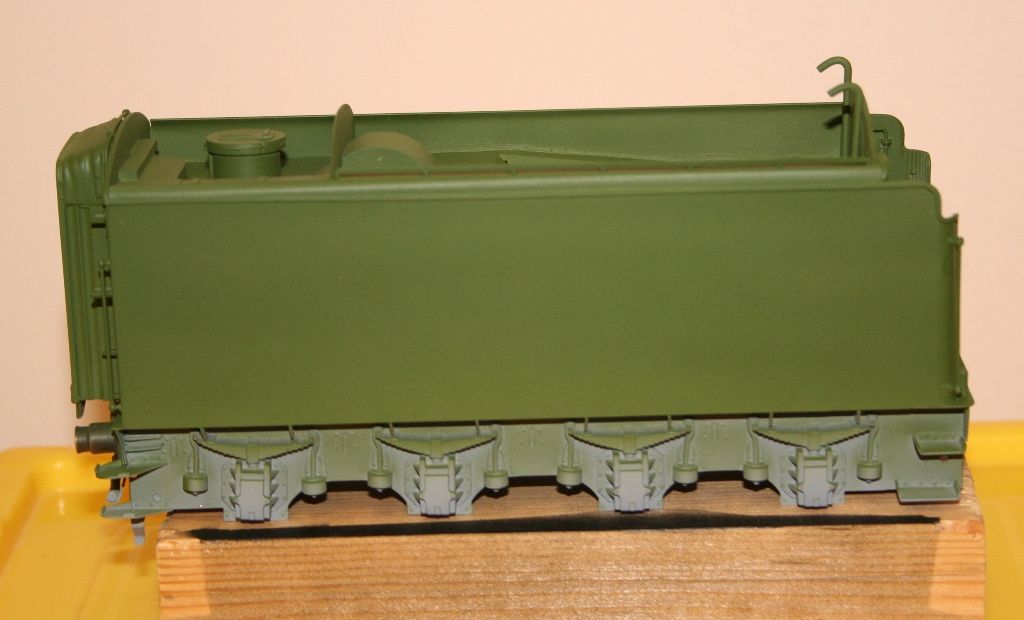
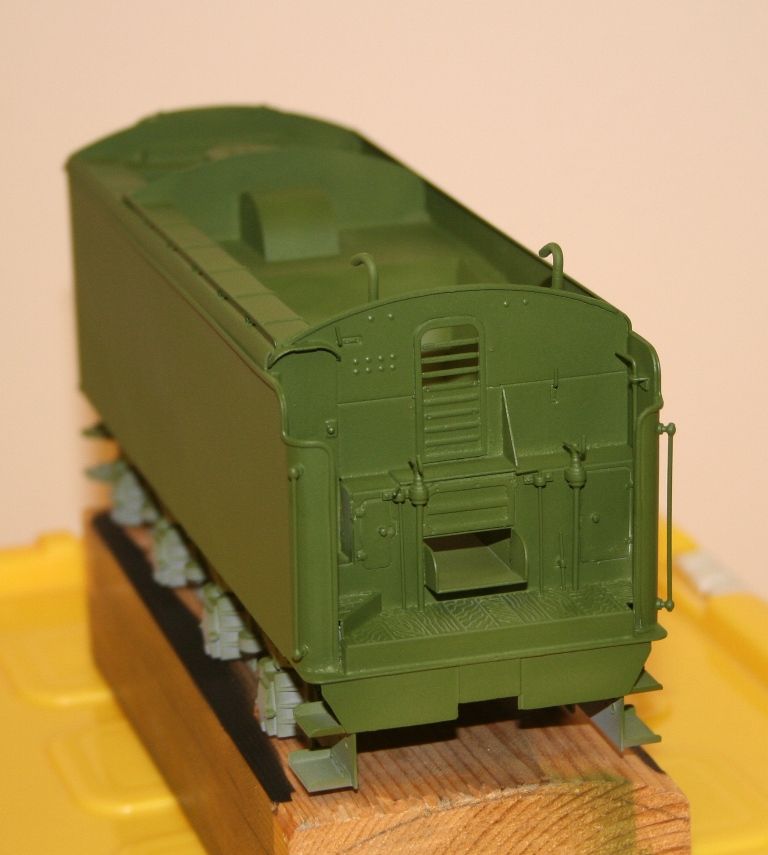
My progress has been on the painting of the body work. To be honest I put the first coat of green on the tender over 12 months ago but not I have the spray booth I took the opportunity to make a bit more progress.
Another coat was put on the tender. So far so good.
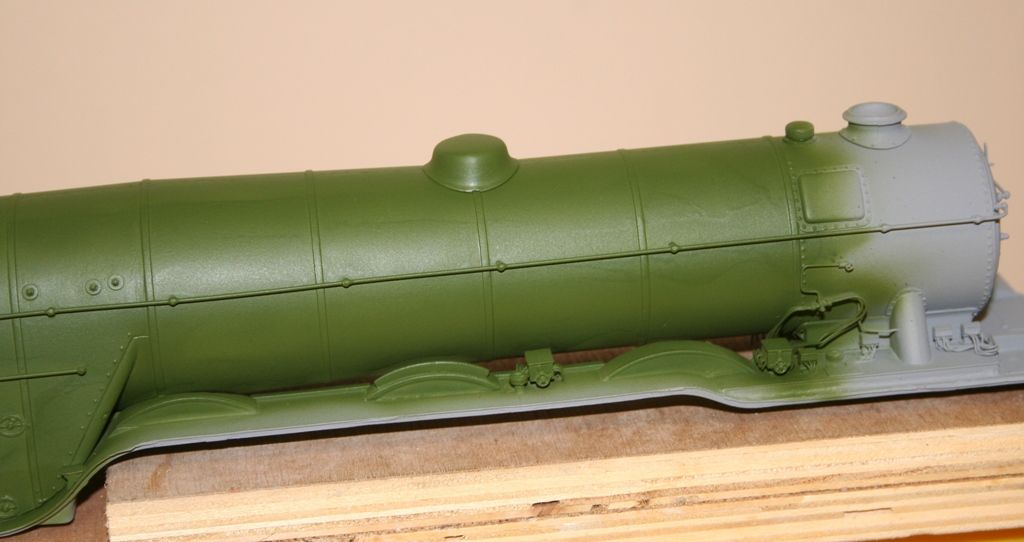
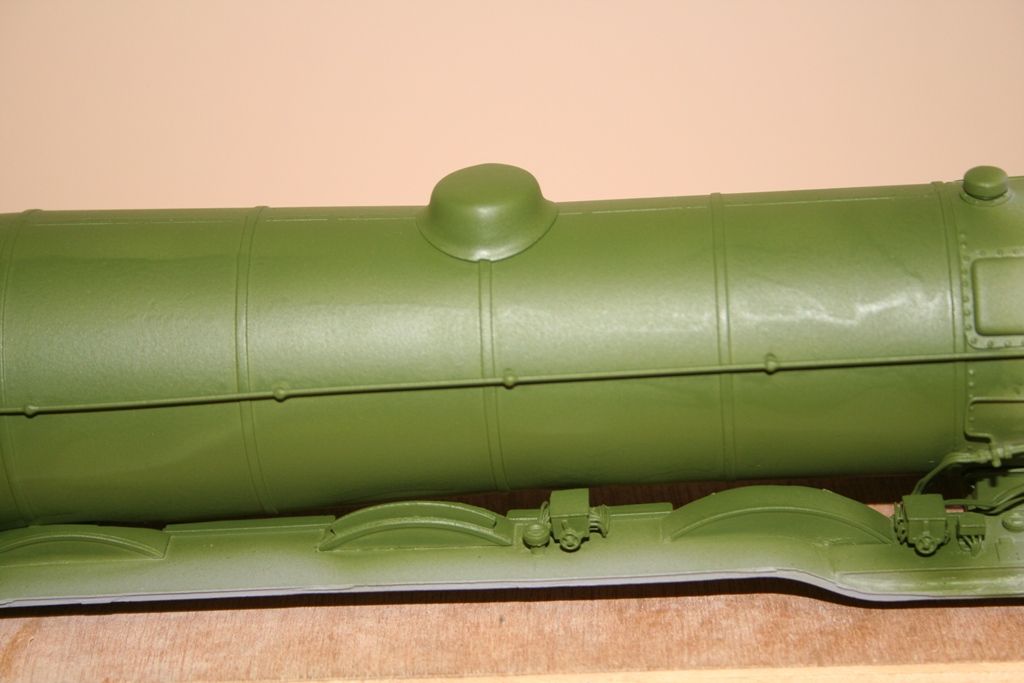
I then took the plunge and started on the boiler/footplate. The first side went well..
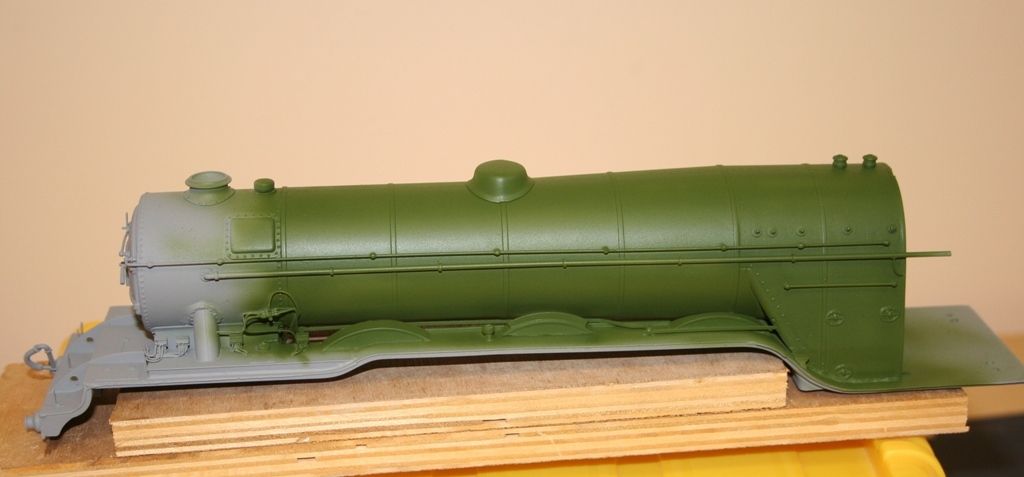
Then it all went wrong and I got lots of runs....
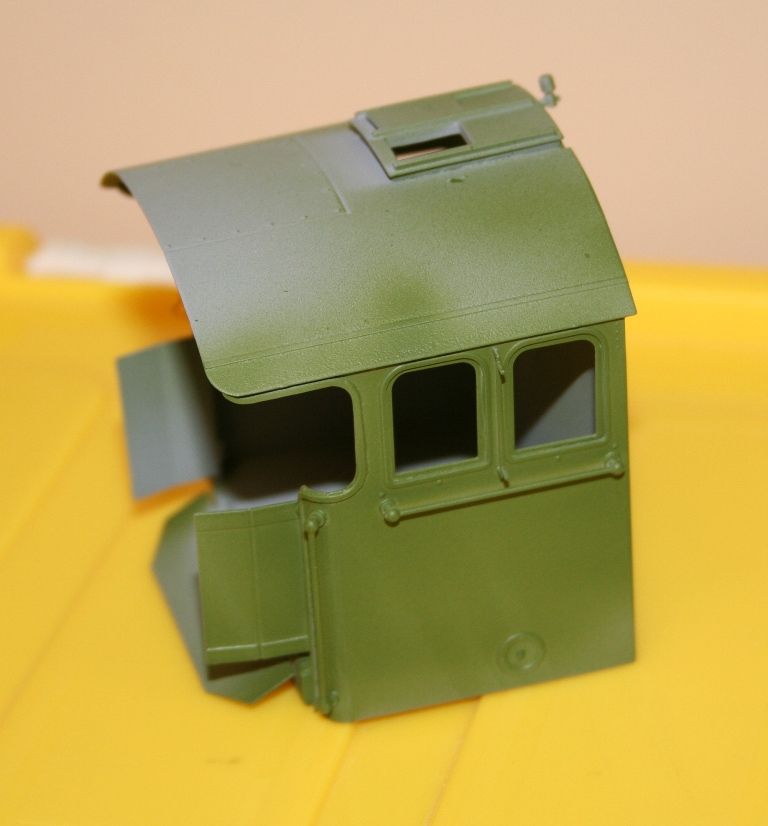
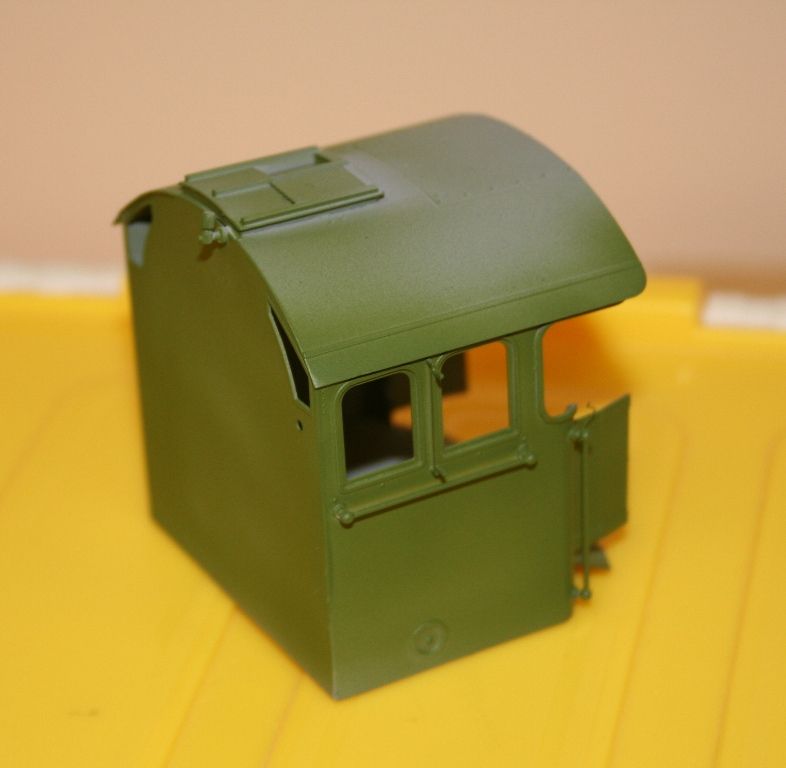
Still all was not lost as the first coat on the cab went on OK.
My progress has been on the painting of the body work. To be honest I put the first coat of green on the tender over 12 months ago but not I have the spray booth I took the opportunity to make a bit more progress.
Another coat was put on the tender. So far so good.
I then took the plunge and started on the boiler/footplate. The first side went well..
Then it all went wrong and I got lots of runs....
Still all was not lost as the first coat on the cab went on OK.
-
Blink Bonny
- LNER A4 4-6-2 'Streak'
- Posts: 3946
- Joined: Mon Dec 03, 2007 9:21 pm
- Location: The Midlands
- Contact:
Re: Rob P's 7mm Workbench - LNER 06 (from an MOK 8F)
Ay up, Rob!
This is going to be a cracker!
This is going to be a cracker!
If I ain't here, I'm in Bilston, scoffing decent chips at last!!!!
-
Atlantic 3279
- LNER A4 4-6-2 'Streak'
- Posts: 6540
- Joined: Fri Jun 26, 2009 9:51 am
- Location: 2850, 245
Re: Rob P's 7mm Workbench - LNER 06 (from an MOK 8F)
Nice to see the single coal rail atop the corridor of the original pattern corridor tender.
Those runs on the boiler appear to be in quite a thin coat. I imagine that a bit of careful, light, very fine wet rubbing down and more coats of green will eliminate the evidence without recourse to paint stripper.
Those runs on the boiler appear to be in quite a thin coat. I imagine that a bit of careful, light, very fine wet rubbing down and more coats of green will eliminate the evidence without recourse to paint stripper.
Most subjects, models and techniques covered in this thread are now listed in various categories on page1
Dec. 2018: Almost all images that disappeared from my own thread following loss of free remote hosting are now restored.
Dec. 2018: Almost all images that disappeared from my own thread following loss of free remote hosting are now restored.