Page 19 of 21
Re: Rob P's 7mm Loco Workbench - More lining Efforts.
Posted: Sat Feb 08, 2014 6:53 pm
by Robpulham
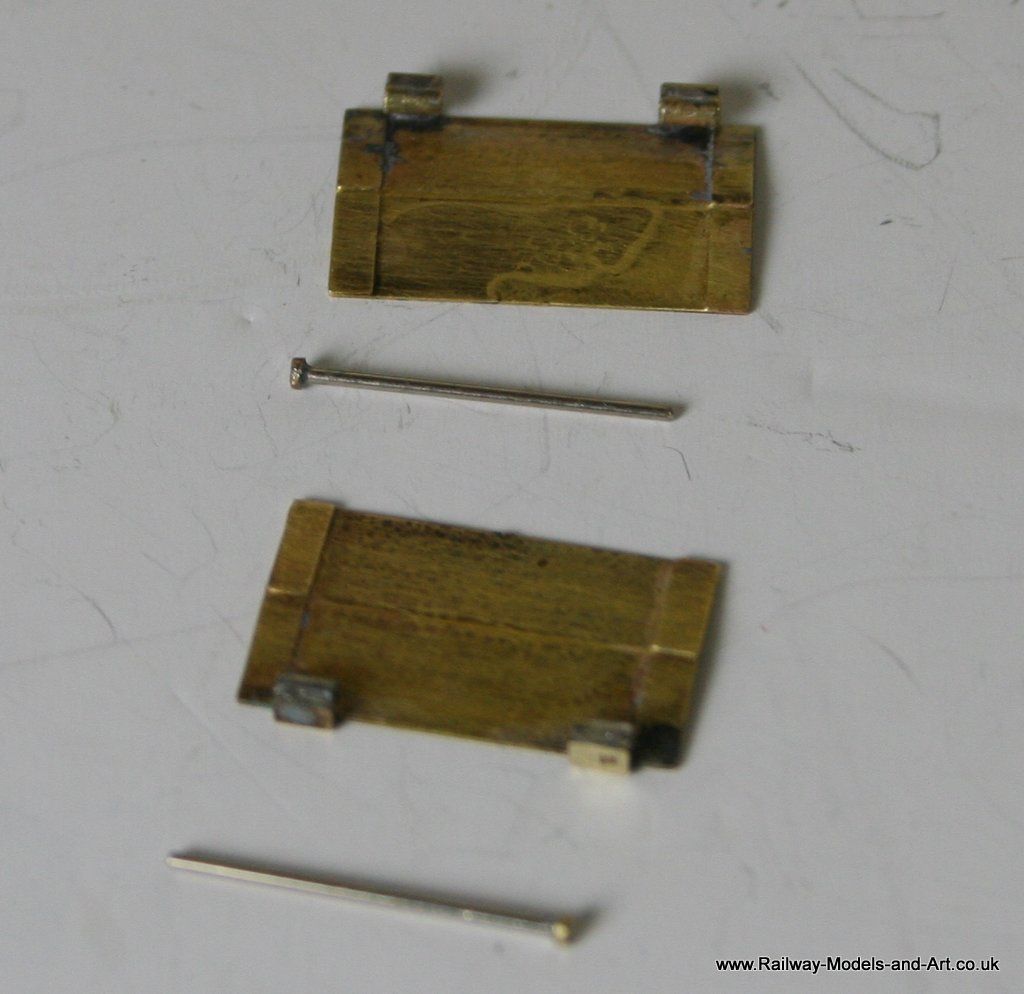
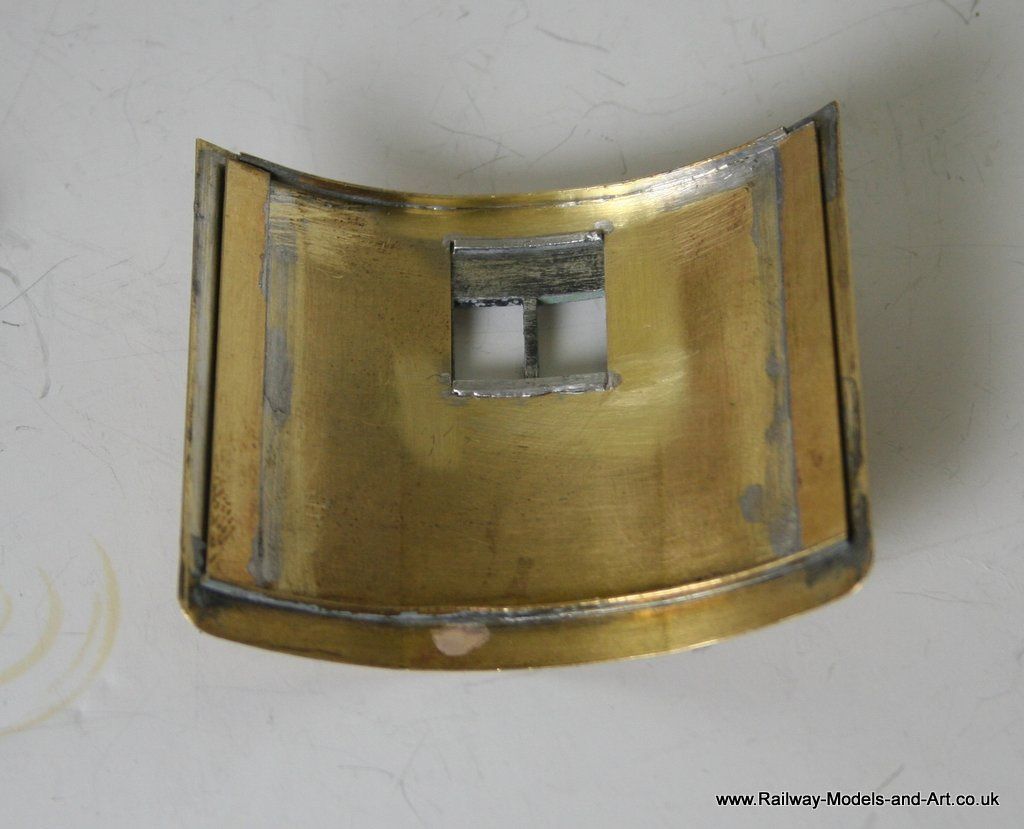
As promised these are the pens and jigs that I used to do the lining job on Severn.
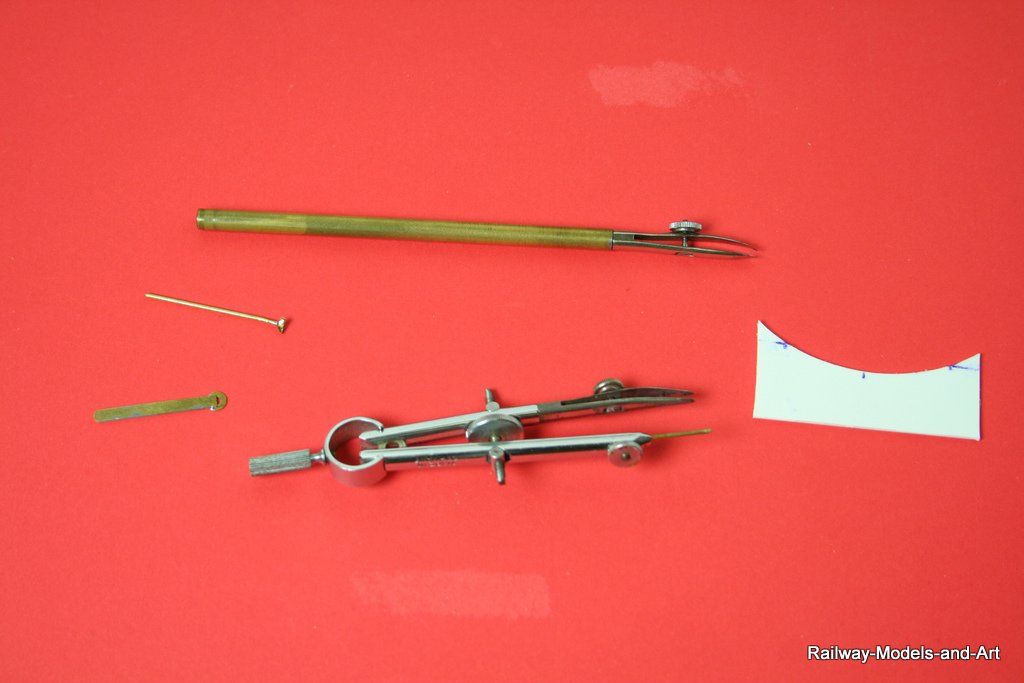
Although I have a Haff pen and compass they are not as fine as those in the photo, the pen is a Kern head that was attached to a strange compass so I made a new handle from some suitably sized brass tube. The compasses are an unknown German make that I picked up in a mix set with the Kern one fr a few quid on Ebay some time ago. I used one of the emery board type files that you get as a free gift each time you place an order with Scale Hardware - they have four different grades of abrasives and the too finest are perfect for honing the pens and compasses.
The flat brass with the washer on the end is for creating the corners
The plastic card curve was used to create the lozenge shape around the name plates
The wire with the small shoe is a dog legged skate that replaces the straight pin in the bow compass to allow me to do the curves on the splashers fronts etc. by reaching above and beyond the rivets on the edge of the splasher tops.
Re: Rob P's 7mm Loco Workbench - More lining Efforts.
Posted: Sun Feb 09, 2014 8:40 pm
by Robpulham
Re: Rob P's 7mm Loco Workbench - More lining Efforts.
Posted: Sun Feb 23, 2014 7:26 pm
by Robpulham
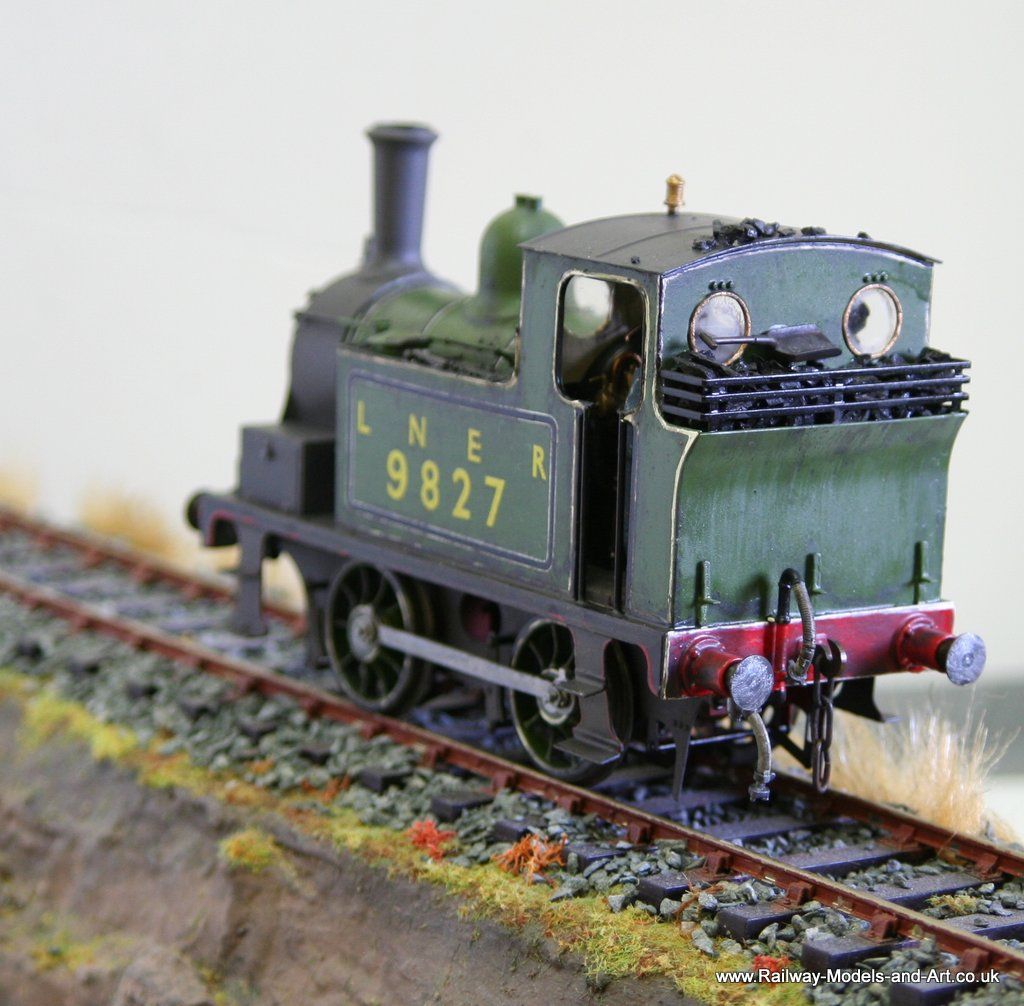
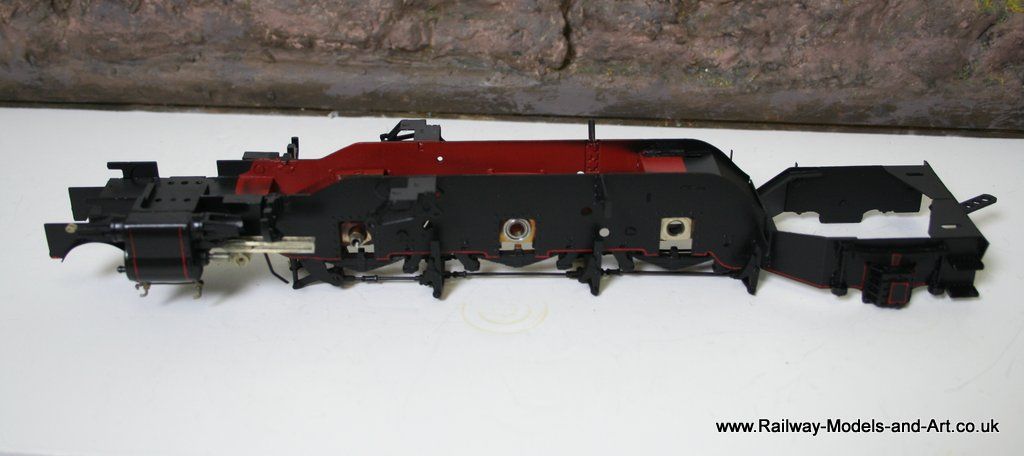
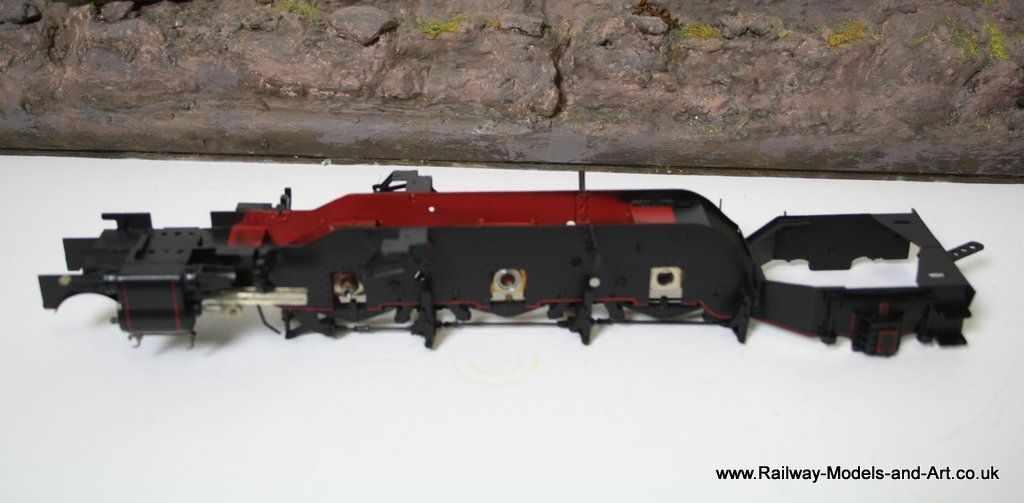
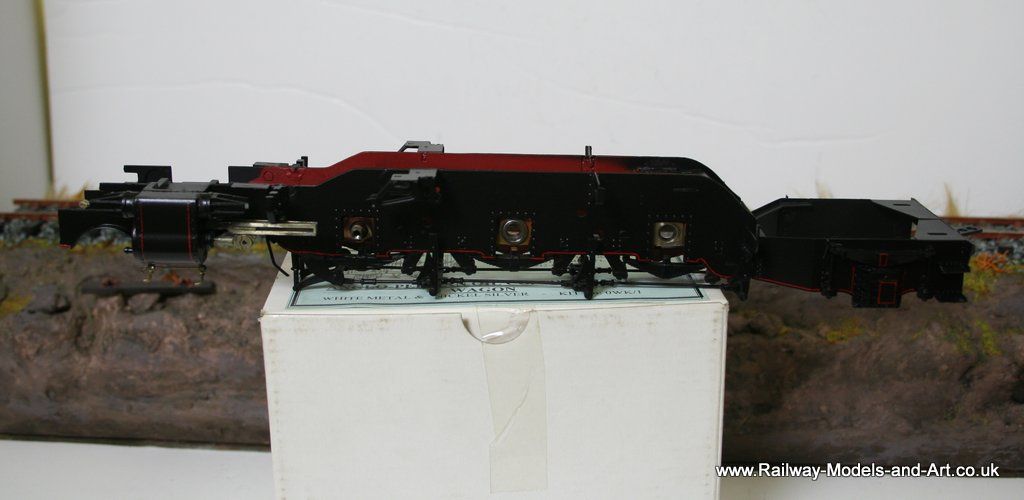
The A3 moves nearer and nearer the finish line.
The chassis is now painted and lined. -I wasn't 100% sure that the red line ran all the way along the chassis bottom but in will be lost behind the wheels and weathering. I have only got one cylinder back on at the moment as I need a small soldering job on the other - the link to the middle cylinder came adrift as I dismantled it.
I also learned something that is worth sharing today. I use Ronseal satin hard glaze as my protective coat (the water based version). In the past despite letting ti down for spraying with de-ionised water and mixing it well I have problems with blobs appearing. Today I thought that I would try letting it down with Tamiya acrylic thinners. What a difference it made to the quality of inish and the speed with which it dries. I will be trying a similar approach to spraying both matt and gloss varnish to see if it improves that too.
Re: Rob P's 7mm Loco Workbench - More lining Efforts.
Posted: Mon Mar 03, 2014 5:19 pm
by Robpulham
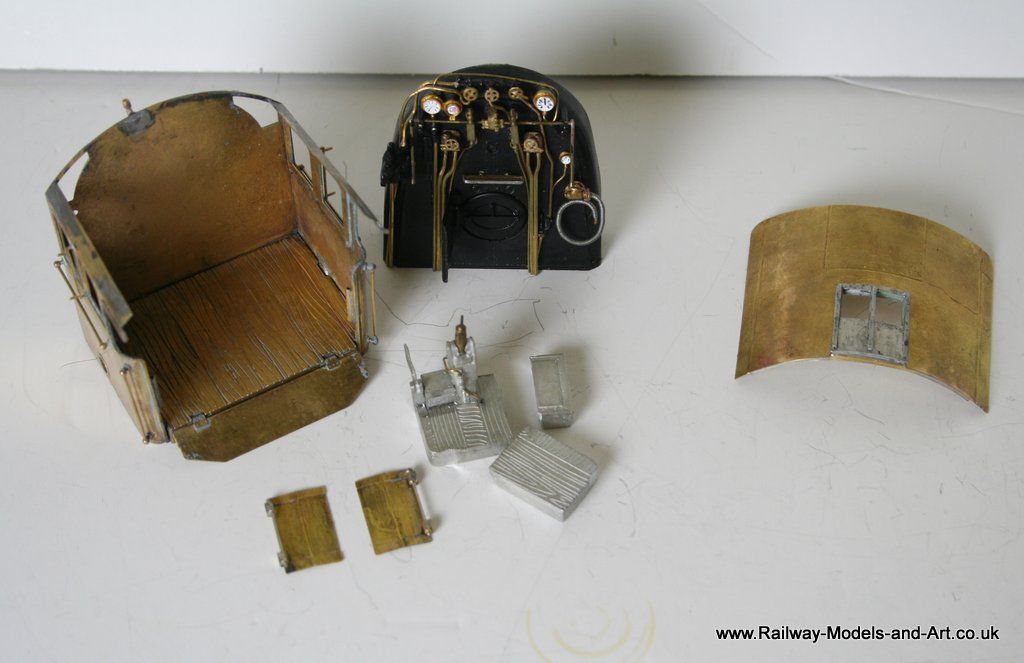
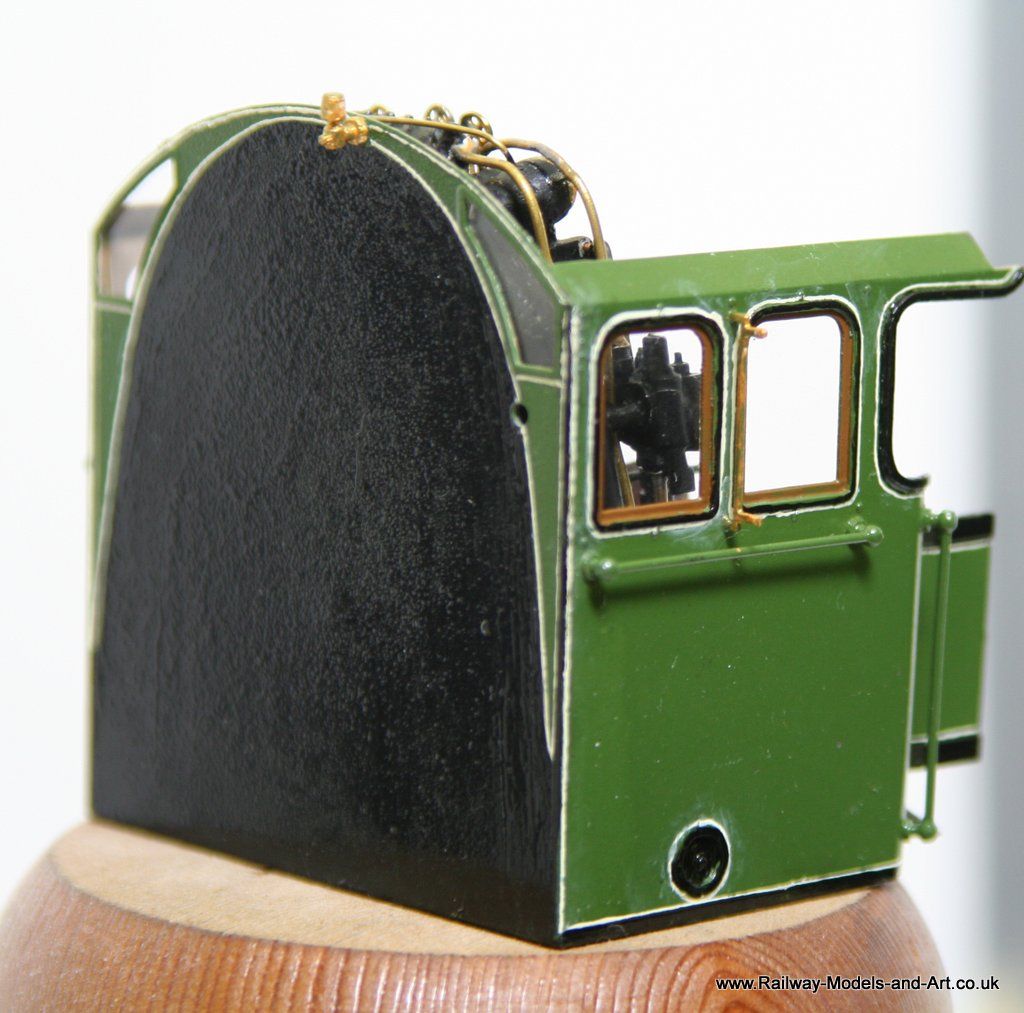
One step forward and three back. Having stripped and repainted the cab, I initially started to spray the exterior with Klear to get a glossy surface to line onto. It promptly ran to the bottom and sat there as a ridge Grrrr!
So being the diligent soul that I am I had read the back of the bottle so knew that you can remove Klear with ammonia. Did any of my local shops stock ammonia these days? - Did they chuff!!! Chris ended up ordering some from Amazon for me..
Anyway, it duly arrived and I eagerly painted some on and..... nothing happened!!!
DOH, so I read the instructions = dilute it 3:1 apply and then let it dry for 5 minutes. When dry scrub off with warm soapy water and surprise surprise a Ronseal moment - it did what it said on the tin.
Then onto plan B I tested letting gloss varnish down using tamyia thinners using a tin can and it works. so the next step was to carfully apply some thin coats to get a nice glossy surface to line onto.
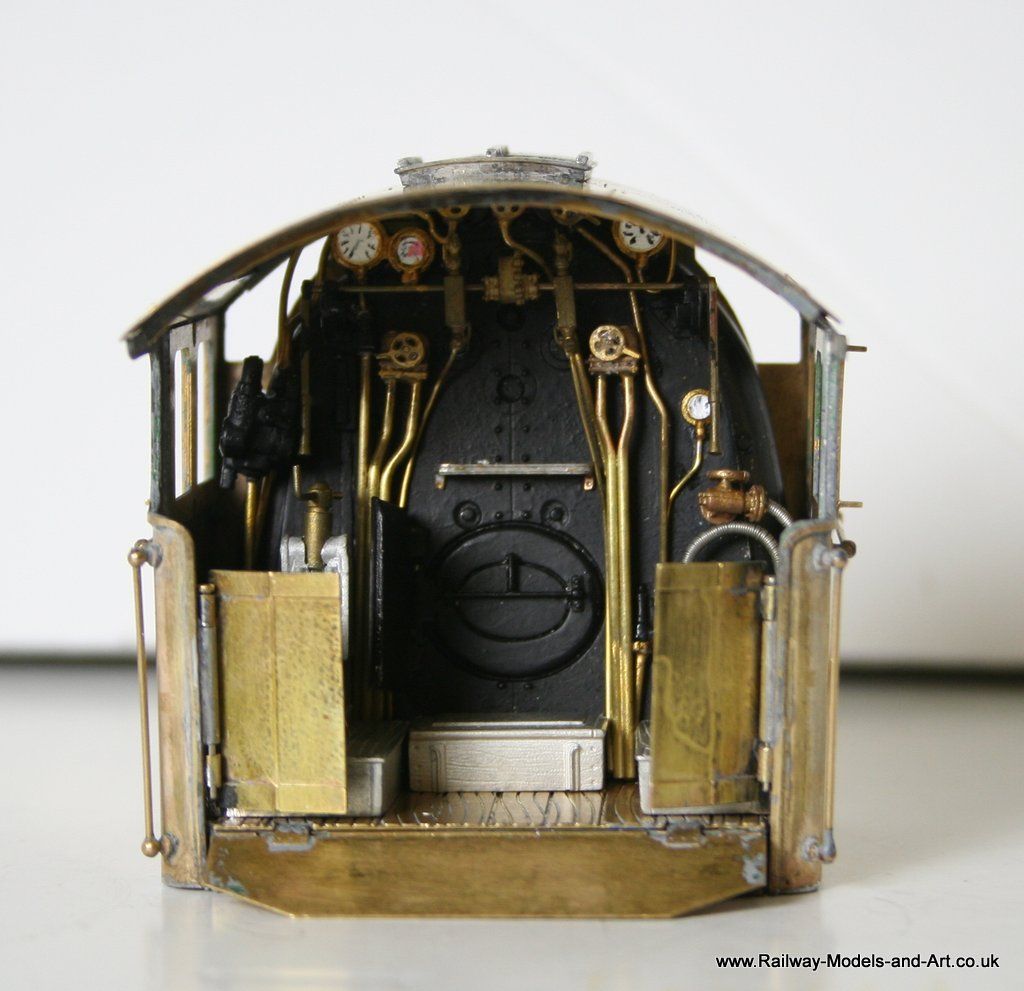
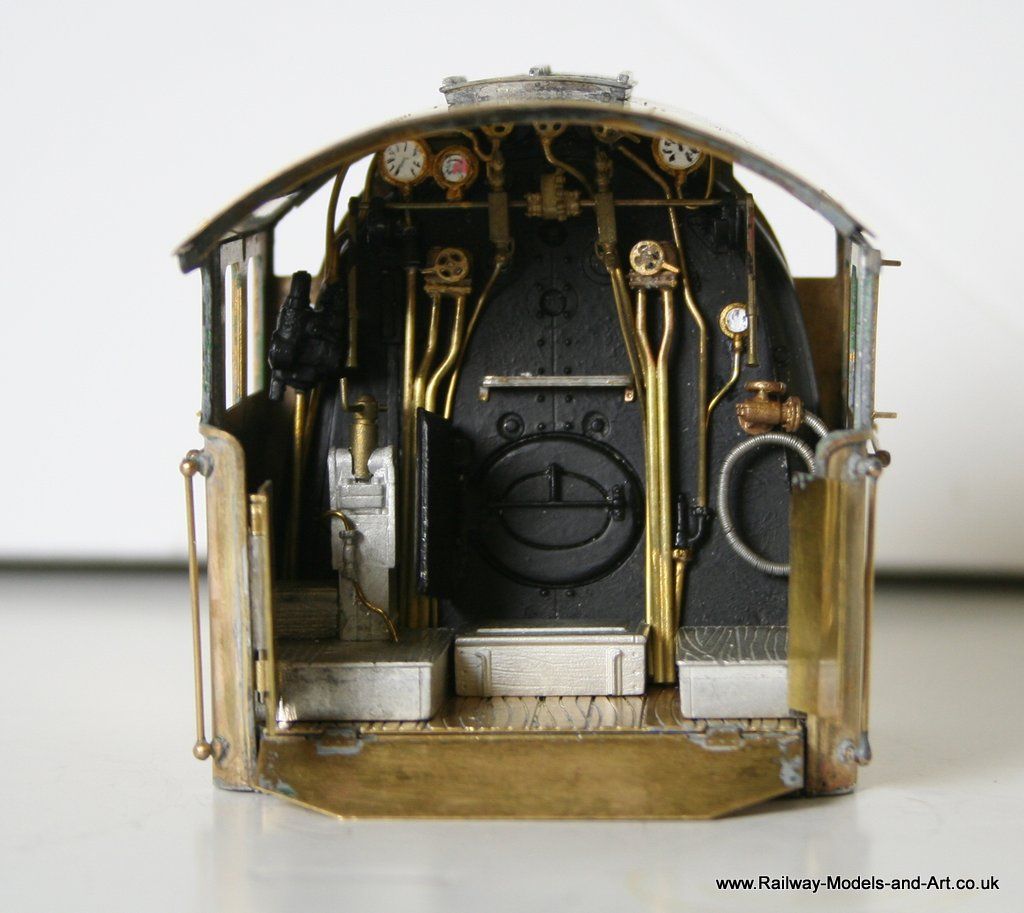
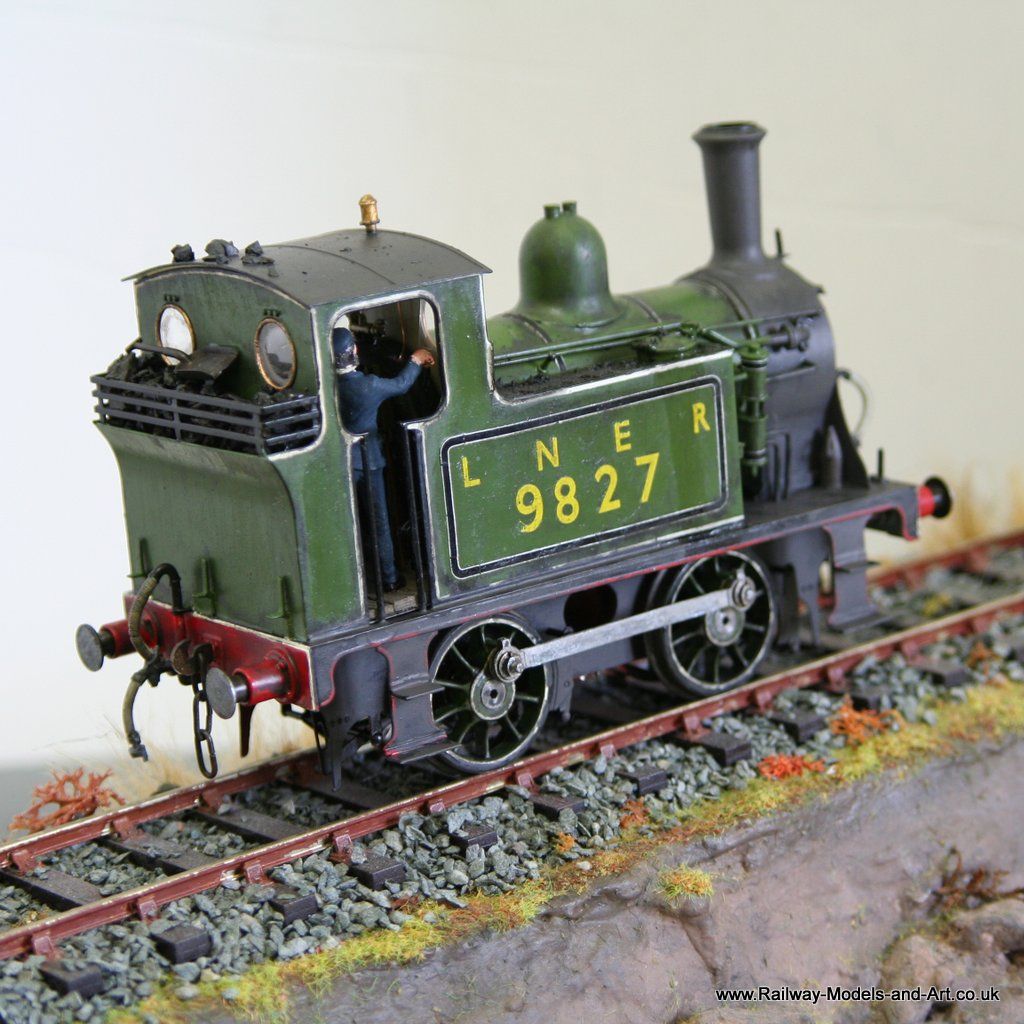
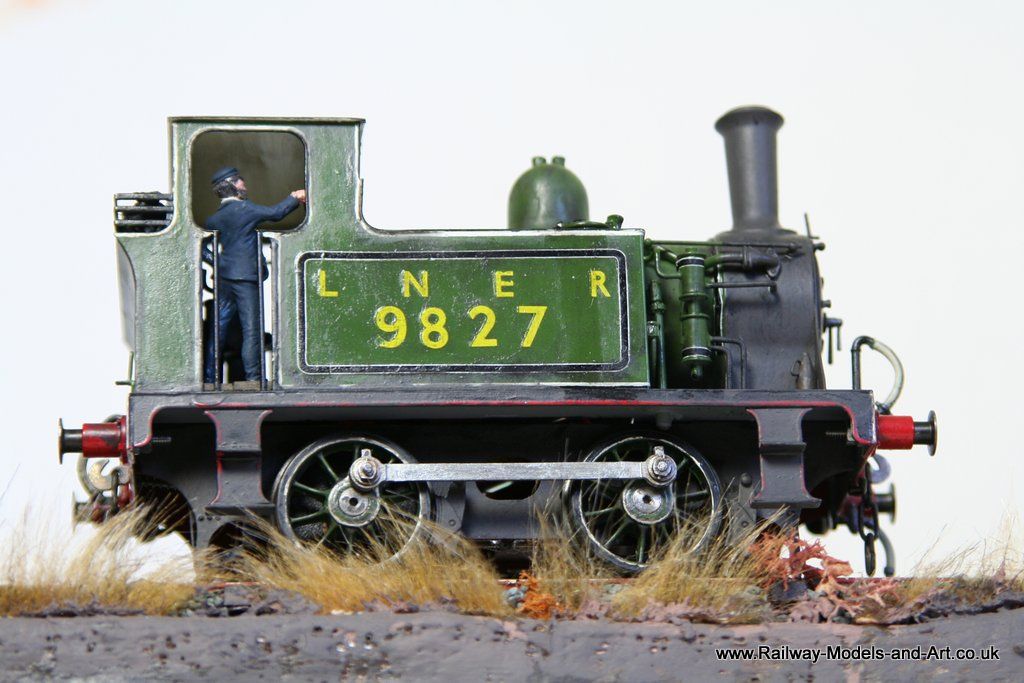
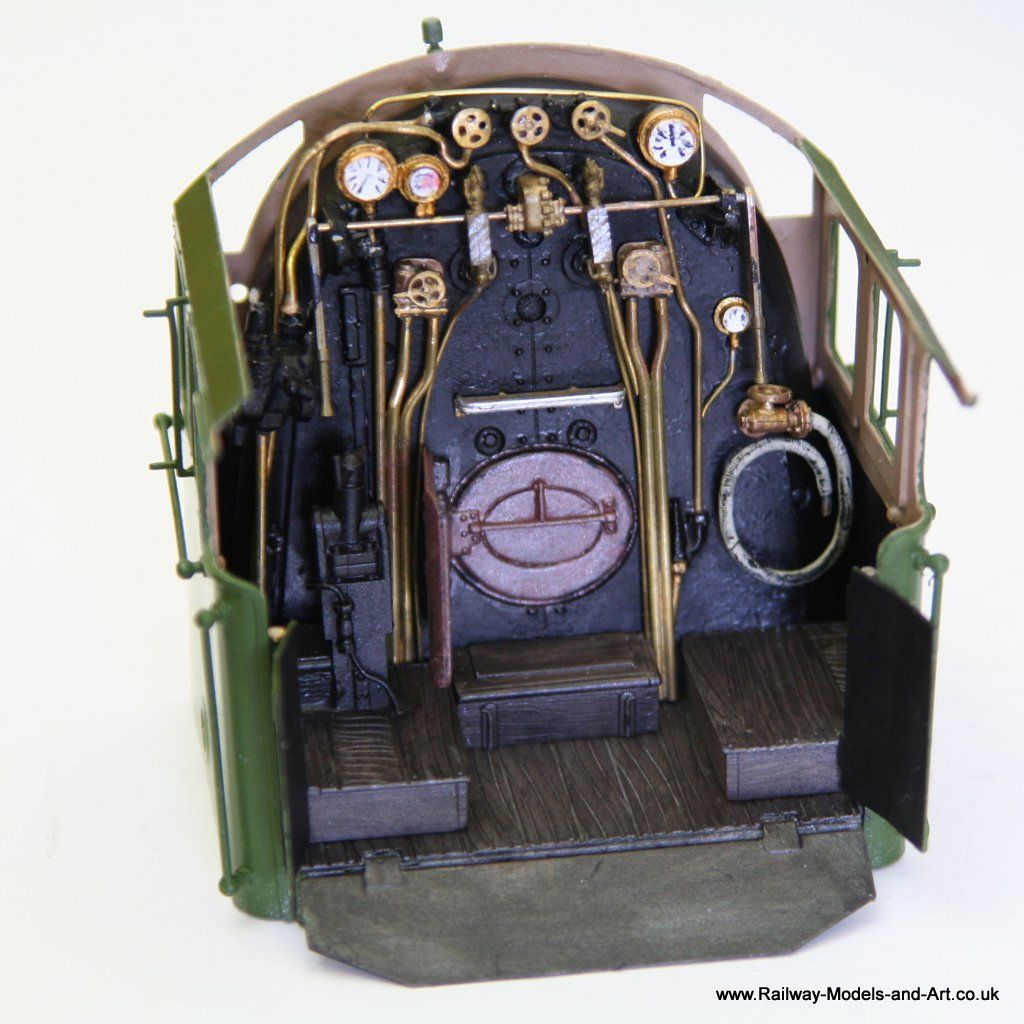
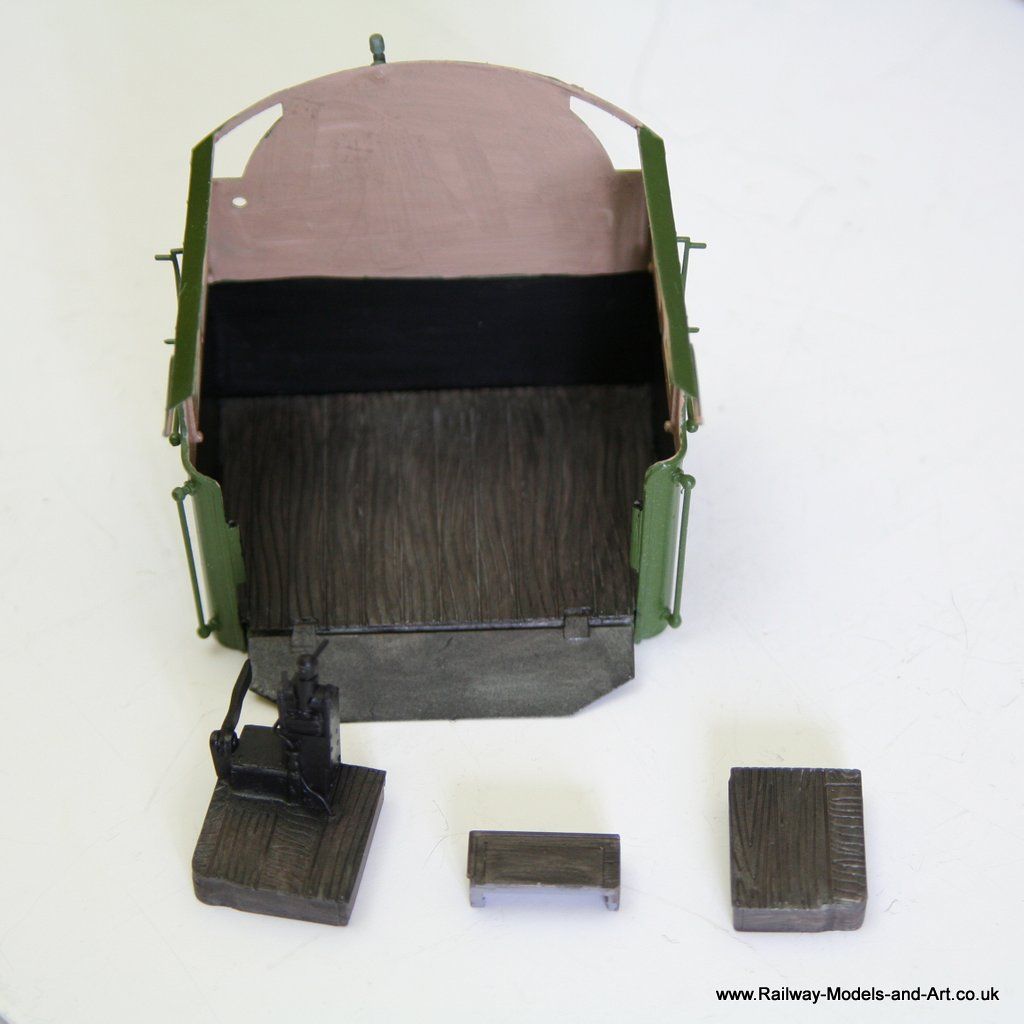
Being as happy as I am going to get with this - it will need a bit of weathering to hide some blemishes I think...... I thought about painting the inside of the cab and painting the cab floor as weathered planks. My success with this was what got me started on weathering the Midland wagon.
I wasn't too concerned about the line between the stone and black being dead straight as the cab fittings break it up anyway.
All the painting has been done with a mixture of Anitas Acrylics and Vallejo Acrylics
That's enough of a preamble here are the photos
Re: Rob P's 7mm Loco Workbench - More lining Efforts.
Posted: Fri Mar 14, 2014 7:59 pm
by Robpulham
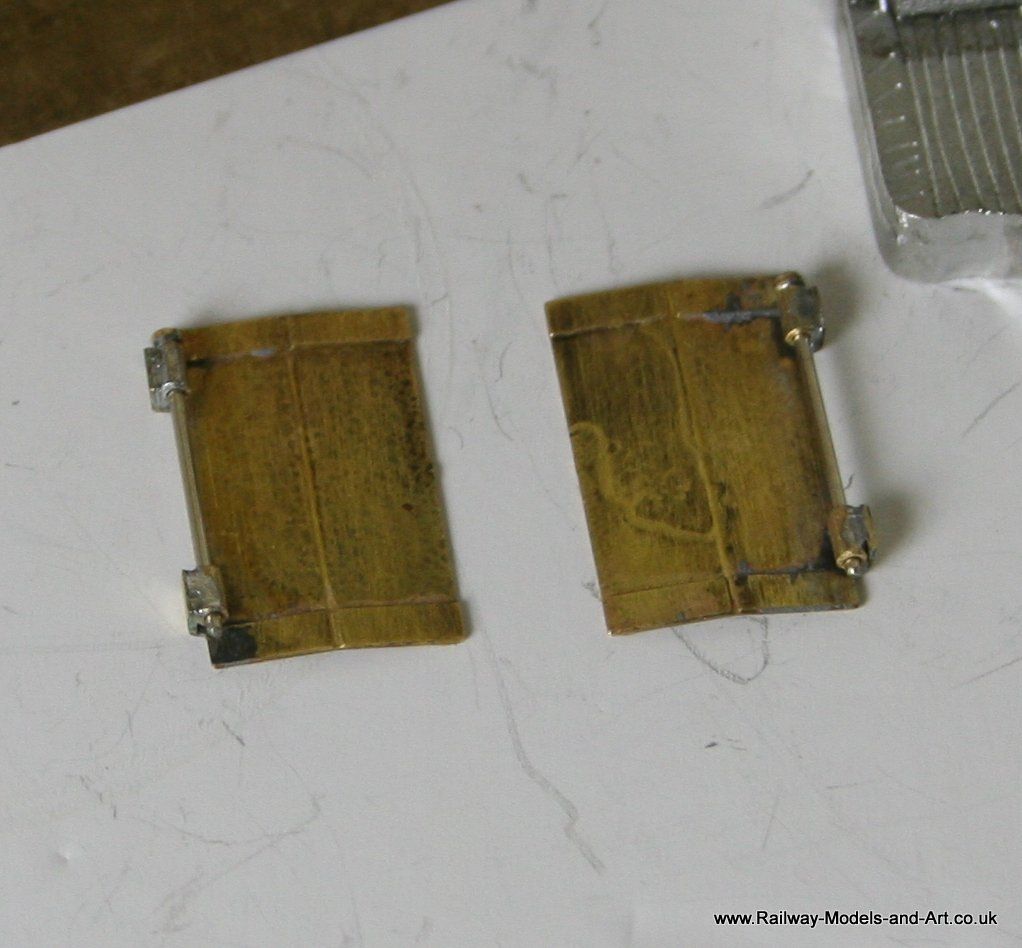
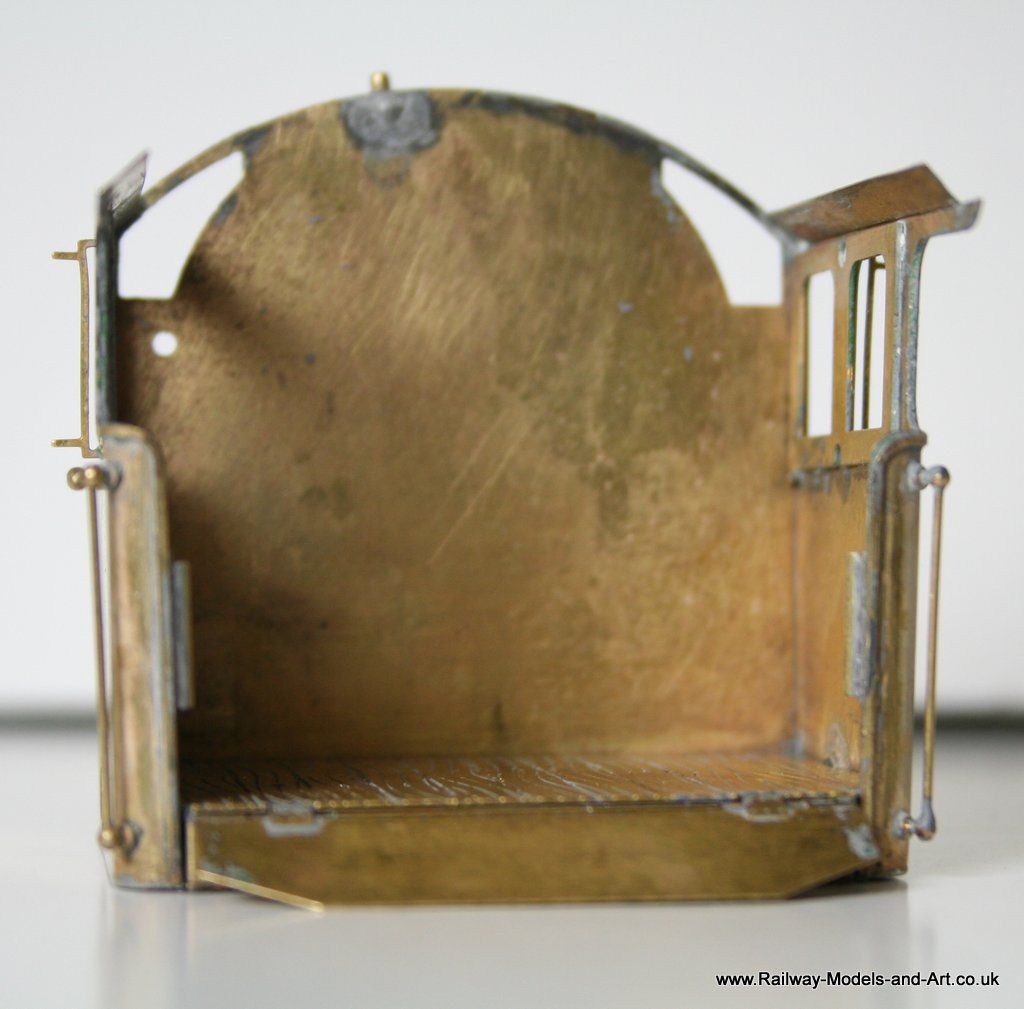
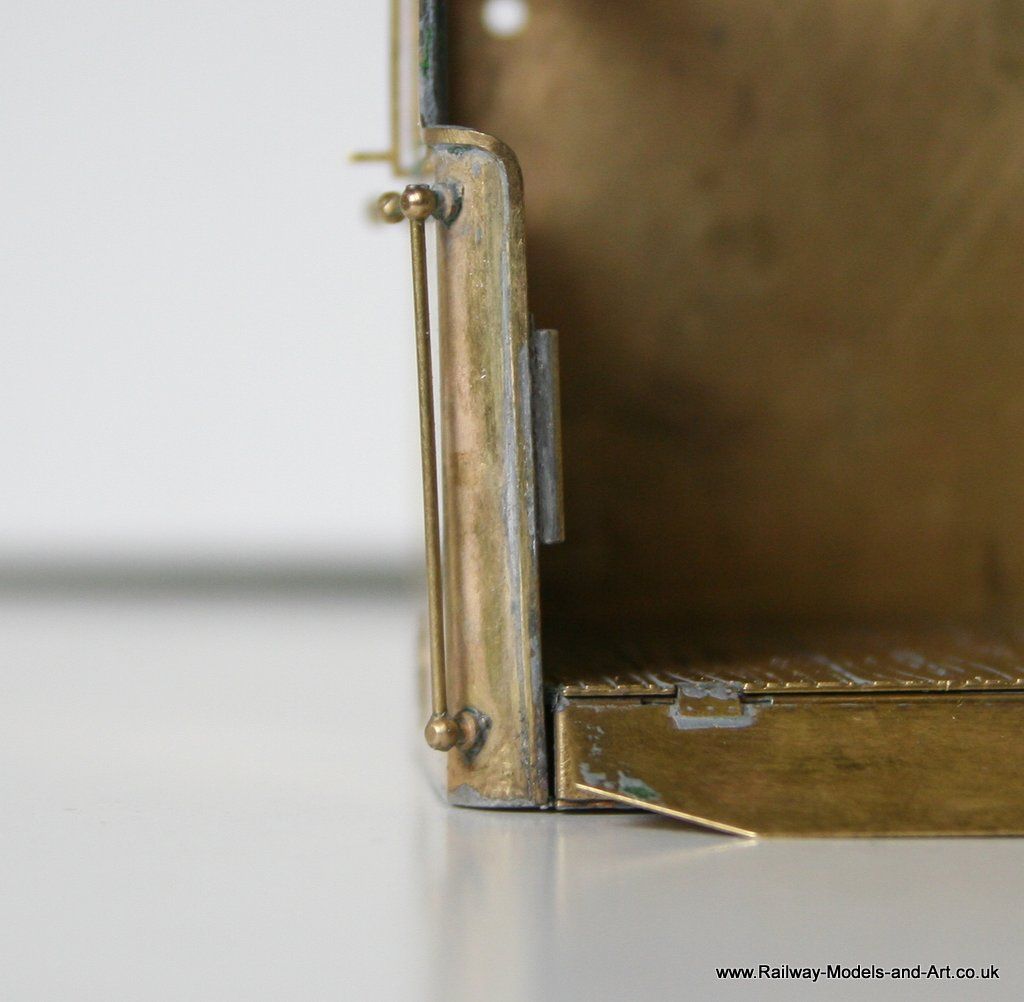
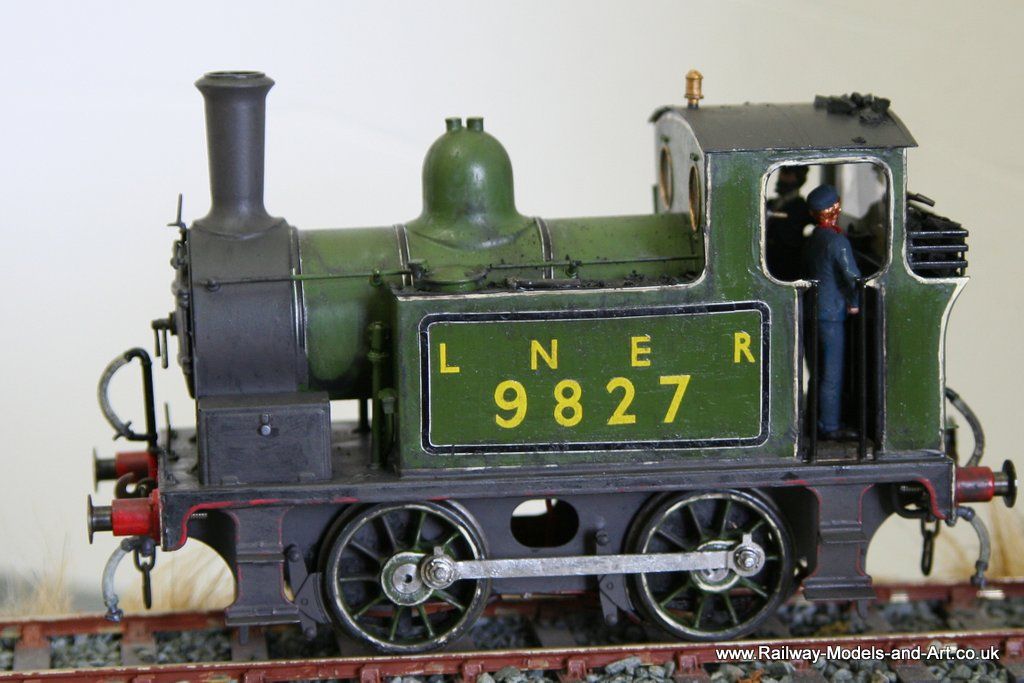
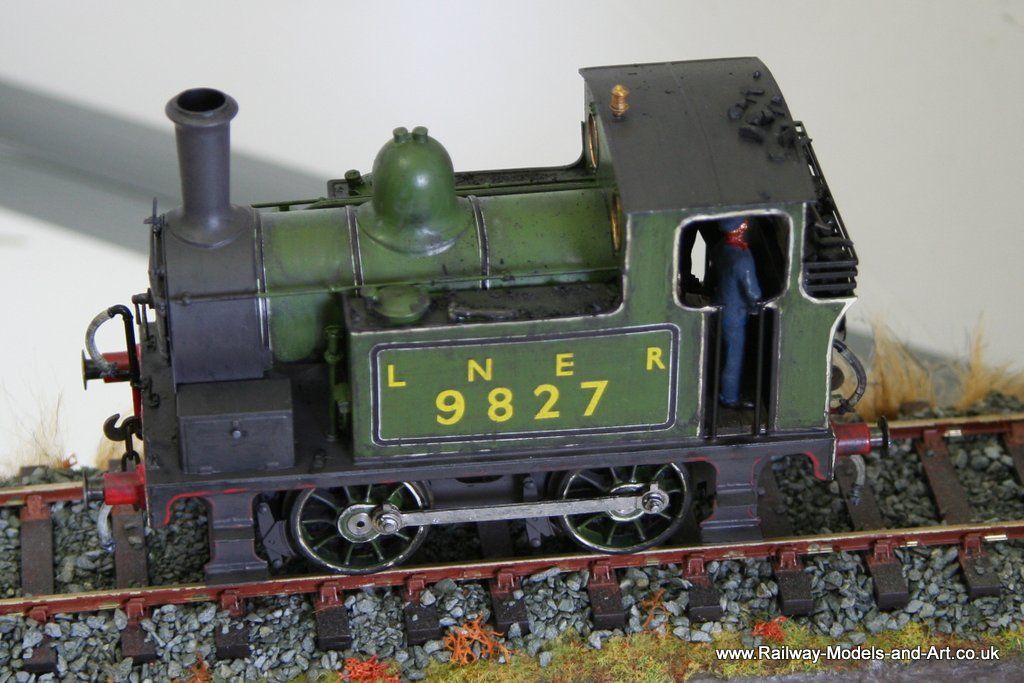
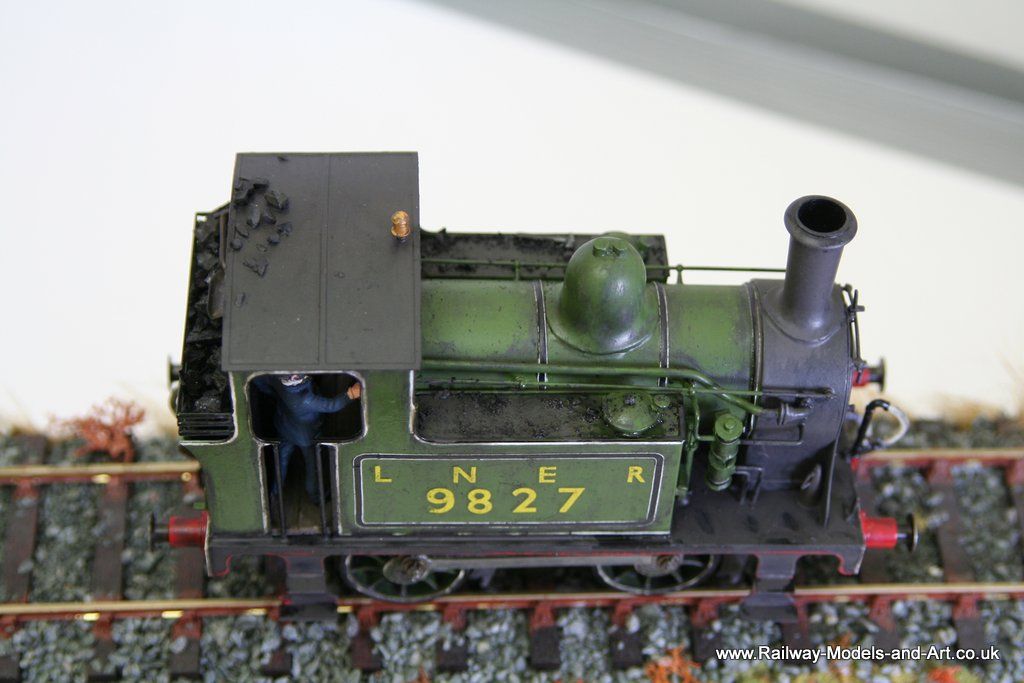
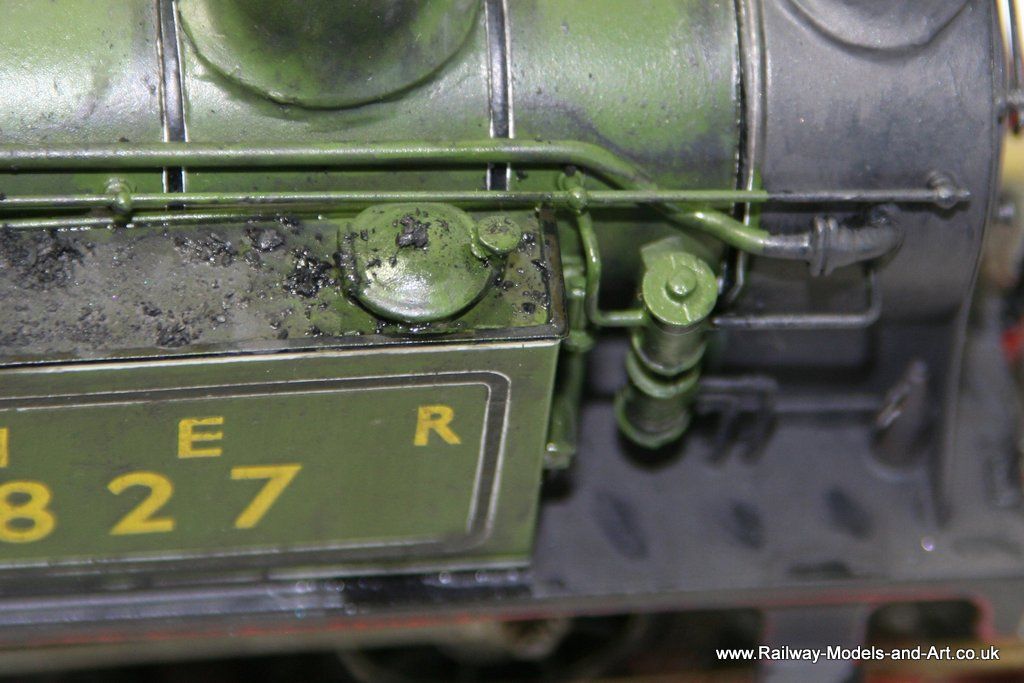
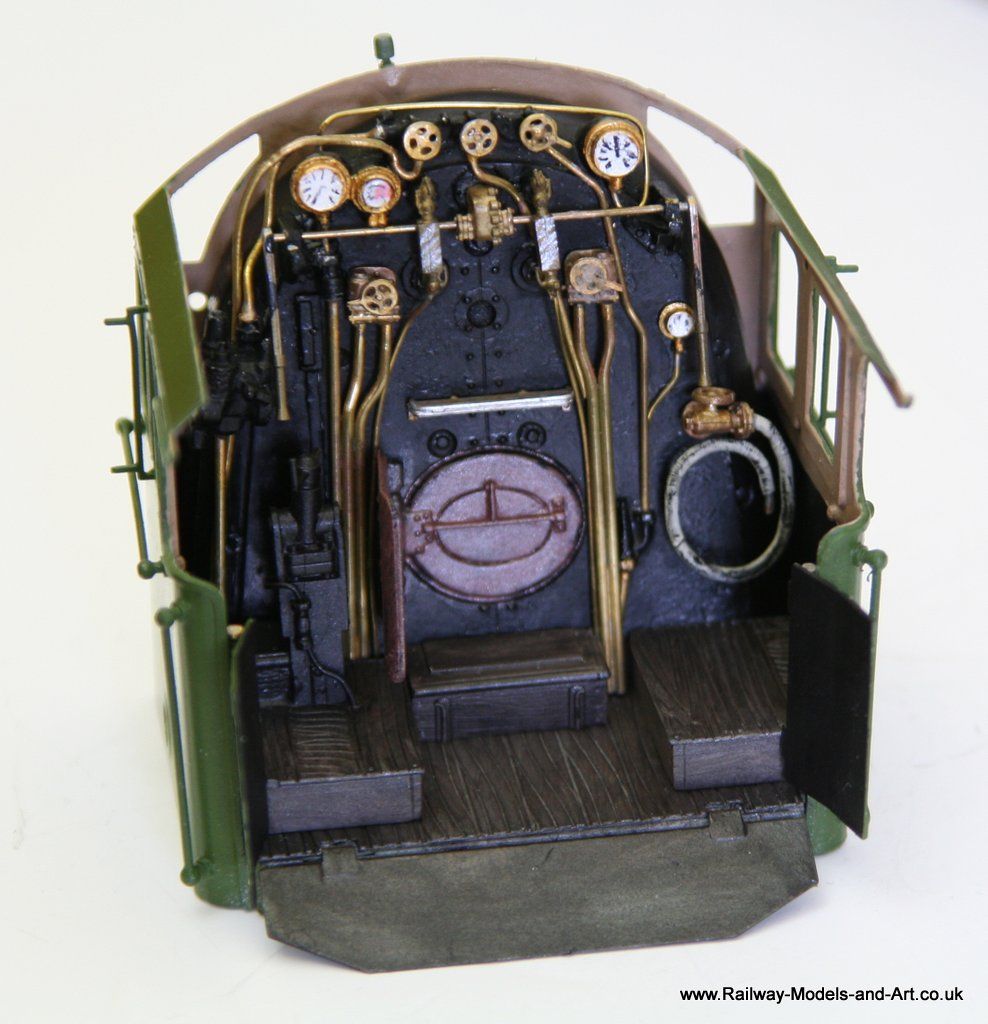
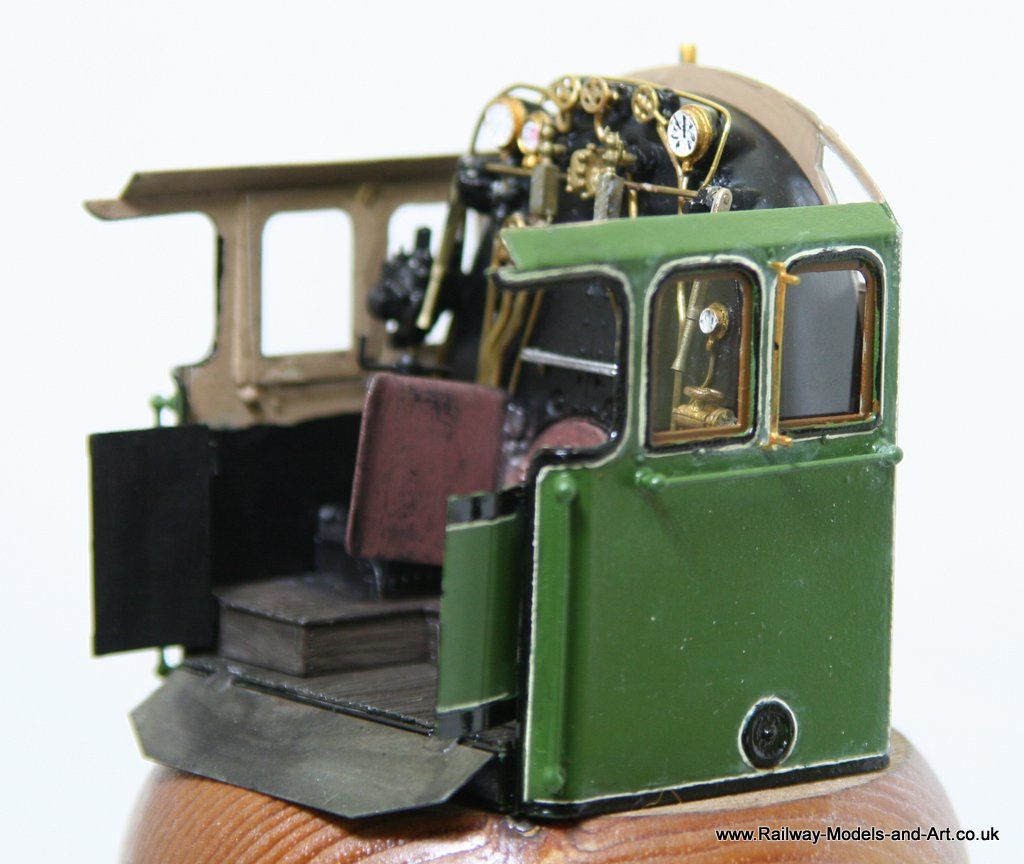
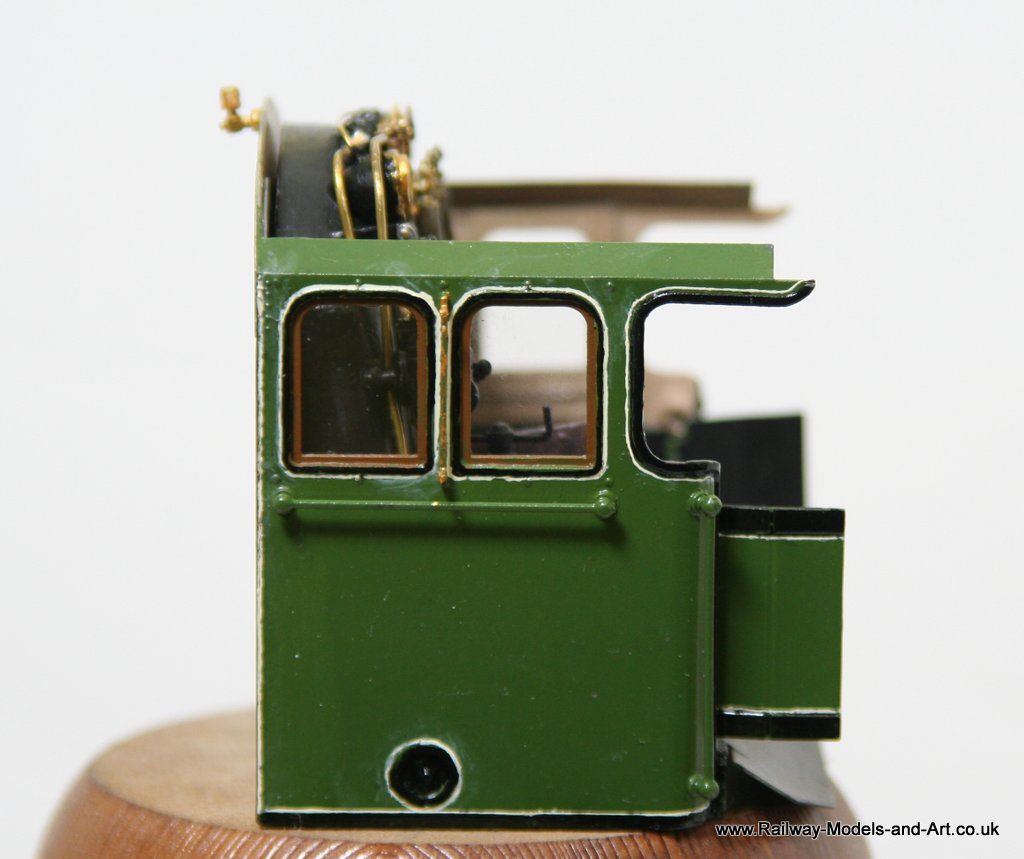
In between my efforts at weathering stock I have still been beavering away lining, and glazing the cab.
Here are a few cruel close ups. There are still a few smudges of white that I need to remove. But this one is going to be weathered not ex works so any blemishes will blend in.

Hopefully the transfers will go on the cab and tender over the weekend.....
Re: Rob P's 7mm Loco Workbench - More lining Efforts.
Posted: Tue Mar 25, 2014 6:03 pm
by Robpulham
Re: Rob P's 7mm Loco Workbench - More lining Efforts.
Posted: Wed Mar 26, 2014 1:09 am
by lnernut
Not boring at all....... The weathering effects look fantastic.
Re: Rob P's 7mm Loco Workbench - More lining Efforts.
Posted: Thu Mar 27, 2014 7:53 am
by Clock O' the North
Hi
That little 0-4-0 is looking really good.

Thanks Lachlan
Modelling Preserved LNER line in the North East of England
Re: Rob P's 7mm Loco Workbench - More lining Efforts.
Posted: Fri Mar 28, 2014 8:46 pm
by Robpulham
Thanks Gents!
Re: Rob P's 7mm Loco Workbench - More lining Efforts.
Posted: Tue Apr 15, 2014 5:28 pm
by Robpulham
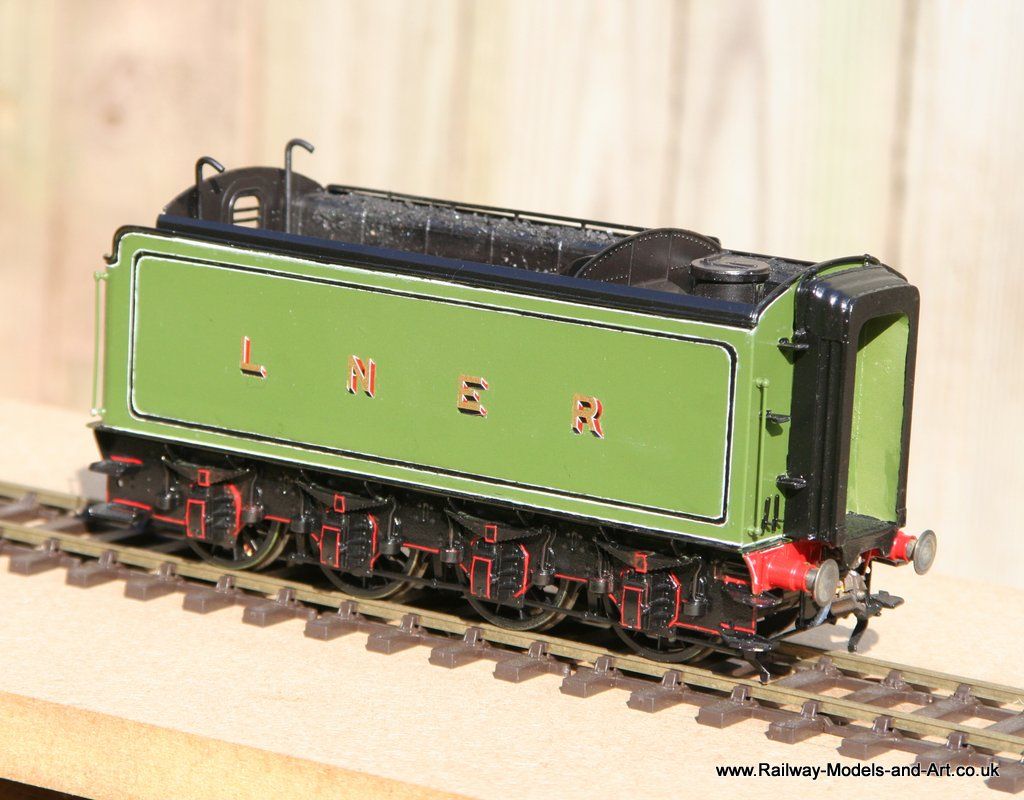
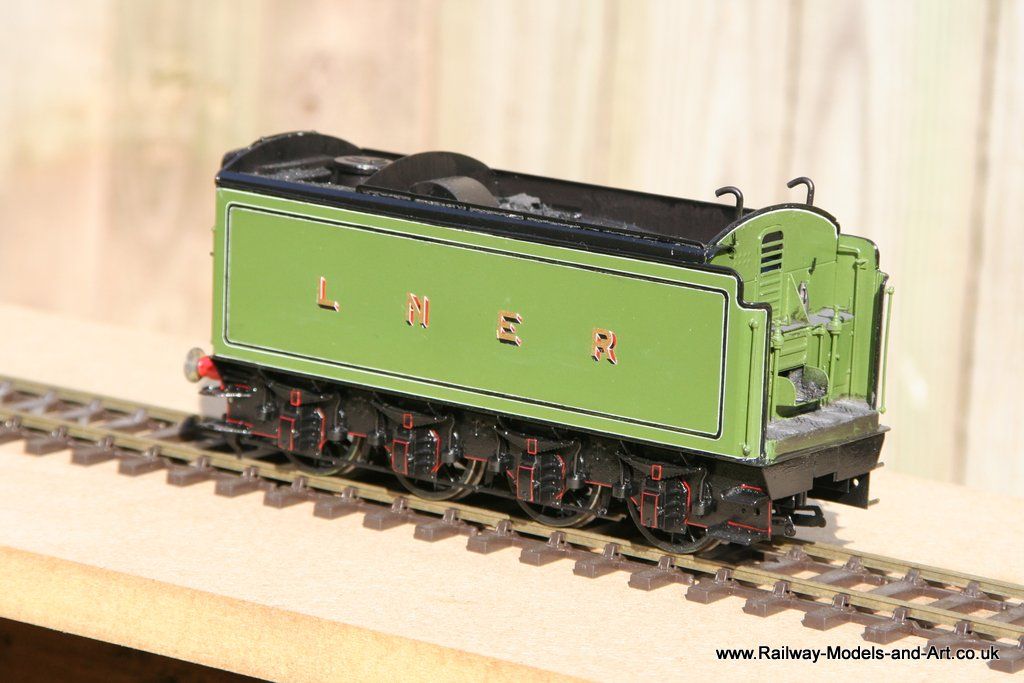
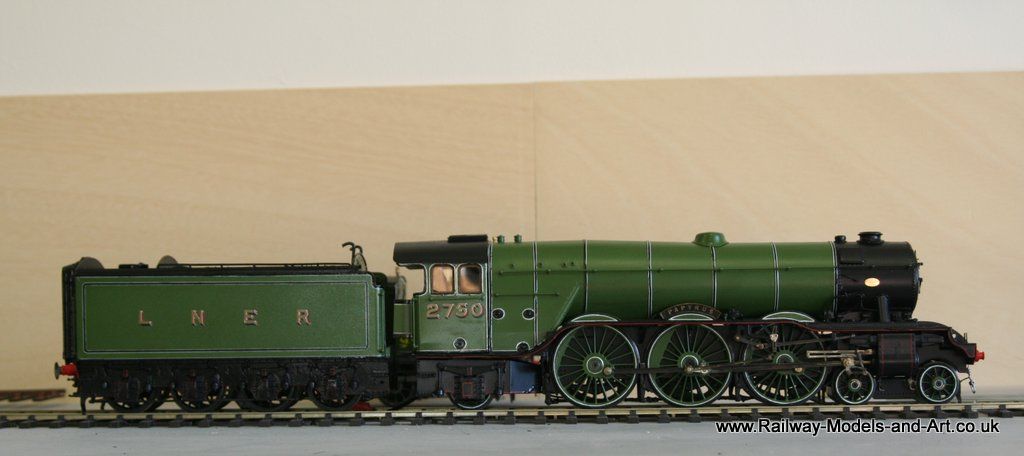
Like buses, nothing for a while then two posts at once. As alluded to I am still working patiently away on the A3 in the background I am doing it this way so as not to get disheartened when things don't go as hoped.
The tender is now almost there just a bit of black lining around the buffer beam to go.
Since the sun was shining I took the opportunity to get a couple of photos outside.
Re: Rob P's 7mm Loco Workbench - The A3 almost there!!!!
Posted: Fri Apr 18, 2014 6:50 pm
by Robpulham
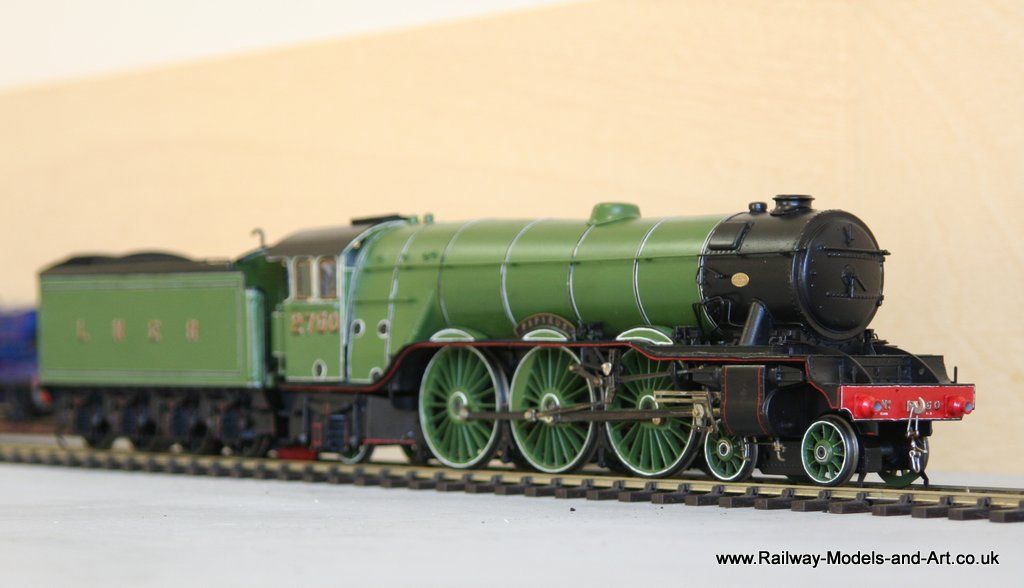
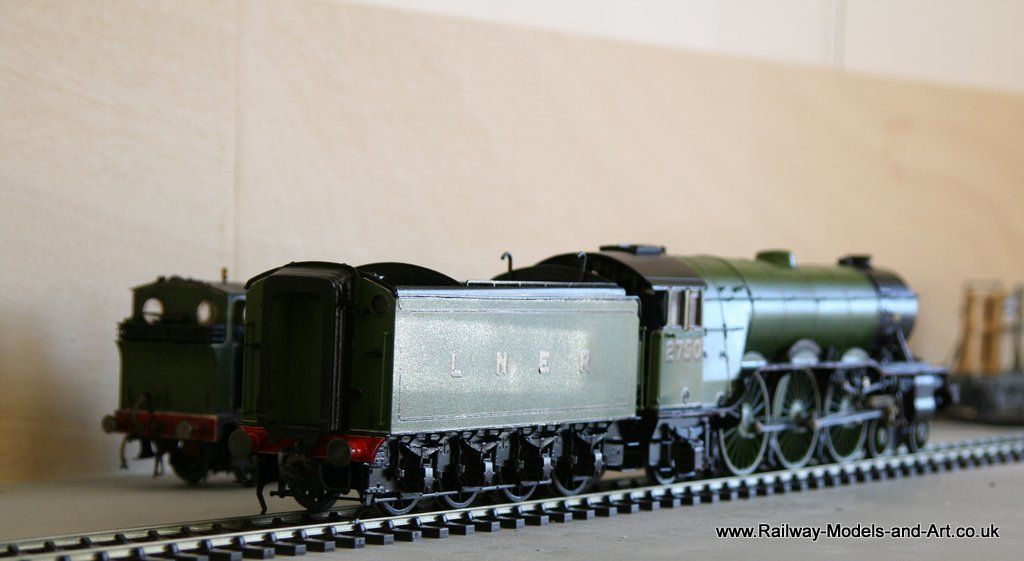
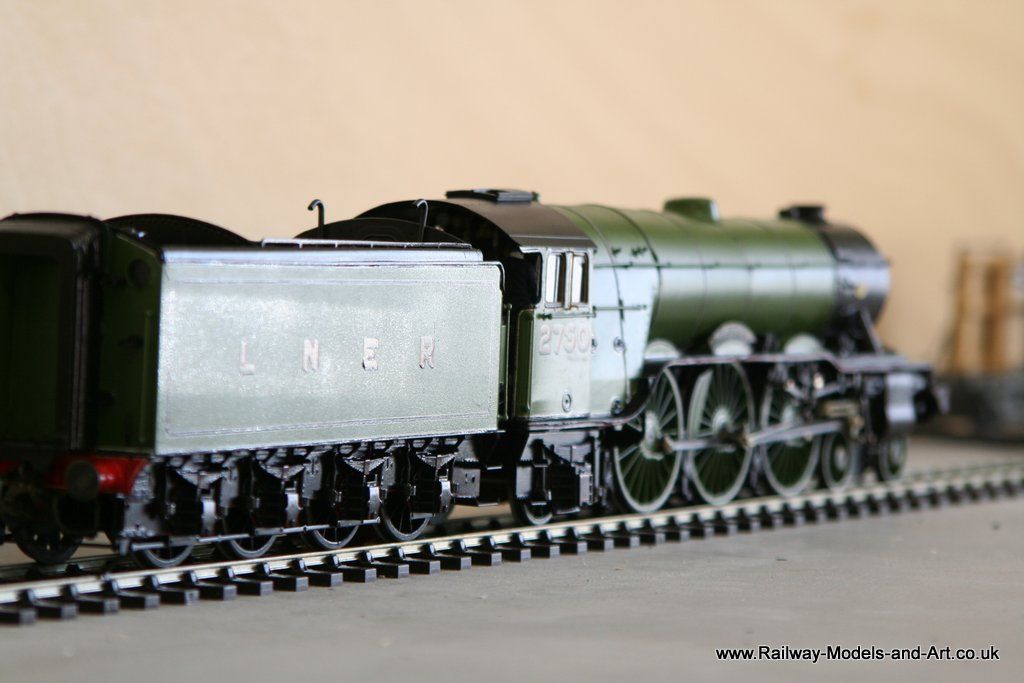
Well the bit that many have been waiting for the A3 is almost there!!!
I got the body back on this afternoon but despite running fine on the rolling road, put her on the track and she just died. I have to admit to being almost at the point of throwing the towel in and putting her in a cupboard to rot...
Chris came to the rescue and after 3 hours of frustrating diagnostics we (she) narrowed the problem down to dodgy connection in the plugs that joint the loco and tender (I am using the american pick up method).
These will be replaced tomorrow and hopefully there might be video in the offing. The eagle eyed among you will not the absence of a few bits - the revering rod which still needs cutting to length and the angled rod that goes under the right hand side of the cab which I seem to have misplaced. I still need to work out how the front buffers fit too but at first glance it looks like I have lost two of the springs for them too....
On to the photos:
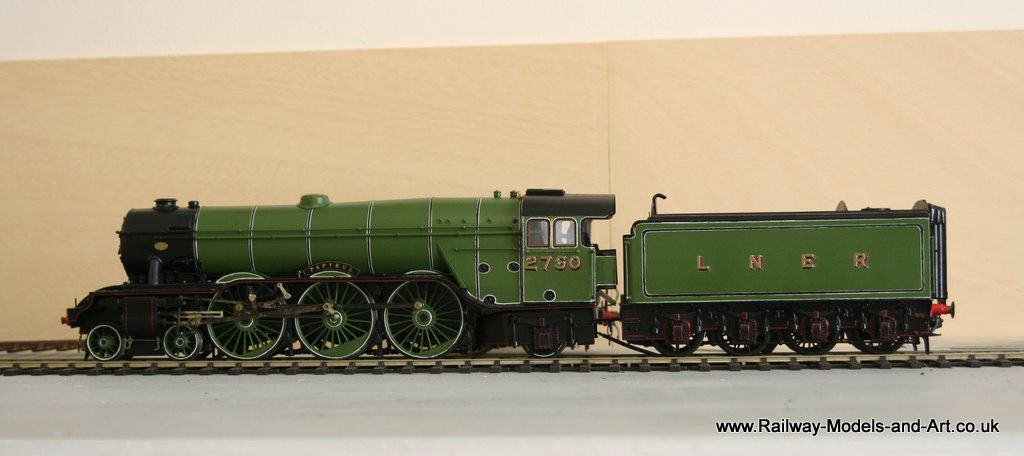
What appears to be a rod under the draw bar is the connecting wire (the one with the faulty plugs....) which I haven secured yet.
Re: Rob P's 7mm Loco Workbench - The A3 almost there!!!!
Posted: Sun Apr 20, 2014 10:12 am
by Robpulham
She's Alive, below are links to a couple of dodgy videos showing her moving under her own power.
I need to sort some cosmetic detail but I feel that the end is in sight.
http://youtu.be/Usaukqj_Pzs
http://youtu.be/iZb01v5YWsE
Re: Rob P's 7mm Loco Workbench - The A3 almost there!!!!
Posted: Sun Apr 20, 2014 10:45 am
by S.A.C. Martin
Stunning work Rob, great choice of name and number too. Papyrus is on my list of locos to model one day. Must get the A4s out the way first!
Re: Rob P's 7mm Loco Workbench - The A3 almost there!!!!
Posted: Sun Apr 20, 2014 11:07 am
by Robpulham
Thanks Simon,
To be honest my choice of name was somewhat dictated by which loco's retained their corridor tenders the longest (Chris bought the kit with the corridor tender) with Papyrus holding onto one until 1937.
I have a Finney A4 in the to do pile which has the streamlined non corridor tender and she will be Sparrow Hawk.
I have a few shelf queens to get out of the way first though - next on the loco front is to finish the 06 followed closely by the F8 (I hope).
Re: Rob P's 7mm Loco Workbench - The A3 almost there!!!!
Posted: Sun Apr 20, 2014 11:36 am
by 2002EarlMarischal
Congratulations Rob on a lovely model of a special engine. Very well done!