Page 8 of 10
Re: Rob's 7mm Scale Coach Workbench
Posted: Tue Oct 24, 2017 5:14 pm
by Robpulham
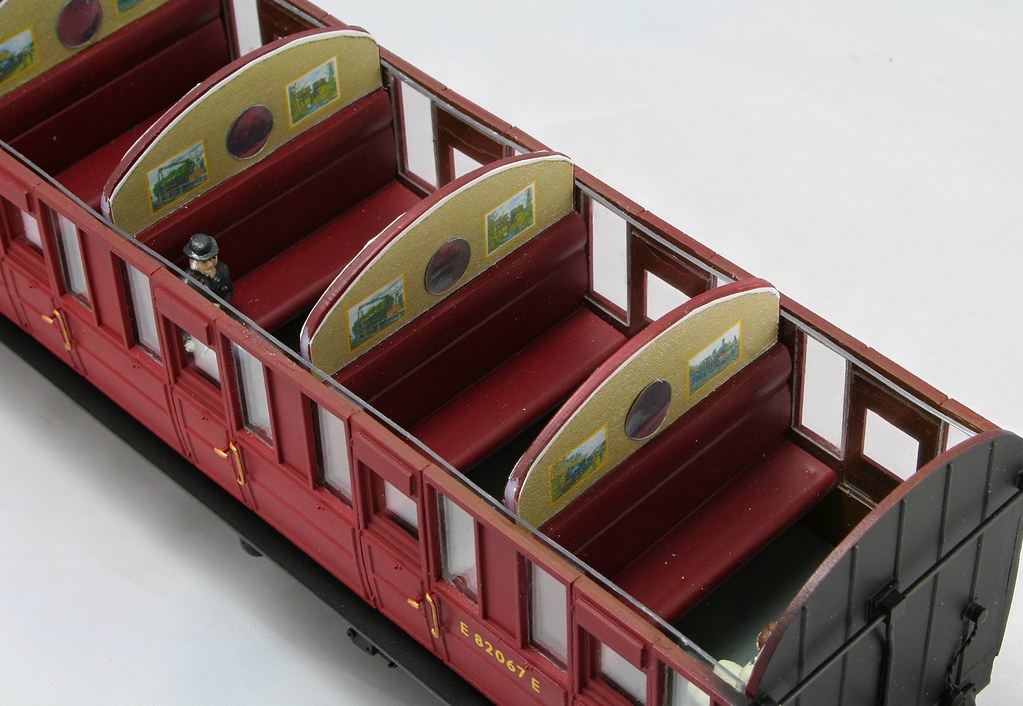
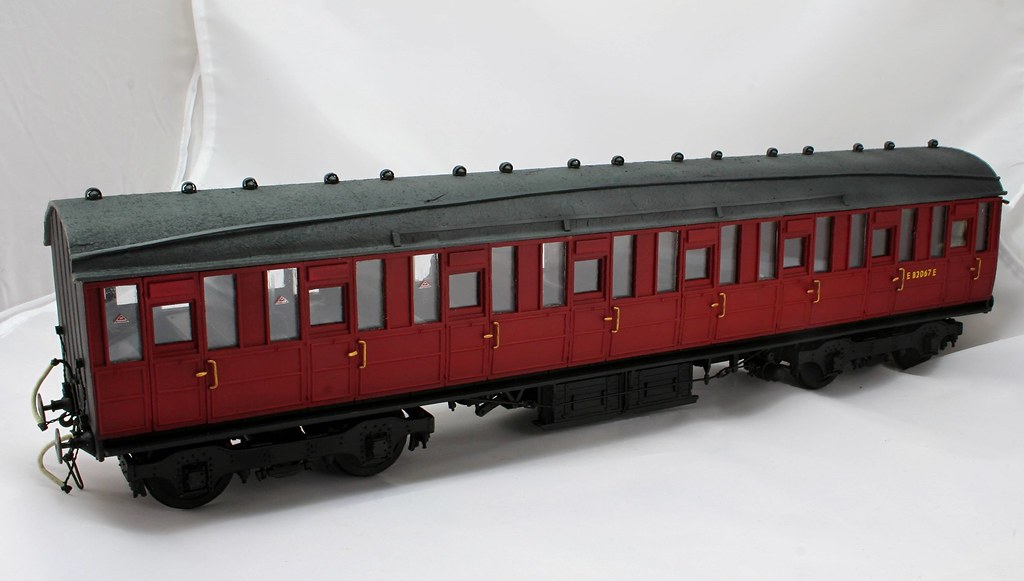
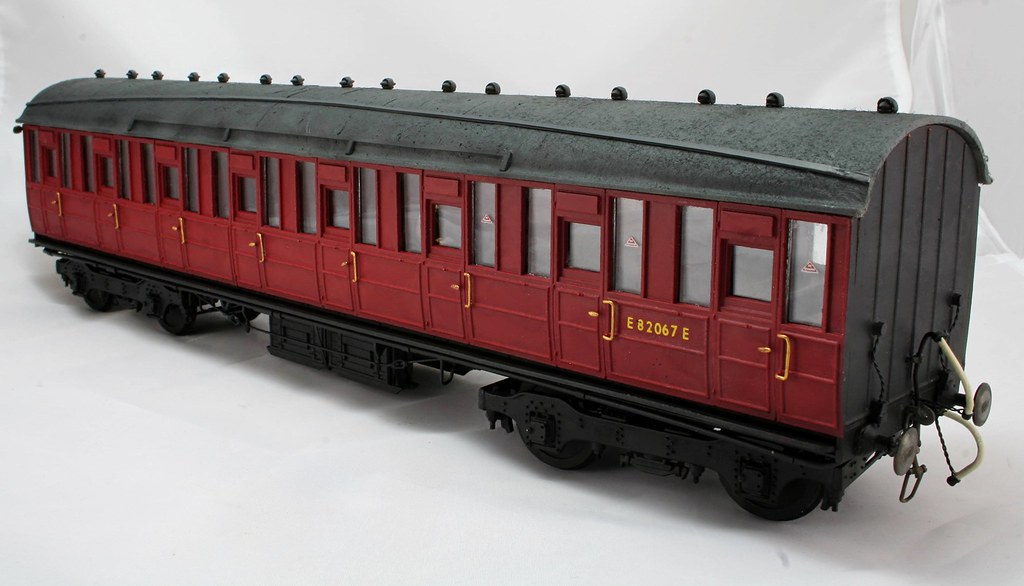
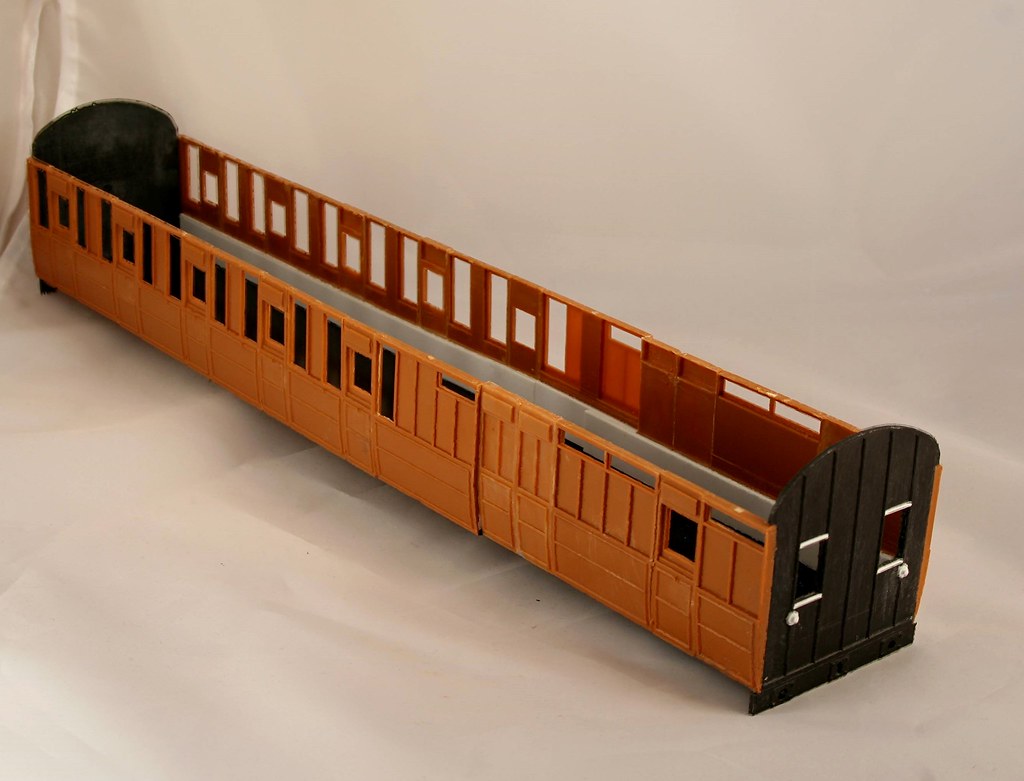
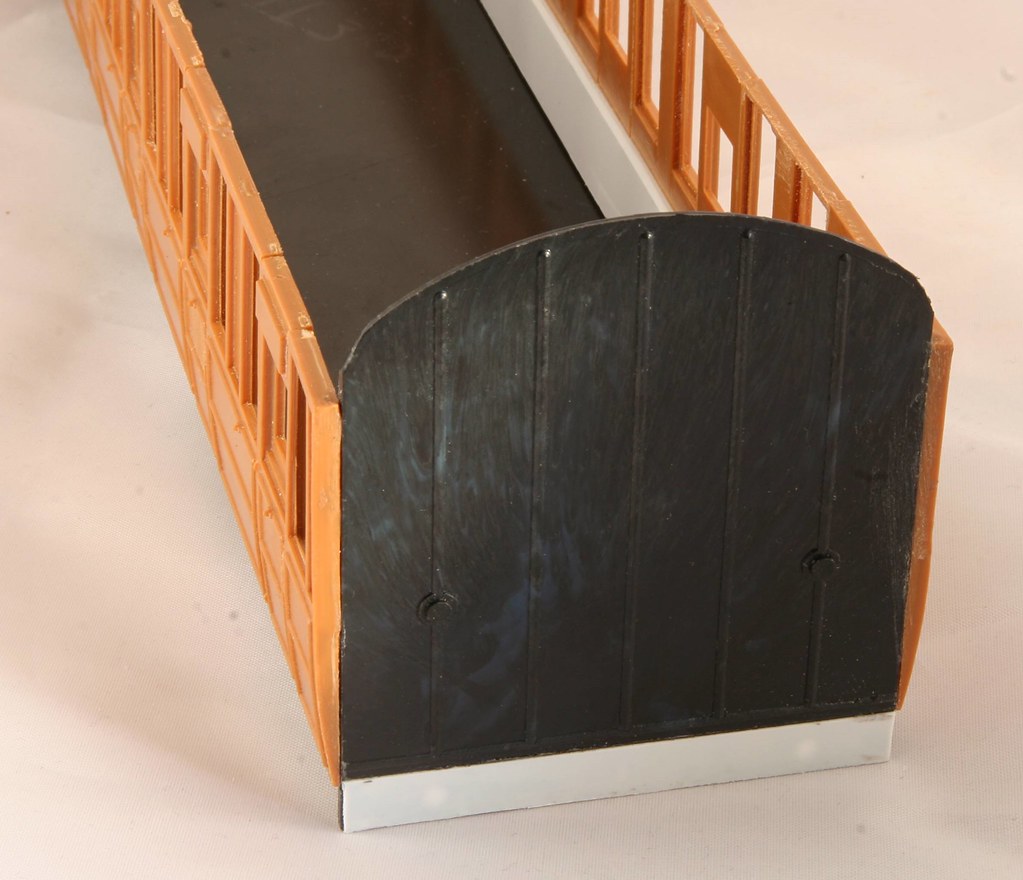
Although I have only one photo, the All 3rd is nearing completion. The transfers are on, it's glazed and the roo vents have been re-fitted - right number in the right place....
I left it on Sunday night with the glue in the glazing drying so unless I discover anything that I have missed I should have it all put together next weekend.
Re: Rob's 7mm Scale Coach Workbench
Posted: Sun Oct 29, 2017 10:54 pm
by Robpulham
Re: Rob's 7mm Scale Coach Workbench
Posted: Mon Oct 30, 2017 10:11 am
by Dave
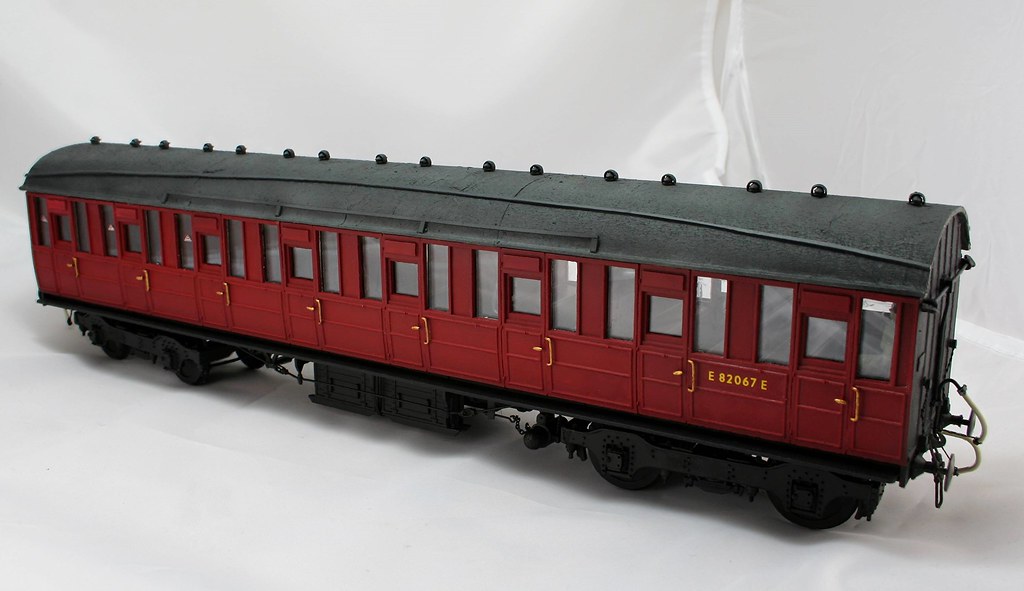
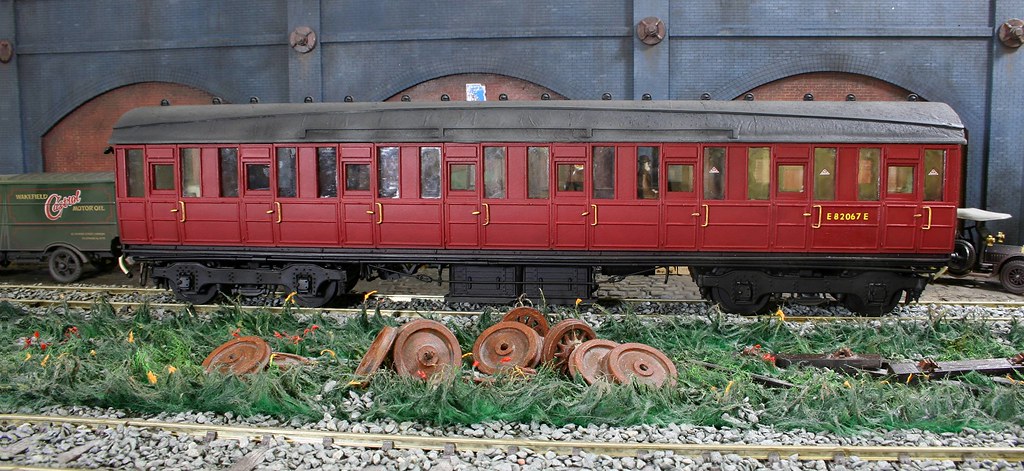
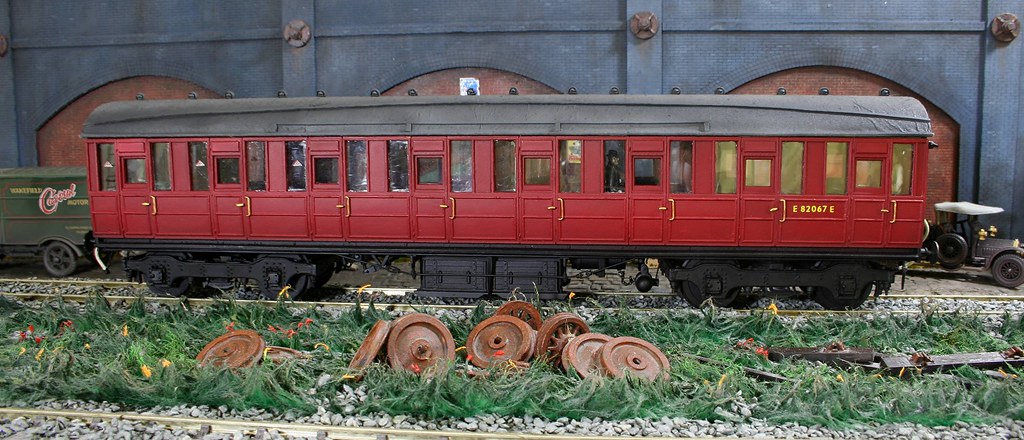
Very nice Rob.
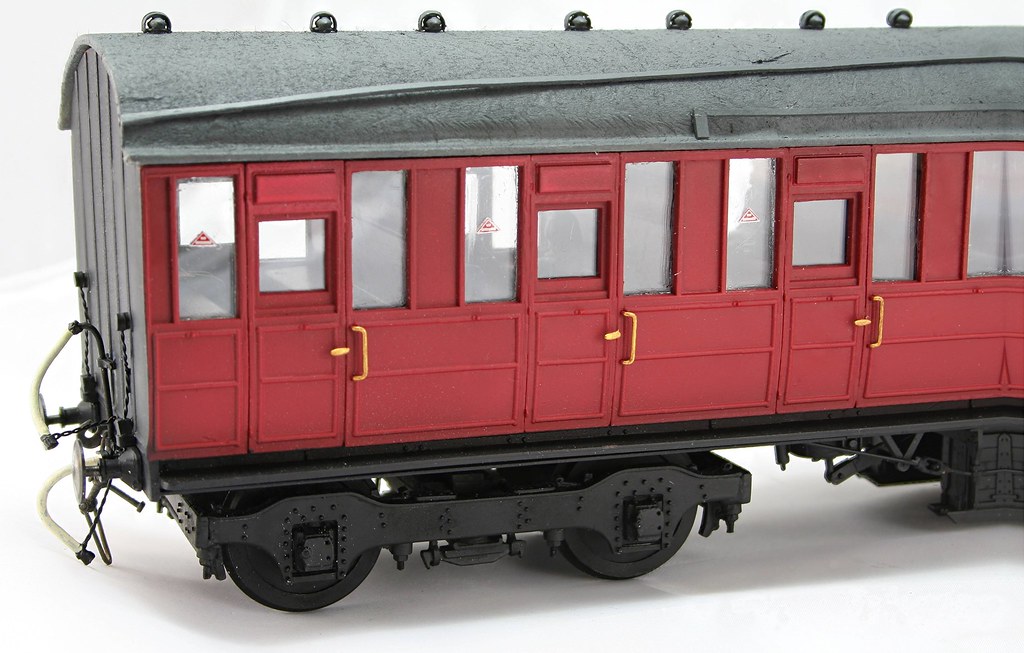
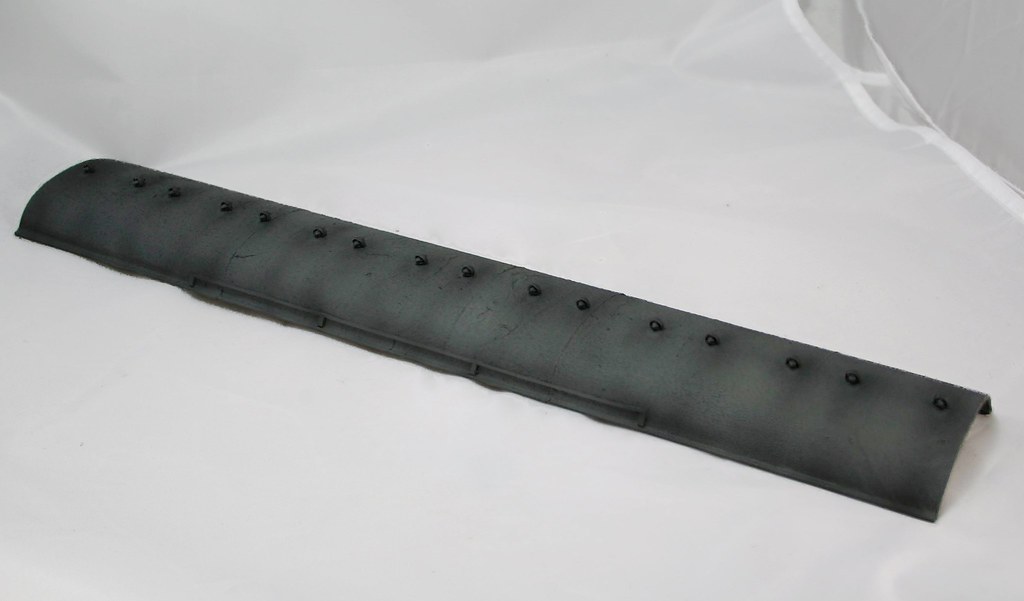
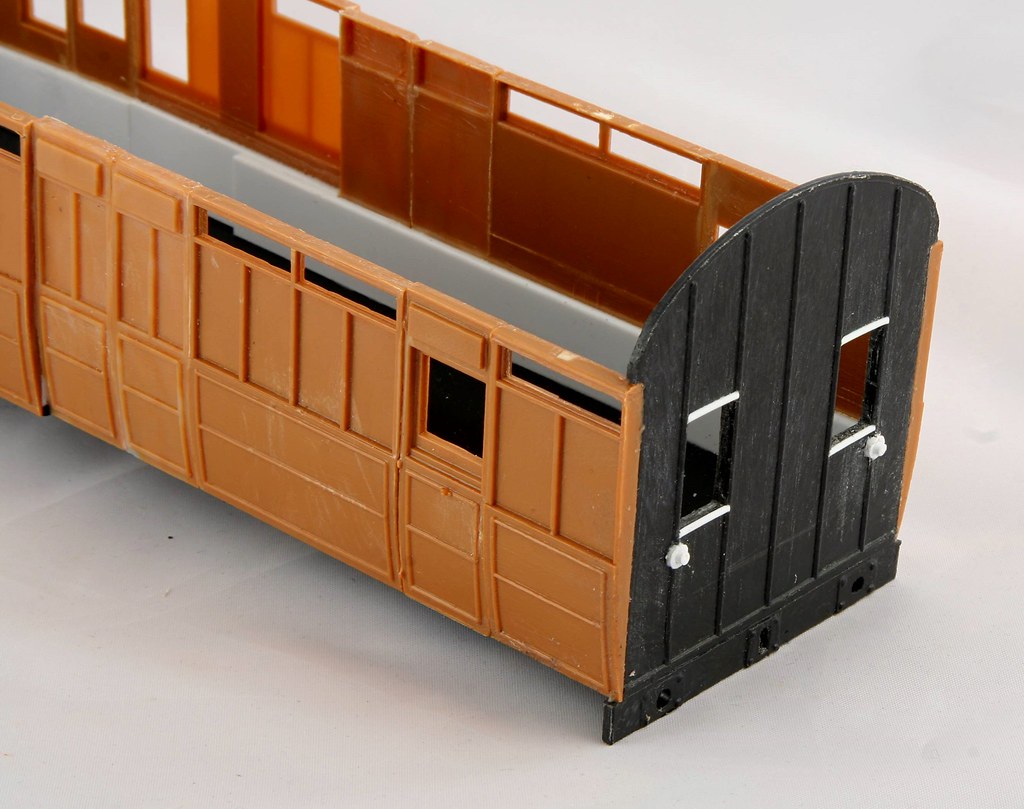
Just a small point, in one of your pics the rain strip seems to have lifted.
I would sack your works foreman

.
Re: Rob's 7mm Scale Coach Workbench
Posted: Mon Oct 30, 2017 7:56 pm
by Robpulham
Dave wrote: ↑Mon Oct 30, 2017 10:11 am
Very nice Rob.
Just a small point, in one of your pics the rain strip seems to have lifted.
I would sack your works foreman
.
Thanks Dave,
Photos don't let you get away with anything do they? I had noted it when posting the pictures. At least it's an easy fix.
Re: Rob's 7mm Scale Coach Workbench
Posted: Tue Jan 16, 2018 6:31 pm
by Robpulham
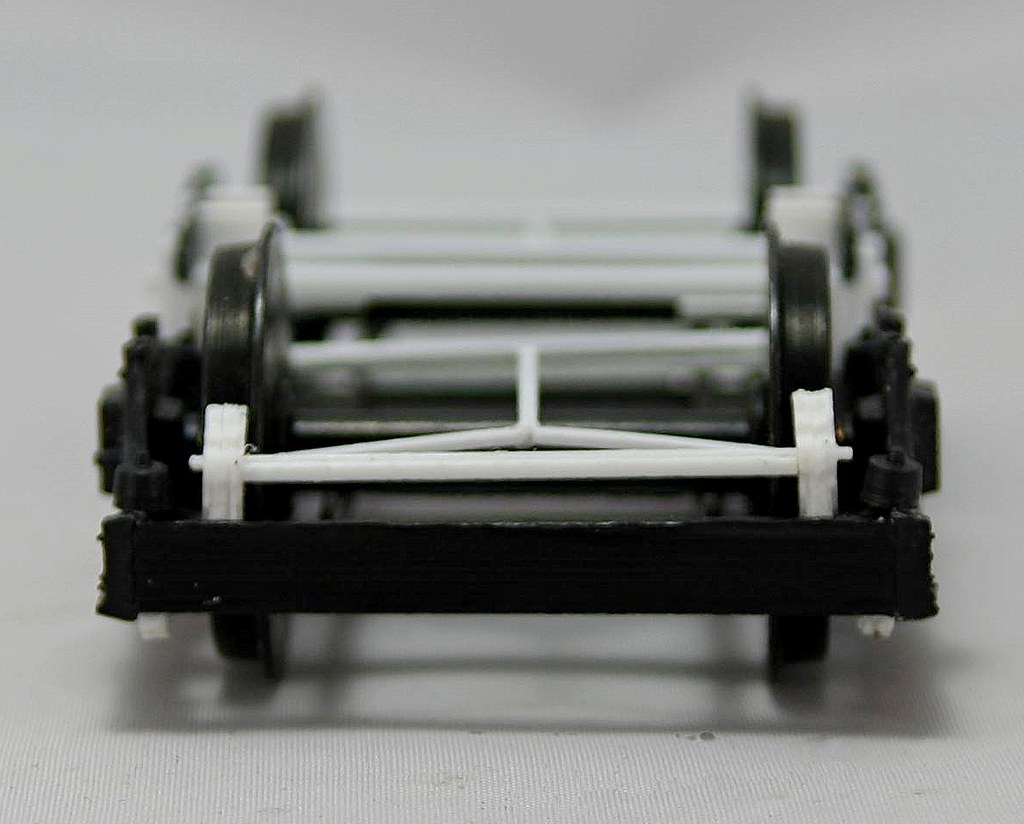
I am back on the trail of Kirk coach builds, this time it's an all 3rd/brake 3rd twin set (Diags 105/125).
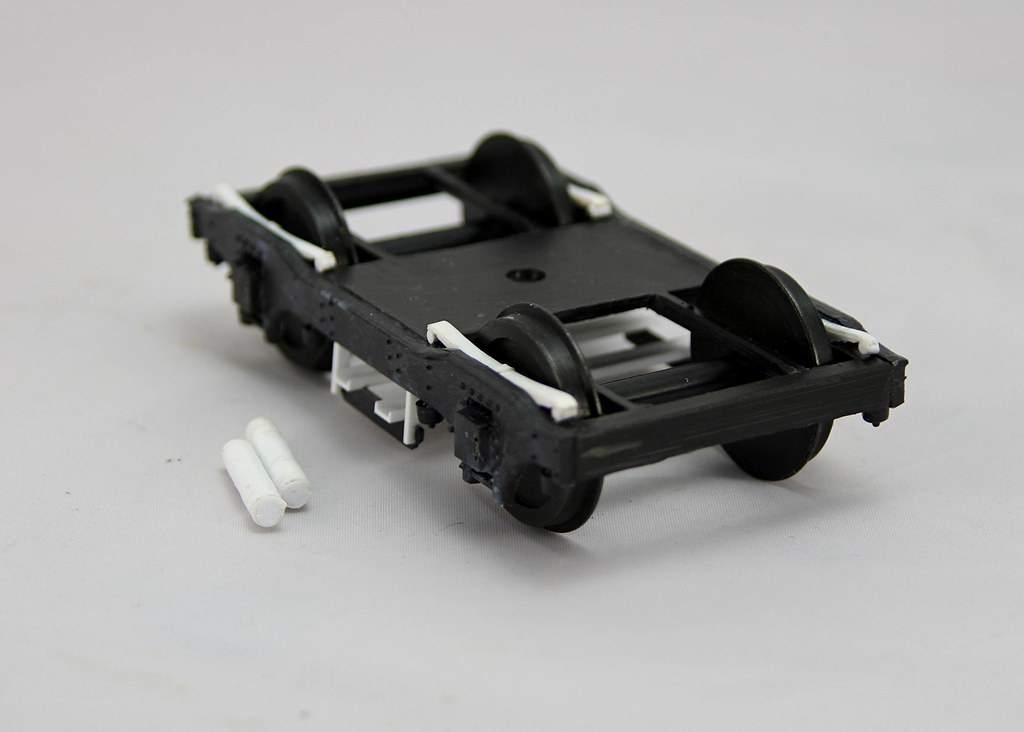
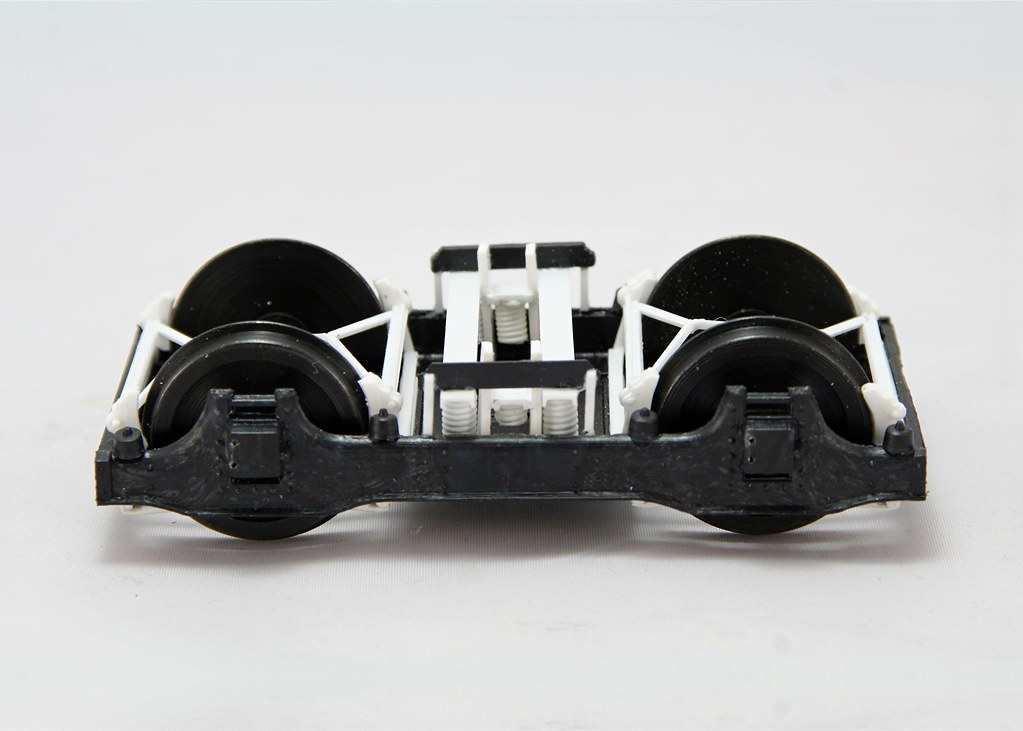
It's for the gent that I built the last two for and this time he has gone for using the supplied Kirk bogies so I thought that I might upgrade them a little.
First I added some of my Silhouette cut leaf springs and then looked to make some springs for the bolsters.
I am aware that others have used 2ba screws to do represent the bolsters springs but to my mind the coils are a little too sharp in profile so I wound some 3mm styrene rod with 0.8/mm styrene rod to make the springs.
I also added the spring carriers and in hindsight I should have added the springs before sticking the carriers to the bogies because it's going to be interesting getting the springs in position now.

I have also assembled the sides but didn't take photos of them.
Re: Rob's 7mm Scale Coach Workbench
Posted: Mon Feb 05, 2018 5:48 pm
by Robpulham
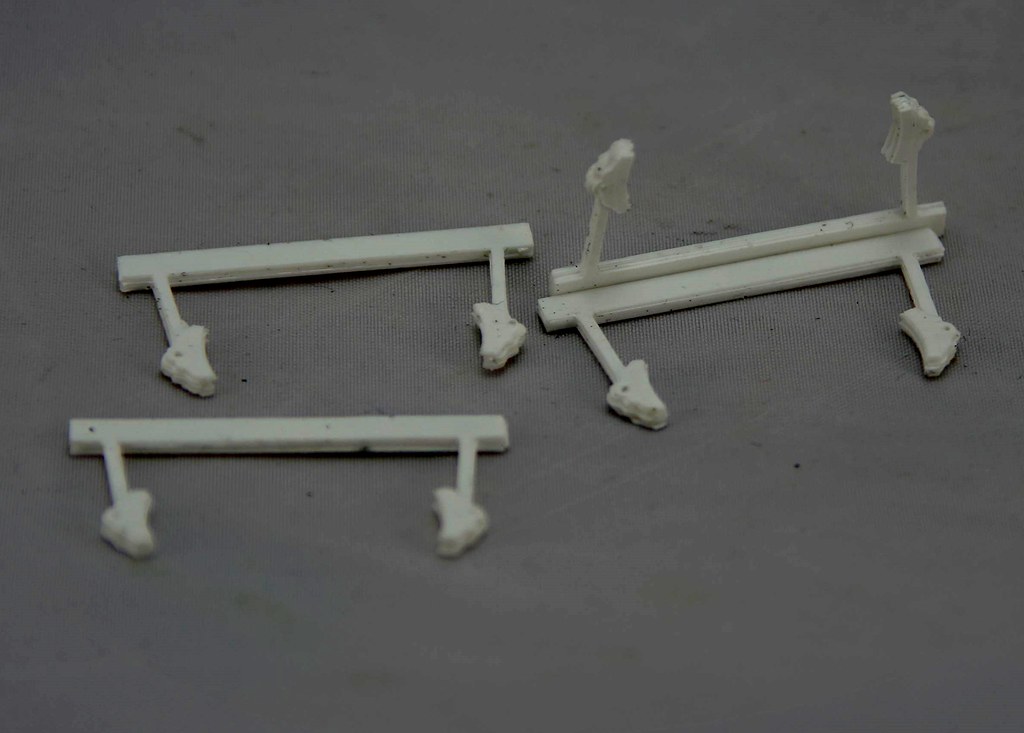
When fellow modellers came along to see me when I was demoing at Pontefract show, the parts that I was cutting were some brakes for my Kirk coach bogies
Once glued together (5 layers) they came out looking like this.
Apologies for the poor photo, white on white isn't the best combination
The demo must have been well received because I have also been asked to demo at Telford as well as Doncaster this year.
Not much modelling got done last week due to having a busy week compounded by minor surgery, but over the weekend the Mojo returned and I made progress on the twinset.
The first bogie now has it's bolster springs an I have the parts prepared to fit to the other two. I did end up having to remove the bolster frame to fit the springs so a lesson learned.
I also managed to get three of the ends attached to their respective sides. The fourth one needs cutting down for the narrower brake end.
Re: Rob's 7mm Scale Coach Workbench
Posted: Mon Feb 26, 2018 5:41 pm
by Robpulham
This weekend saw much progress on the Twin set.
Timely posting of a photo of the brake end allowed me to cut the windows while the end was in the flat and then both coach bodies were assembled.

I also blanked of the inner ends by filling the holes for the buffers and coupling hooks and then overlaid a piece of 20 thou to form a solid foundation for the shared bogie pivot.

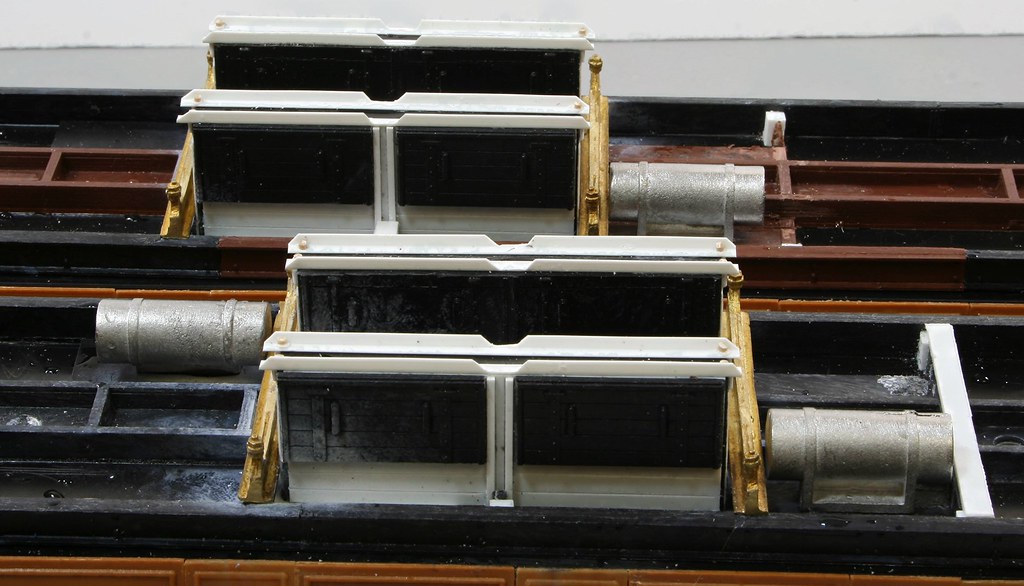
Lastly I made a start of building up/detailing the battery boxes (although there are five I only need four for this job). Next I need to cut out the end straps with the silhouette because I have run out.
Re: Rob's 7mm Scale Coach Workbench
Posted: Mon Mar 19, 2018 6:18 pm
by Robpulham
More done on the bogies over the weekend.
The brakes and yokes are now fitted to all three bogies. not exactly like the real thing but will pass muster hidden away underneath the coach.
[/url]
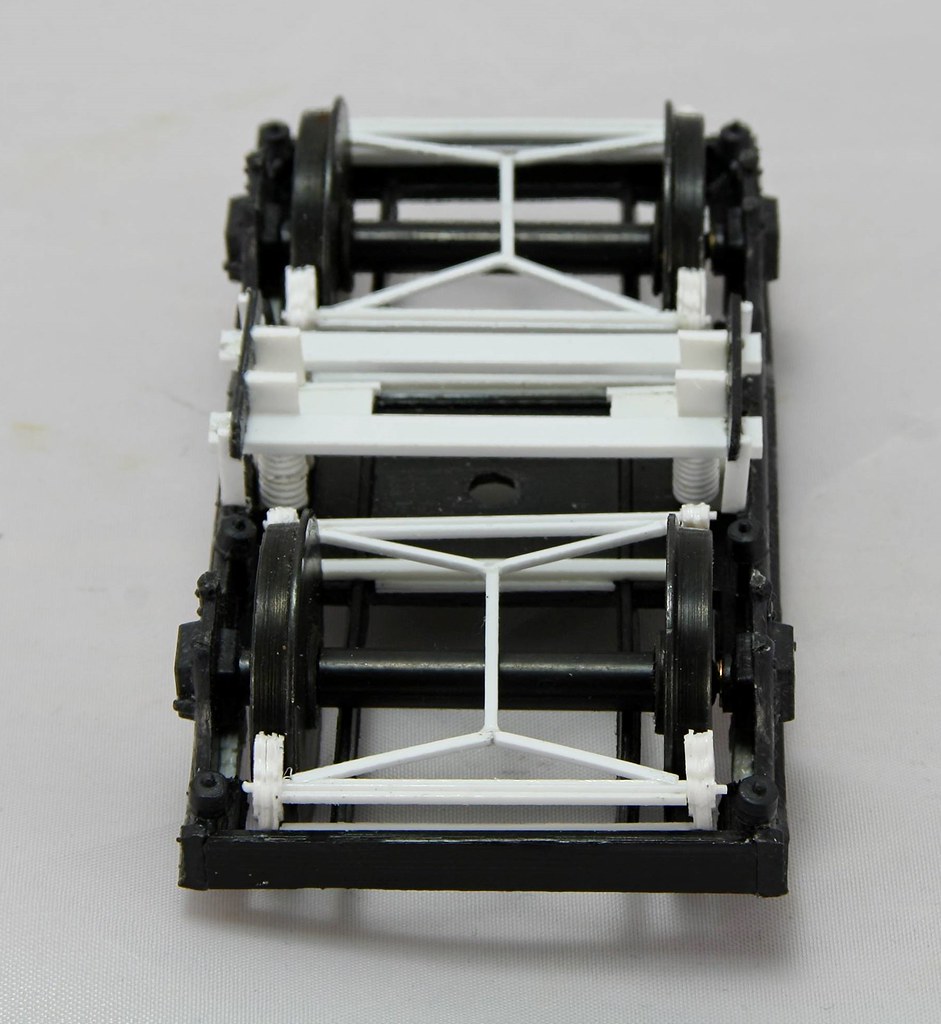
If you are wondering why the rod between the two yokes? It's to hold the brakes away from the tyres to prevent friction.
They just need guard irons over the yokes and they are well on their way.
Re: Rob's 7mm Scale Coach Workbench
Posted: Wed Mar 21, 2018 10:26 am
by Dave
Nice bogies Rob
Re: Rob's 7mm Scale Coach Workbench
Posted: Thu Mar 22, 2018 11:57 am
by Atso
Lovely work Rob, well worth the additional effort!

Re: Rob's 7mm Scale Coach Workbench
Posted: Wed Apr 25, 2018 5:30 pm
by Robpulham
Although I haven't posted on this for a while things have progressed but there hasn't been much to take photos of.
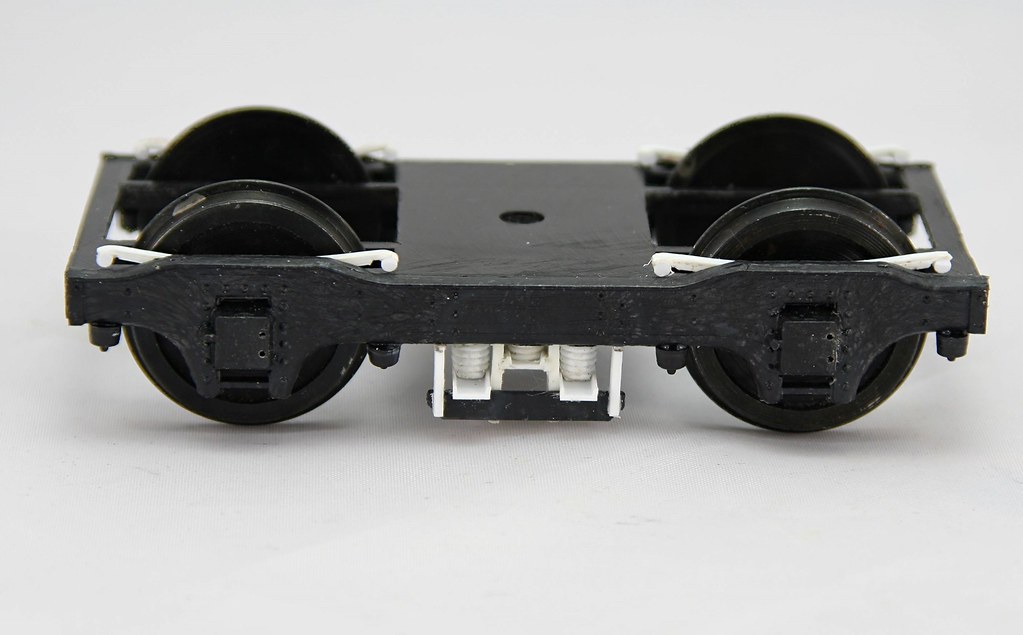
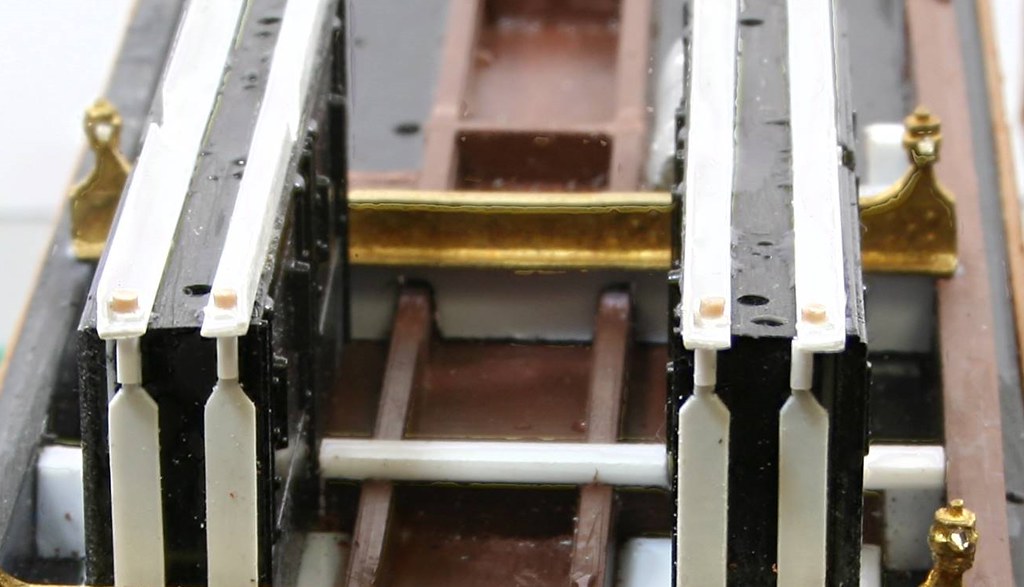
We had decided to try the Sparmac queen posts from Invertrain while all the other fittings (vac tanks, roof vents, grab handles etc.) came from JLRT late last year before they closed although they look similar the key different in the Sparmac queen posts is the fact that they don't have holes for the truss rods to go through. I popped them with a punch, deepend the mark with a pin vice and then used my Proxxon Pillar drill to finish them off. Sadly taking the photos has just highlighted to me that I have missed drilling through one the holes so I will need to do that one by hand since they are now stuck firmly on.
I also added the vacuum tanks.

Re: Rob's 7mm Scale Coach Workbench
Posted: Wed Apr 25, 2018 10:45 pm
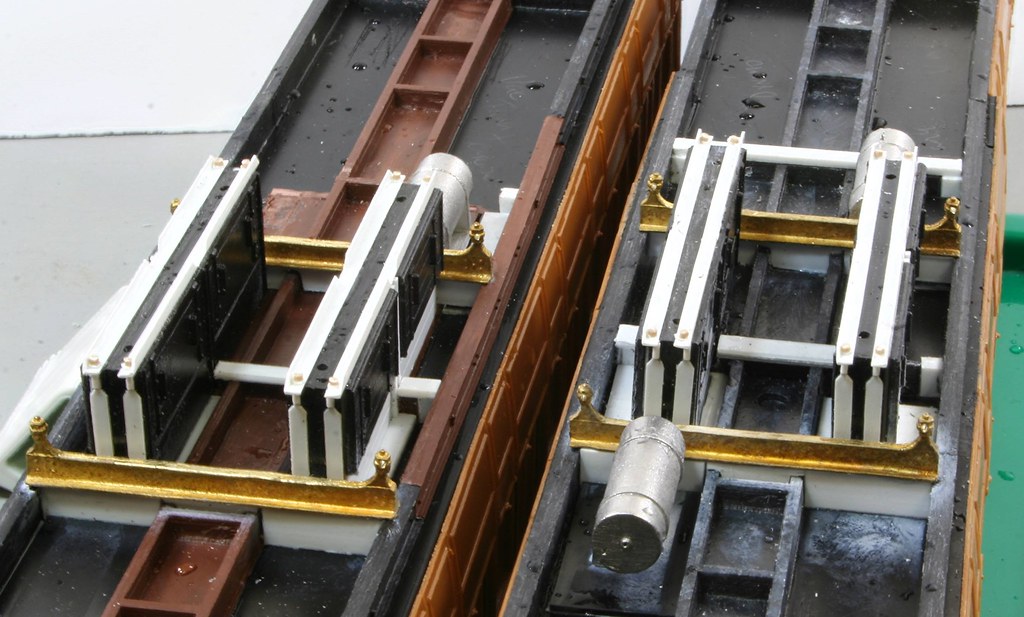
by manna
G'Day Gents
Thanks for the pics, the underside of a coach is not something we normally see, the Queen posts, are bolted to a girder, first time I've seen that. Thank you.
manna
Re: Rob's 7mm Scale Coach Workbench
Posted: Sun May 13, 2018 11:03 pm
by Robpulham
My recent lathe purchase has started me thinking about making the most of some of my other tools. I used to do quite a bit of woodworking until we converted our garage and I no longer had the room for many of the woodworking tools so I sold them.
What I kept were, chop saw, Router/router table and a linisher. The Router/router table, until a couple of weeks ago was in my loft so not accessible for regular use and my linisher while slightly more accessible by being under my workbench had only seen the light of day once in the last 5 years.
Prompted by getting something out of the loft I decided to get the Router/router table and the linisher out and take them to the other house where I have a dry brick built garage that's alarmed. Fast forward to this weekend and I decided to start making use of them so used the linisher to prepare all the partitions for the twin set. Each one needed to be profiles to fit the vacuum formed Kirk roof and it certainly made a much easier job of the 17 or so partitions plus the coach ends.
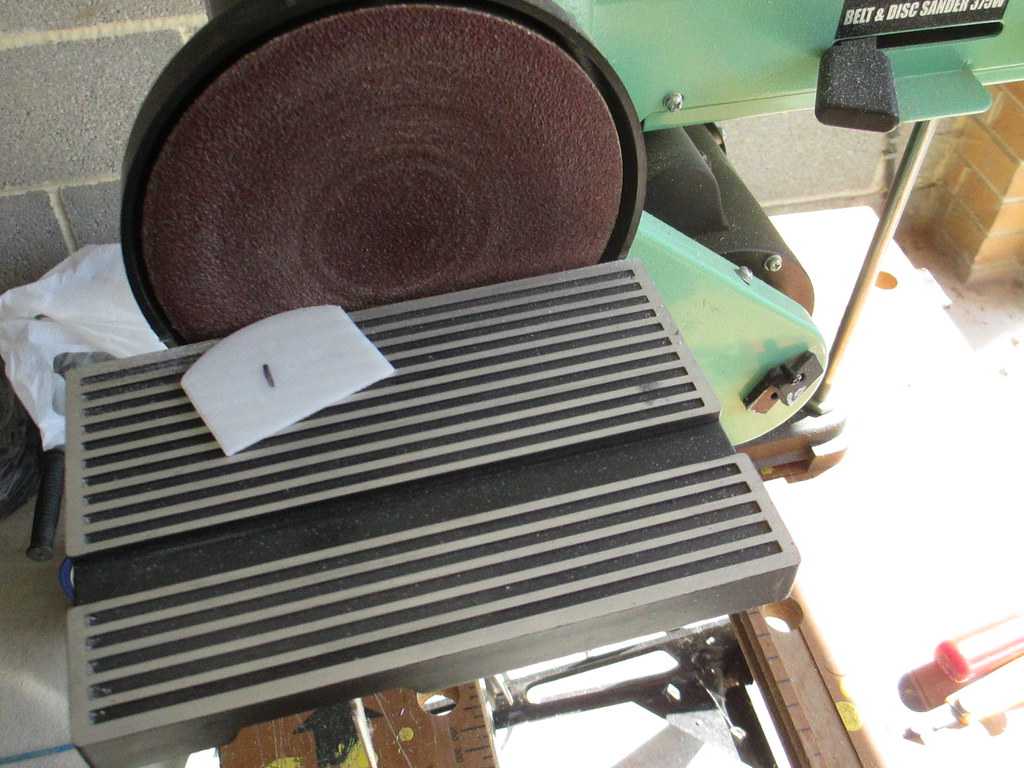

I reckon what I achieved today would have taken at least a couple of weekend's work to achieve filing by hand.
Re: Rob's 7mm Scale Coach Workbench
Posted: Tue May 15, 2018 7:58 am
by notascoobie
Good stuff Rob. I too have been using woodworking tools. I found that chisels are just the job for shaping thicker pieces of plasticard as used in 7mm modelling. My square is also of a more suitable size for 7mm projects and my gent saw is great for cutting sheet. I reckon that plastic is akin to softwood in its resistance to working so good sharp joinery tools work well. See you at the Donny show? Vernon
Re: Rob's 7mm Scale Coach Workbench
Posted: Tue May 15, 2018 8:51 am
by Atlantic 3279
I remember reading an article in RM magazine at least a decade ago, advocating the use of a small sharp wood chisel and mallet for chopping out window apertures in the thick basic plasticard base layers of 4mm scale buildings - much quicker, easier and less risky to fingers than struggling with a craft knife, even a heavy one, let alone the scalpel that some insist is vital when cutting model parts.
I use all sorts of tools for modelling - they don't have to be confined to their "labelled" purpose. I also find that tools with a good sized handle, like a basic heavy Stanley knife, are far easier to control accurately than is any tool whose small handle has to be gripped tightly by trembling tired fingers. I've never felt the need of a scalpel.