West End Workbench

This forum is for the discussion of railway modelling of the LNER and its constituent companies.

Moderators: 52D, Tom F, Rlangham, Atlantic 3279, Blink Bonny, Saint Johnstoun, richard

45609
GCR D11 4-4-0 'Improved Director'
Posts: 426
Joined: Thu Sep 07, 2006 4:51 pm

Re: On my Workbench - before the Grouping.

Post by 45609 »

I understand the LSWR had some just after the Great War; does anyone have any livery details for those? They'd be spot in the time frame for our Corfe layout at Ormesby.
I picked up a secondhand copy of Rowledge's Locos of the War Depatrment Vol 1 yesterday. I'll have a look this evening and see if it says much about the RODs that went to the LSWR.

I'm looking forward to seeing the Bachmann O4 at Warley. I don't suppose there is any word on when the production model is due for release? I can't see anything on the Bachmann website but they have been known to spring the odd surprise in the past.

Cheers...Morgan
User avatar
Atlantic 3279
LNER A4 4-6-2 'Streak'
Posts: 6540
Joined: Fri Jun 26, 2009 9:51 am
Location: 2850, 245

Re: On my Workbench - before the Grouping.

Post by Atlantic 3279 »

Morgan / All: I believe I overheard the Bachmann representative at Peterborough forecasting next Easter for the O4, so you've all still got plenty of time to be the first to have alternative cabs and boilers, or complete bodies, ready to drop on to the new chassis.

Sorry for digressing from your main theme JW.
Most subjects, models and techniques covered in this thread are now listed in various categories on page1

Dec. 2018: Almost all images that disappeared from my own thread following loss of free remote hosting are now restored.
jwealleans
LNER A4 4-6-2 'Streak'
Posts: 4222
Joined: Wed Oct 25, 2006 8:46 am

Re: On my Workbench - before the Grouping.

Post by jwealleans »

No problem Graeme, it's all useful. After your point about the frames I had a quick Google and the handful of photos I turned up in 5 minutes seemed to me to show that the model looks quite like the preserved one but there are other pictures showing a much more angled end to the frames. I didn't even take it as far as opening Yeadon, though, so perhaps that shouldn't be taken as entirely scientific.
45609
GCR D11 4-4-0 'Improved Director'
Posts: 426
Joined: Thu Sep 07, 2006 4:51 pm

Re: On my Workbench - before the Grouping.

Post by 45609 »

Hi Jonathan and Graeme

It is funny how you notice new things when looking at photos more closely. Prompted by Graeme I have done pretty much the same thing as you Jonathan. The one thing that stuck me is that the rivet pattern on the front frames of 63601 (that I presume holds the front frame spacer/pony truck bearer to the frames) is different from what I had thought all the O4s were like, i.e. 6 large rivets along the top edge of the frame.

Also an Easter release date sounds good. I just had a thought that they might be ready for Warley. Probably being too optomistic.

Anyway back on topic I think someone has mostly answered your query on RMweb. All I can add is that Rowledge mentions that the RODs were used on nightly West Country and Southampton freight turns making light work of Litchfield summit (between Micheldever and Basingstoke) and Honiton bank. There is also mention of No.2119 being used on a passenger train between Exeter and Templecombe. Nothing is said about LSWR livery being applied so I would assume that they were left in the ROD plain black livery.

Cheers....Morgan
Bill Bedford
LNER A3 4-6-2
Posts: 1241
Joined: Sat Mar 08, 2008 9:43 pm

Re: On my Workbench - before the Grouping.

Post by Bill Bedford »

jwealleans wrote:I understand the LSWR had some just after the Great War; does anyone have any livery details for those? They'd be spot in the time frame for our Corfe layout at Ormesby.
There is a photo in Rowledge which shows one newly painted in black with the RoD number plate and possibly 'LSWR' on the tender.
jwealleans
LNER A4 4-6-2 'Streak'
Posts: 4222
Joined: Wed Oct 25, 2006 8:46 am

Re: On my Workbench - before the Grouping.

Post by jwealleans »

Excellent! Cheers, Bill - I'll get on to the library for it, or look it out in the NRM next month.
jwealleans
LNER A4 4-6-2 'Streak'
Posts: 4222
Joined: Wed Oct 25, 2006 8:46 am

Re: On my Workbench - before the Grouping.

Post by jwealleans »

With paint drying on the wagons I've been working on, I've given in to temptation and started a Bill Bedford kit which has been in the in tray since early summer. It's a Great Eastern Clerestory Lavatory Composite, as illustrated and drawn in Nick Campling's Carriage Drawings book. As smudger was asking about building Bill's kits I thought I'd illustrate in more depth than usual. Hopefully Bill won't have his head in his hands by the end...

This is what you get in the packet:

Image

Over lunchtime sides and ends were cut from the etch and the tabs tidied up. While the sides were still flat, I used a sharp knife to mark the door lines over the lower panel. The tumblehome was then rolled using a piece of skirting board and a length of pipe. Use the ends to check the shape of the sides and vice versa (these coaches curved in at the ends as well as the lower sides).

Bill provides a one-piece component which forms all 3 door hinges and also reinforces the curve of the coach side. These were cut out, dressed and slotted into the etched holes in the side. They all fitted in a rather satisfying manner.

Image

Contrast isn't brilliant, but here is progress so far - upper side viewed from the back and has the hinges in place but not yet soldered. Lower side as yet unstarted. The slight banana form is the effect of my graving in the door lines. Once the roof is on it'll lose that.
Last edited by jwealleans on Tue Oct 30, 2018 8:07 pm, edited 4 times in total.
User avatar
Robpulham
LNER A4 4-6-2 'Streak'
Posts: 1715
Joined: Thu Mar 27, 2008 9:54 pm
Location: Lower Wensleydale
Contact:

Re: On my Workbench - before the Grouping.

Post by Robpulham »

I am looking forward to following this one Jonathan will you go into detail with the clerestory - I am interested in how you put it together - I have a PC models Clerestory in the part built pile and I haven't worked out how I am going to do the clerestory yet..
jwealleans
LNER A4 4-6-2 'Streak'
Posts: 4222
Joined: Wed Oct 25, 2006 8:46 am

Re: On my Workbench - before the Grouping.

Post by jwealleans »

I'll do my best to oblige, Rob, but there won't be much progress this week as I'm away. What I envisage is as follows and similar to what I did with the Peter K one. The clerestory (almost dead centre of the etches just above the compartment sides) will be made up. It locates into slots in the roof (down the right side of the etches). I'll solder a couple of short bolts inside it and make holes for them through the roof. It will then be able to be unscrewed from the inside for painting and glazing. That said there are some angled pieces along the sides (vents?) which may make that awkward - I'll have to see how it all looks when I get that far.

Bill's clerestory looks much more robust than the Peter K one, which is a good start.
jwealleans
LNER A4 4-6-2 'Streak'
Posts: 4222
Joined: Wed Oct 25, 2006 8:46 am

Re: On my Workbench - before the Grouping.

Post by jwealleans »

Some small progress over a busy weekend - the hinge pieces have been added to both sides and the steps fitted to one end.

Image
Last edited by jwealleans on Tue Oct 30, 2018 8:06 pm, edited 3 times in total.
jwealleans
LNER A4 4-6-2 'Streak'
Posts: 4222
Joined: Wed Oct 25, 2006 8:46 am

Re: On my Workbench - before the Grouping.

Post by jwealleans »

I finally got a morning's modelling in today - the start of my holiday, almost a week after I stopped work.

So, in excruciating detail, here is how I prepared the roof of my Bill Bedford coach.

Image

Bill supplies bracer/forming pieces for the roof which were soldered into place. I had some trouble bending the quite sharp curve of this roof and it will need tidying up. Conversely as this coach will be towards the end of its life some irregularity won't be the end of the world.

Image

The clerestory itself folds up from a one piece etch with these cross pieces to space and brace it. Already quite solid and square.

Image

This was then tacked to the roof piece. I did have some trouble with the ends, which are a separate piece and weren't as high as the clerestory sides no matter how I tried to get them to fit; I had to attach about half a mil. of scrap etch on the bottom to fill a gap. No photo, I'm afraid.

Image

The tabs on the clerestory sides locate into slots on the roof - here it is all in place, a satisfying first time fit and very much better than the floppy mess I had with the Peter K kit.

Image

Finally, I will make the clerestory removable to glaze after painting (or if the glazing ever falls out). I drilled a 2mm hole through the roof from underneath, making sure to mark the underside of the clerestory with the drill. The mark was then used to site a 10 BA bolt which is soldered into place. I usually use some 1/4 " ones you can get from Eileen's, but I seem to be all out. These will be trimmed later. The nut then screws up from underneath and hold it in place. The complication with this coach are the ventilators which look like plates attached to the roof along each side of the clerestory. I intend to solder these to the roof and make them a snug fit against the removable part. It shouldn't be coming on and off very often.
Last edited by jwealleans on Tue Oct 30, 2018 8:06 pm, edited 5 times in total.
mick b
LNER A4 4-6-2 'Streak'
Posts: 3730
Joined: Tue May 30, 2006 4:43 pm

Re: On my Workbench - before the Grouping.

Post by mick b »

Looks much easier than the NER D&S Clerestory I battled with a while ago.
After looking at the Peter K TPO I wont be trying anymore :!:


Happy New Year JW


Mick
User avatar
Robpulham
LNER A4 4-6-2 'Streak'
Posts: 1715
Joined: Thu Mar 27, 2008 9:54 pm
Location: Lower Wensleydale
Contact:

Re: On my Workbench - before the Grouping.

Post by Robpulham »

Thanks for the detailed shots they are most helpful.
It's looking good Jonathan, I shall be pinching some of these ideas for sorting mine out. - It originally had a flimsy plastic roof that the interior was supposed to hang from. I have rolled some brass sections to replace it but couldn't work out how to use them and get the interior in but having seen this I think I will take it apart again and do it a different way.

Cheers and seasons greetings.
jwealleans
LNER A4 4-6-2 'Streak'
Posts: 4222
Joined: Wed Oct 25, 2006 8:46 am

Re: On my Workbench - before the Grouping.

Post by jwealleans »

Cheers, Mick, Rob and any other readers. A very happy new year to you and yours as well.

I have some D & S clerestories in the pile somewhere. I recall you said they were a pain.

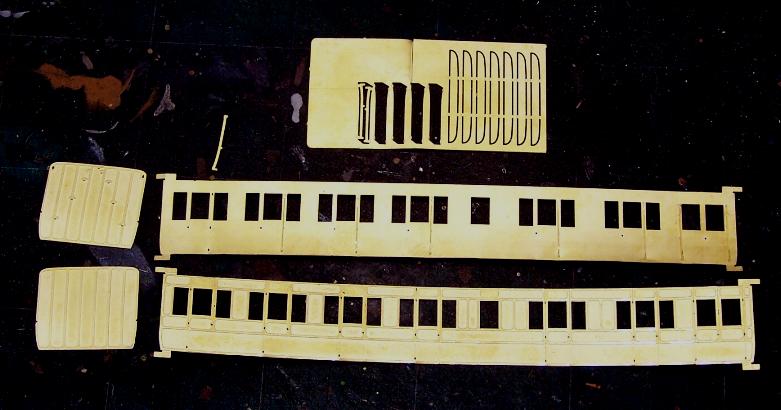
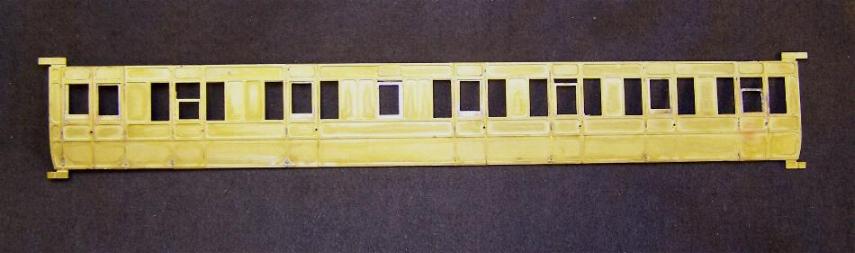
Back to the sides today, once I'd reattached the roof rib which came off when I was washing the whole thing down.

Droplights were the next job. I generally hate these as I get them both cockeyed and too high/low. However the vertical formers for the hinges also serve to locate the droplights vertically, so all you have to do is decide whether you want them open, closed or at a point in between.

Image

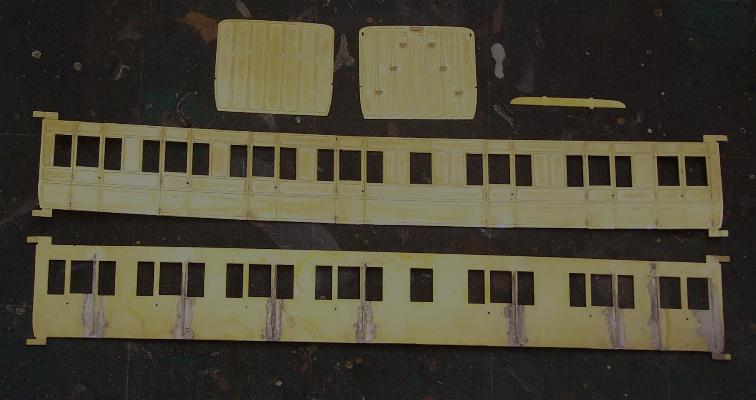
There were actually two too few droplights. This wasn't a problem as I have plenty left over from the GE rake I built last year and I wanted to do something different with the lavatory windows. Nick Campling's book shows one open, revealing that it is a hopper window (it is hinged at the bottom and opens inwards from the top). I wanted to show this on the model and so a bit of scrap etch and a spare droplight and away we went.

Image

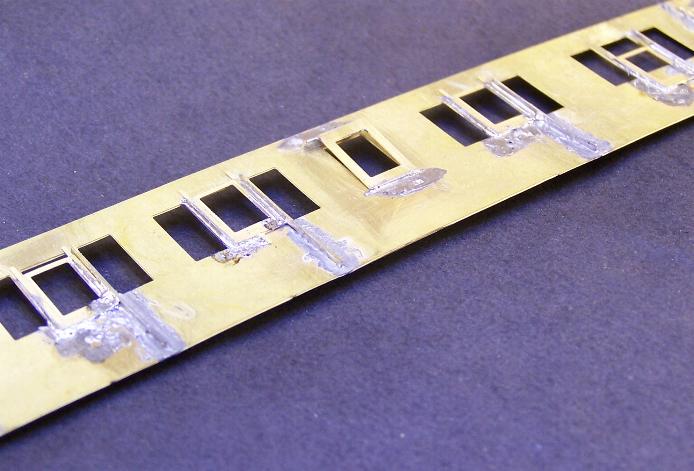
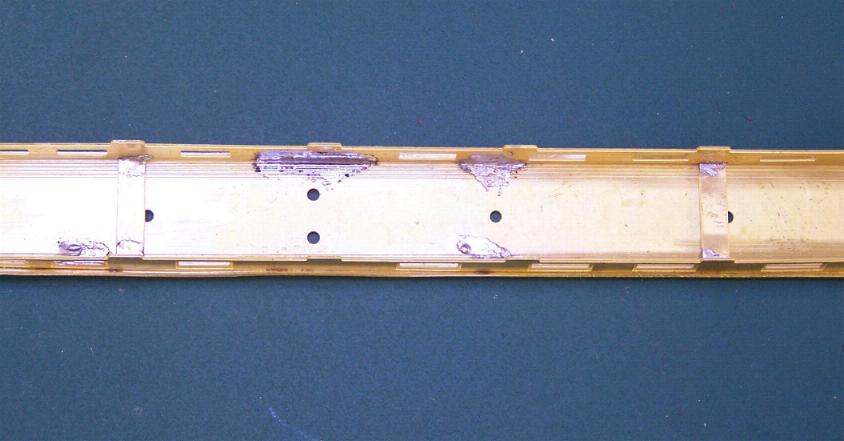
Droplights done, I went to grab handles. I do these last so I don't risk deforming them by pressing on the back of the side when working on something else. They're slightly cranked at the top then curve in towards the side as they go down. I bent them up from .33 wire and then used a bit of card to space them off the side and soldered them from the back. It's also worth going back over all the holes you drilled out in the sides at this point as you may well have filled them with solder, droplight (if open) or both.

Image

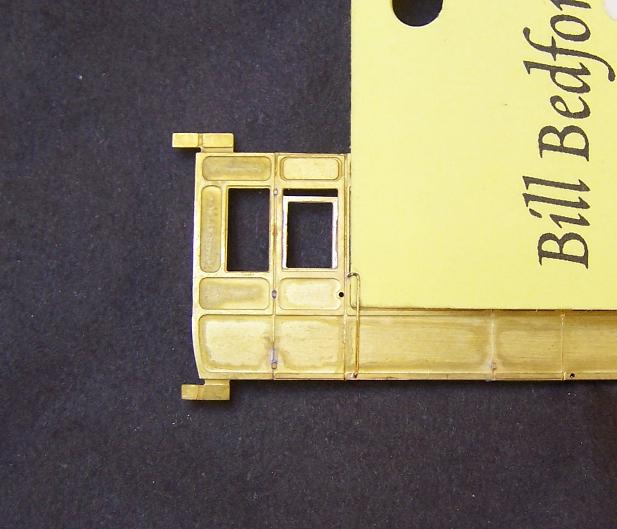
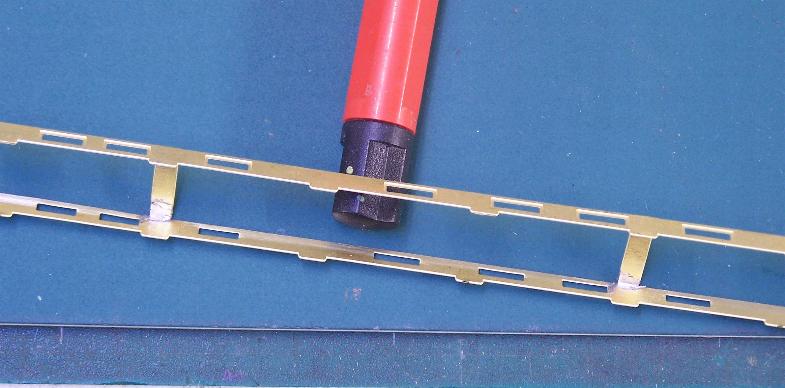
Once these are done, grind/file/sand the back of the side smooth. That will help when you glaze the coach and also ensure that the sides fit over the floor, which has a small fold up section at each side which holds the sides straight. It was now time to put sides and ends together. Bill provides these fold up bits of etch to help attach sides to ends.

Image

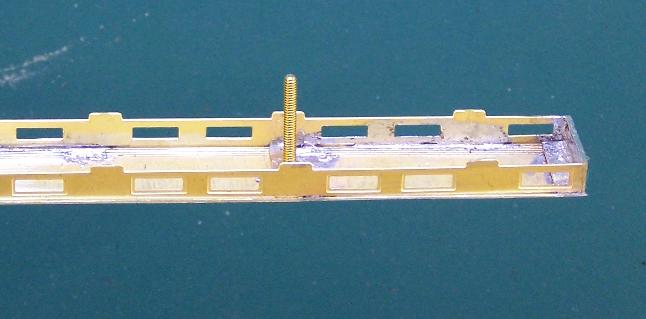
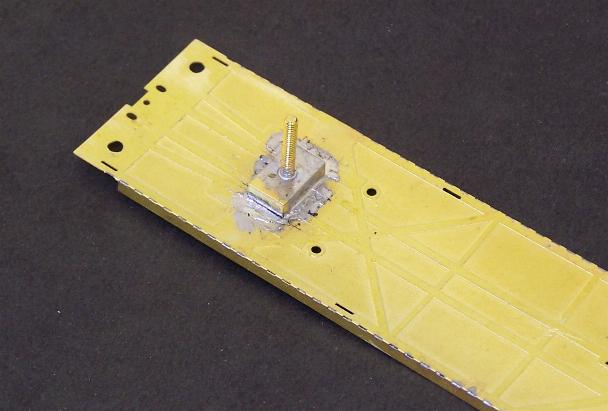
That done, I moved onto my own method of attaching body shell to floor. I put a brass strip with two captive nuts across the end of the coach and then use 10 BA bolts up though the floor to fasten it all together. I found that the lower attaching bits above fouled my brass strip so I ground them off again at this end.

Image

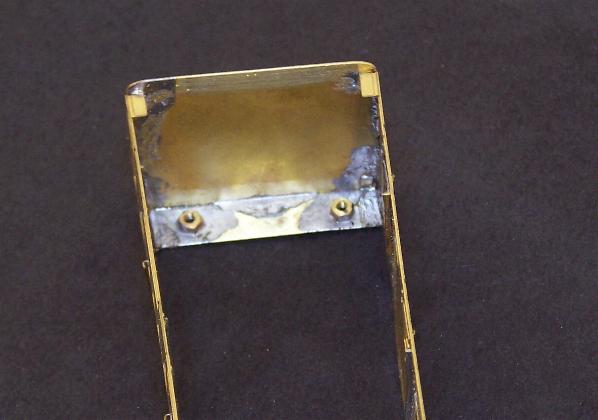
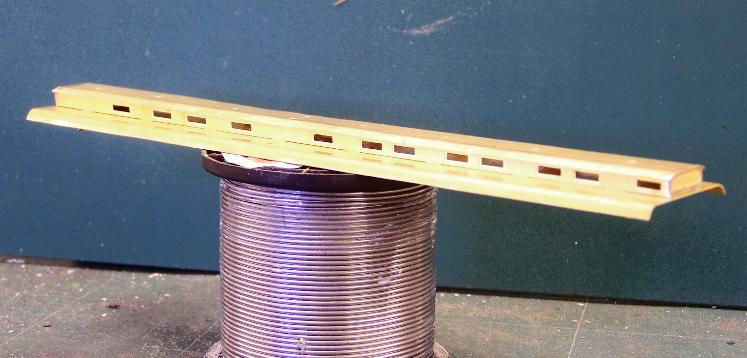
I could have attached sides to roof, but I wanted to give it all a thorough wash first. I also still need to attach the vents to the roof. I moved on to the floor. This is quite thin brass and has become curved across its width while still in the etch. I expect attaching the internal partitions and buffer beams will help straighten it out. Here all I've done is attach the bogie mounts - captive 8 BA bolt inside - and make the holes to screw up into the body to marry the whole thing up.

Image

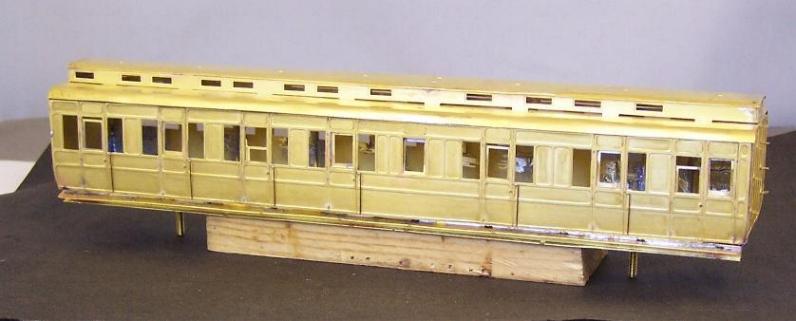
Finally here it is looking much more like a coach. Note that I haven't put all the end gear on - alarm gear and the like will be attached after I've soldered roof to body as there's too much of a likelihood of it falling off if I put it on now.

Image

Last thing is another scrub in shiny sinks and into the airing cupboard overnight. Only one of the grab handles came undone, so I must have had a good day with the iron.
Last edited by jwealleans on Tue Oct 30, 2018 8:16 pm, edited 3 times in total.
User avatar
Atlantic 3279
LNER A4 4-6-2 'Streak'
Posts: 6540
Joined: Fri Jun 26, 2009 9:51 am
Location: 2850, 245

Re: On my Workbench - before the Grouping.

Post by Atlantic 3279 »

My goodness JW, you've put that together PDQ! Well done, etched coaches always seemed to take ages when I was last doing any - but the pleasures of the underframe, interior and paint job still lie ahead I presume.
Most subjects, models and techniques covered in this thread are now listed in various categories on page1

Dec. 2018: Almost all images that disappeared from my own thread following loss of free remote hosting are now restored.
Post Reply