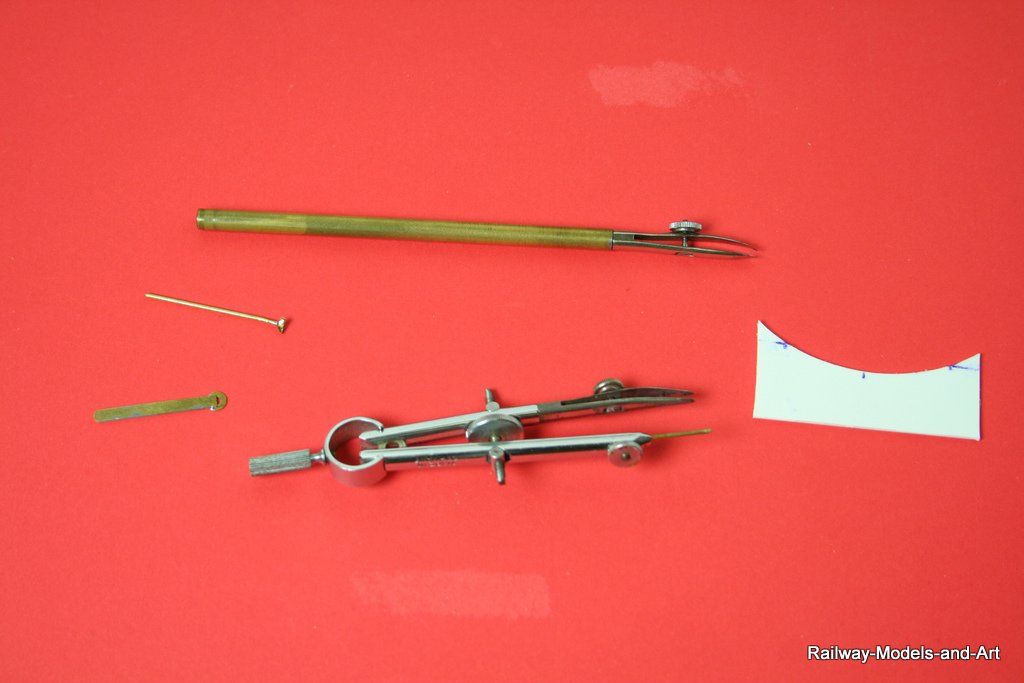
Although I have a Haff pen and compass they are not as fine as those in the photo, the pen is a Kern head that was attached to a strange compass so I made a new handle from some suitably sized brass tube. The compasses are an unknown German make that I picked up in a mix set with the Kern one fr a few quid on Ebay some time ago. I used one of the emery board type files that you get as a free gift each time you place an order with Scale Hardware - they have four different grades of abrasives and the too finest are perfect for honing the pens and compasses.
The flat brass with the washer on the end is for creating the corners
The plastic card curve was used to create the lozenge shape around the name plates
The wire with the small shoe is a dog legged skate that replaces the straight pin in the bow compass to allow me to do the curves on the splashers fronts etc. by reaching above and beyond the rivets on the edge of the splasher tops.